It turns out finishing this build blog has been harder than building the boat. As I am sure you have figured out, a lot of stuff has happened in the more than two years since I last published. On top of that, it has been quite a while since I have exercised the writer muscles so bear with me. When we last talked I had just loaded up the trailer and was getting ready for launch day. Lets start there.
Launch day for me was one of the more stressful things I have done. A constant parade of all the things that could possibly go wrong kept me up for most of the night. Finally around 4 am I gave up trying to sleep and got up. The game plan was to launch Freya from the boat ramp just down the street from our house on the mighty Satilla River. There were a lot of boat ramps that would have been better for a first launch but the Satilla River was special to me. Growing up I had spent most of my summers cruising up and down that river in an old wooden rowboat so it was a fitting place to christen Freya. It was also one mile away from the shop so if I needed anything it was close by.
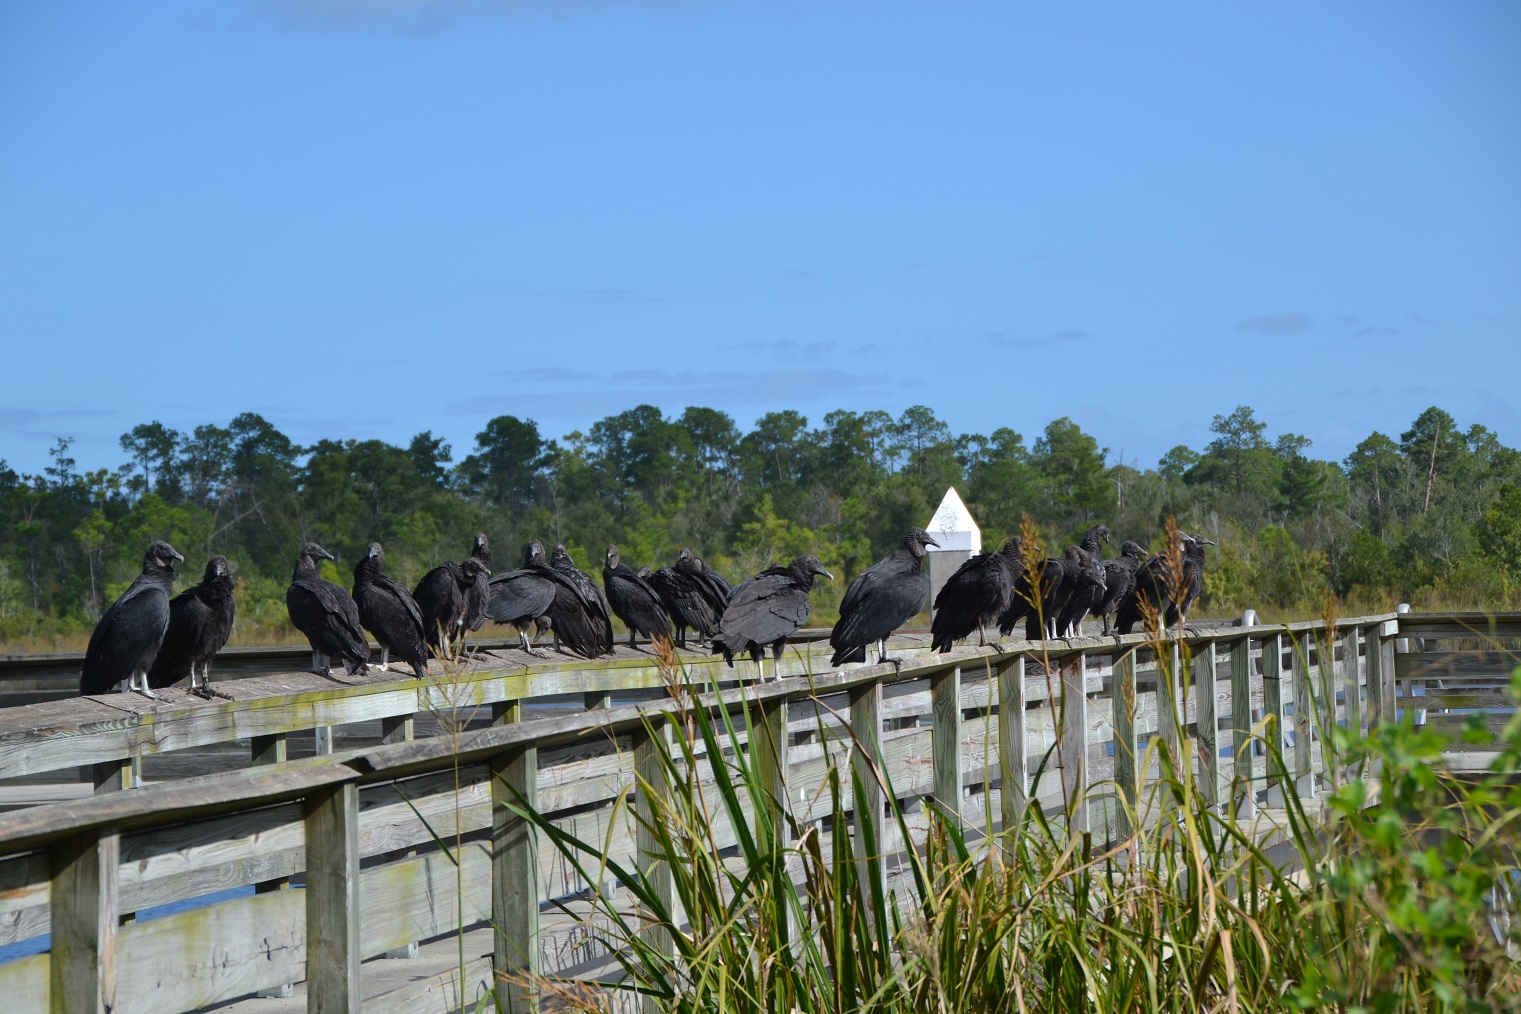
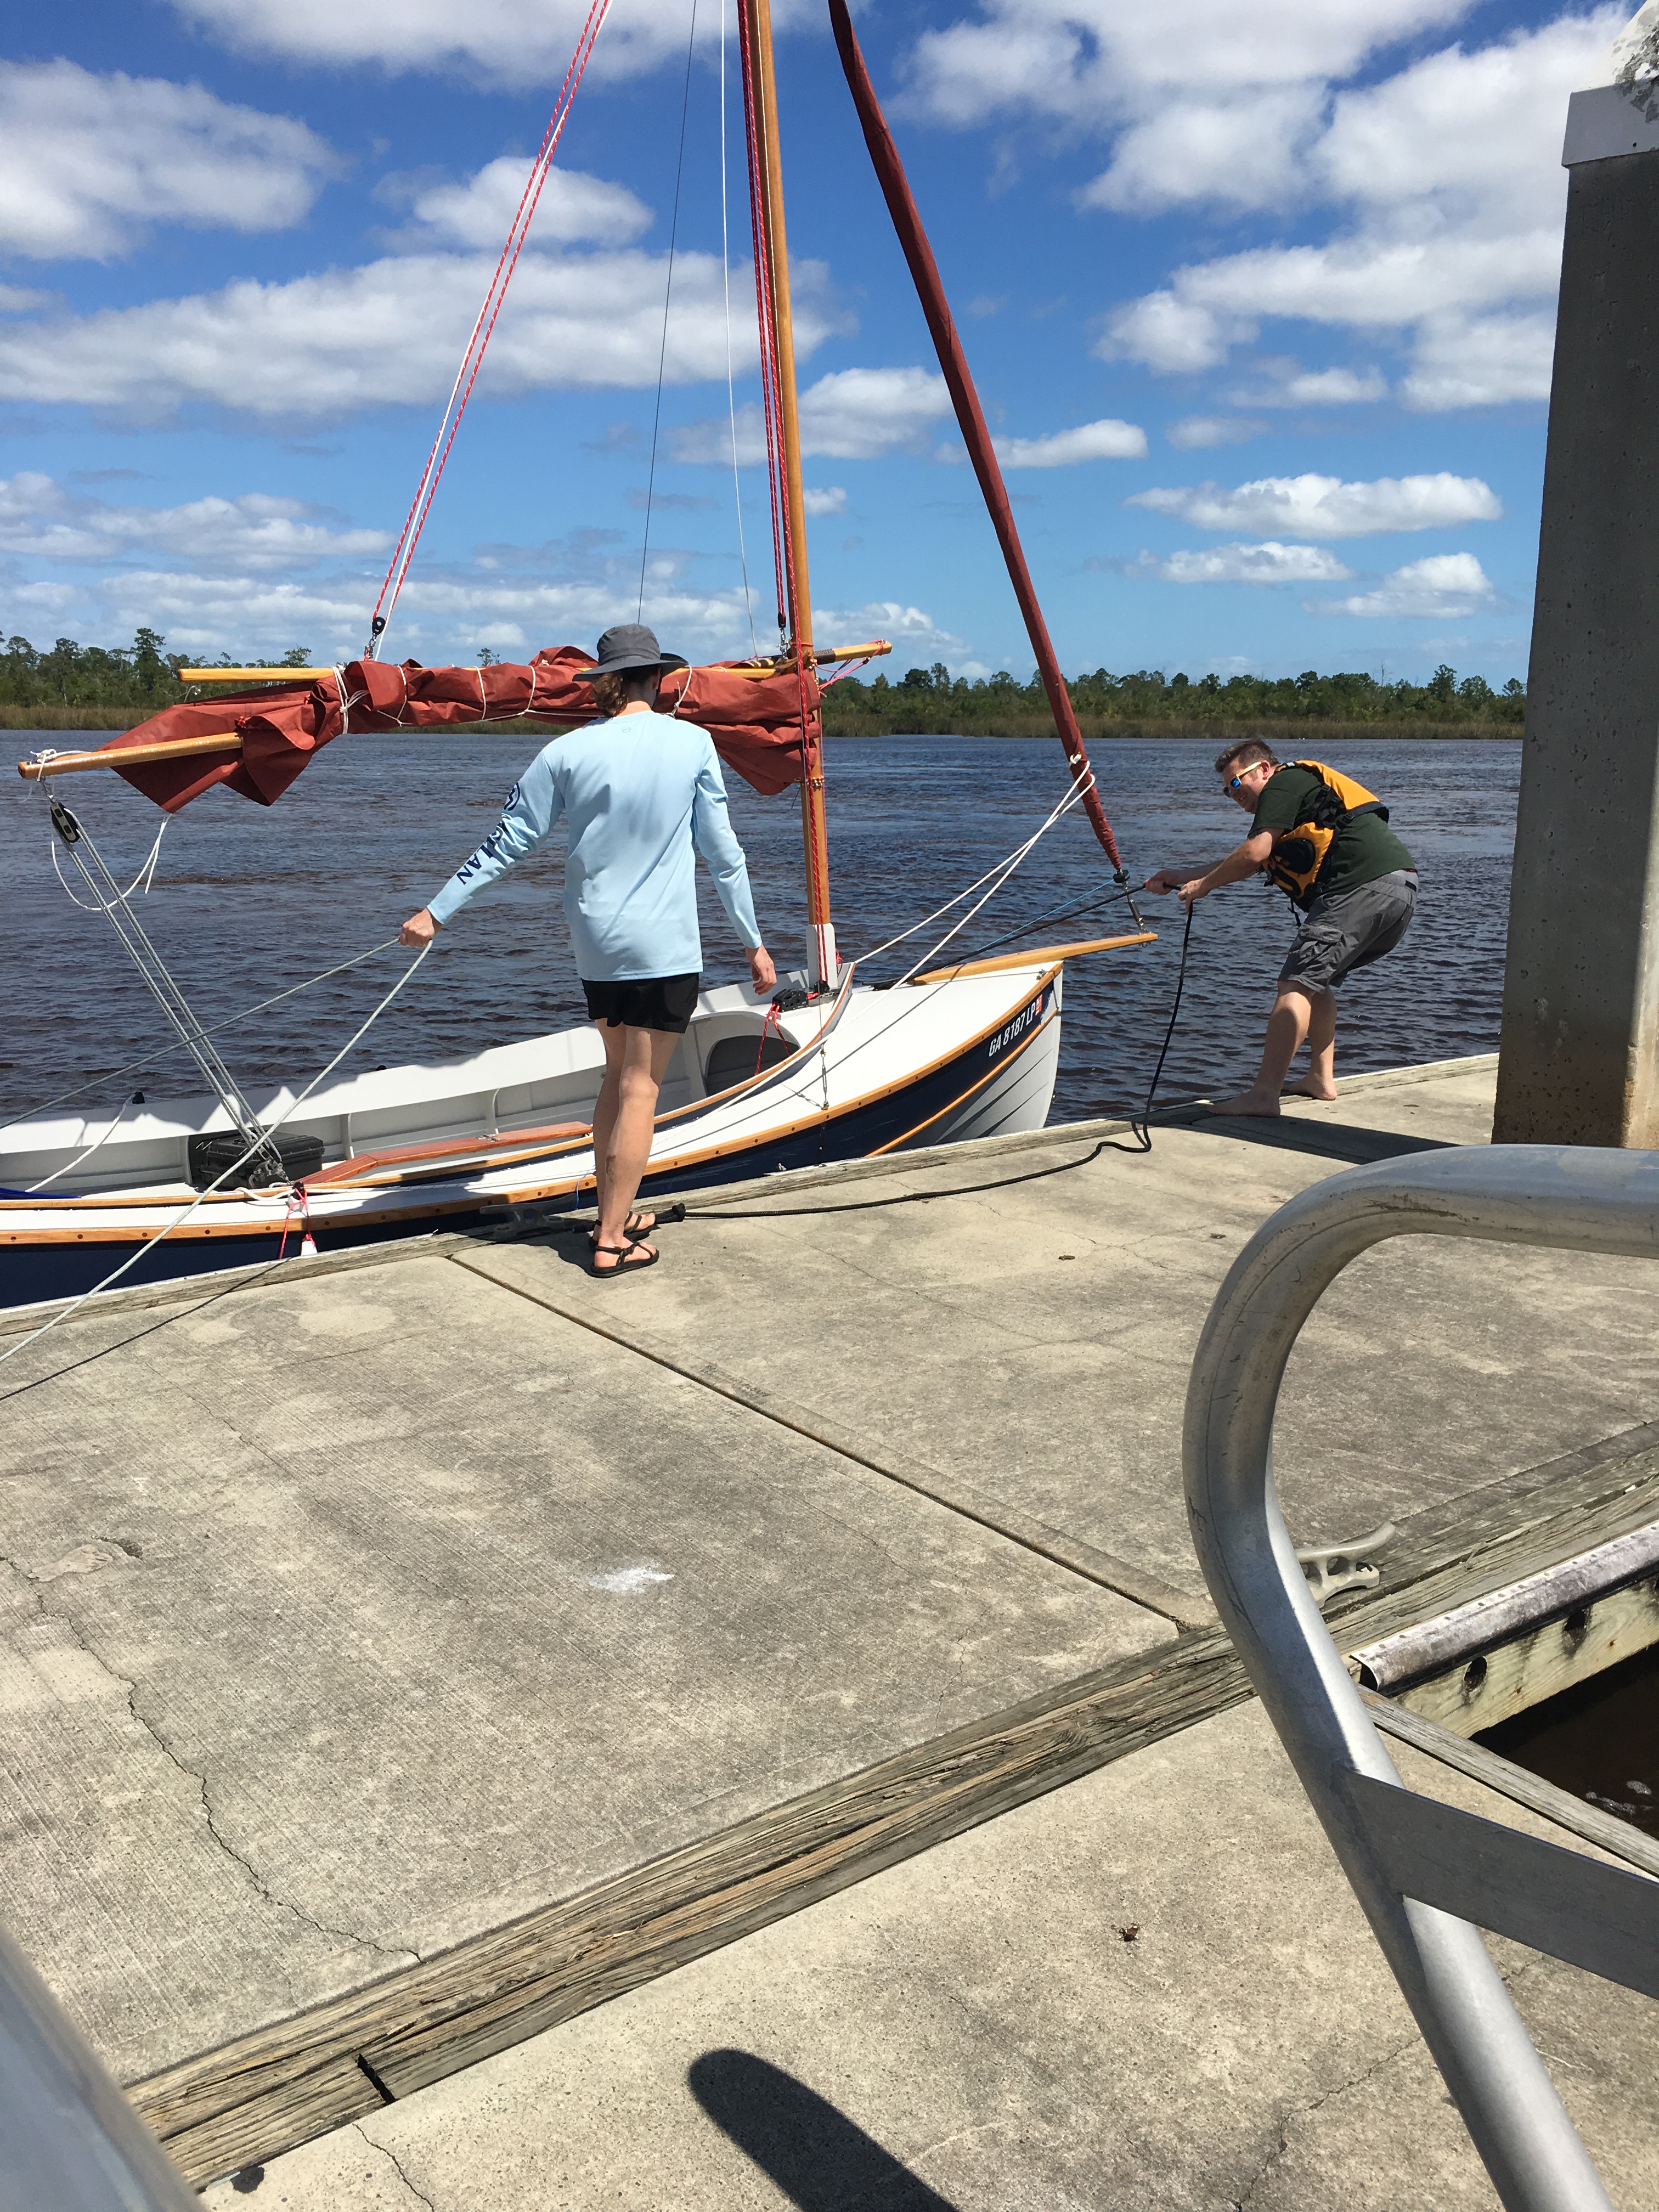
When we showed up to the boat ramp we had quite the audience. These guys really didn’t help my anxiety at all.
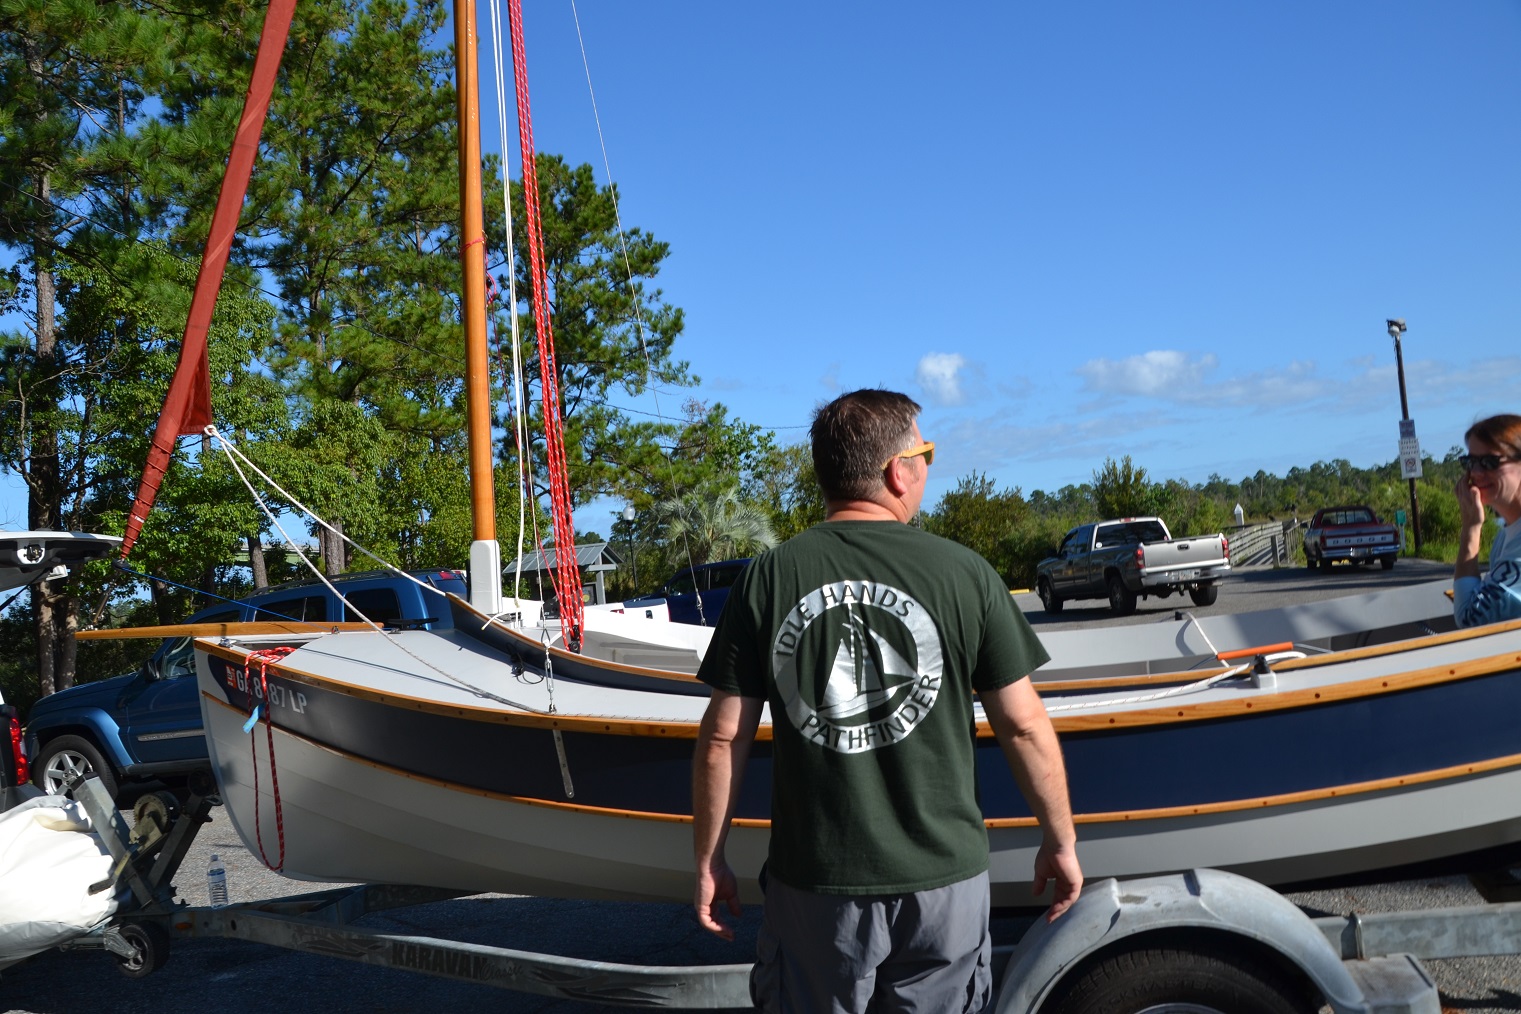
First order of business was to set the rigging.
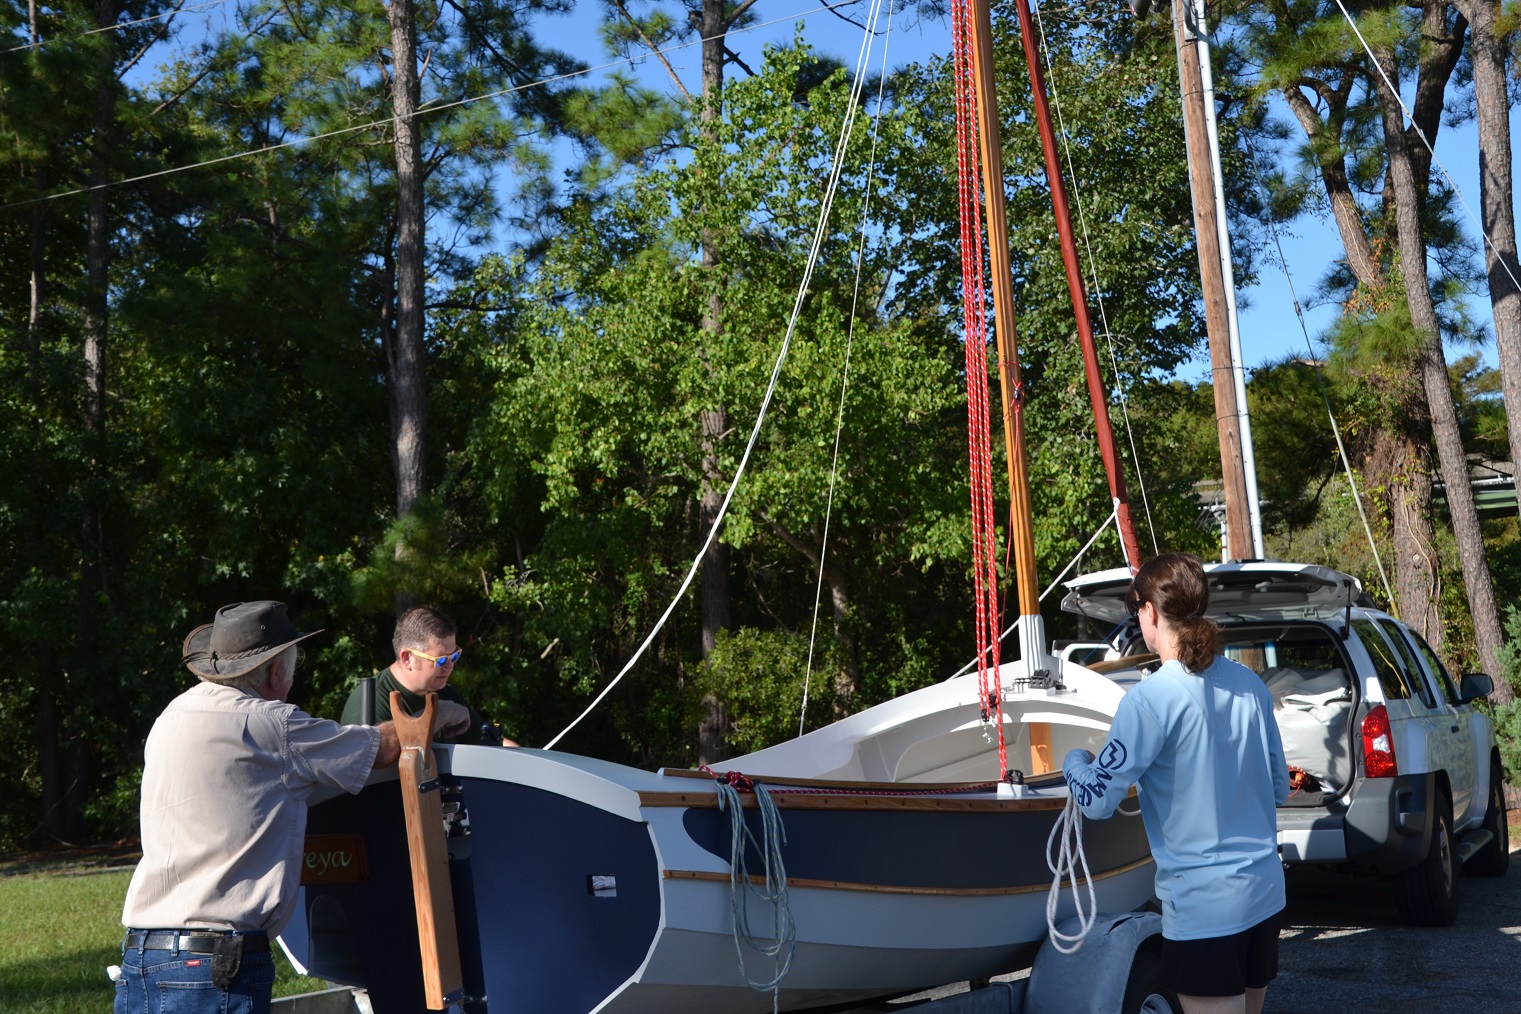
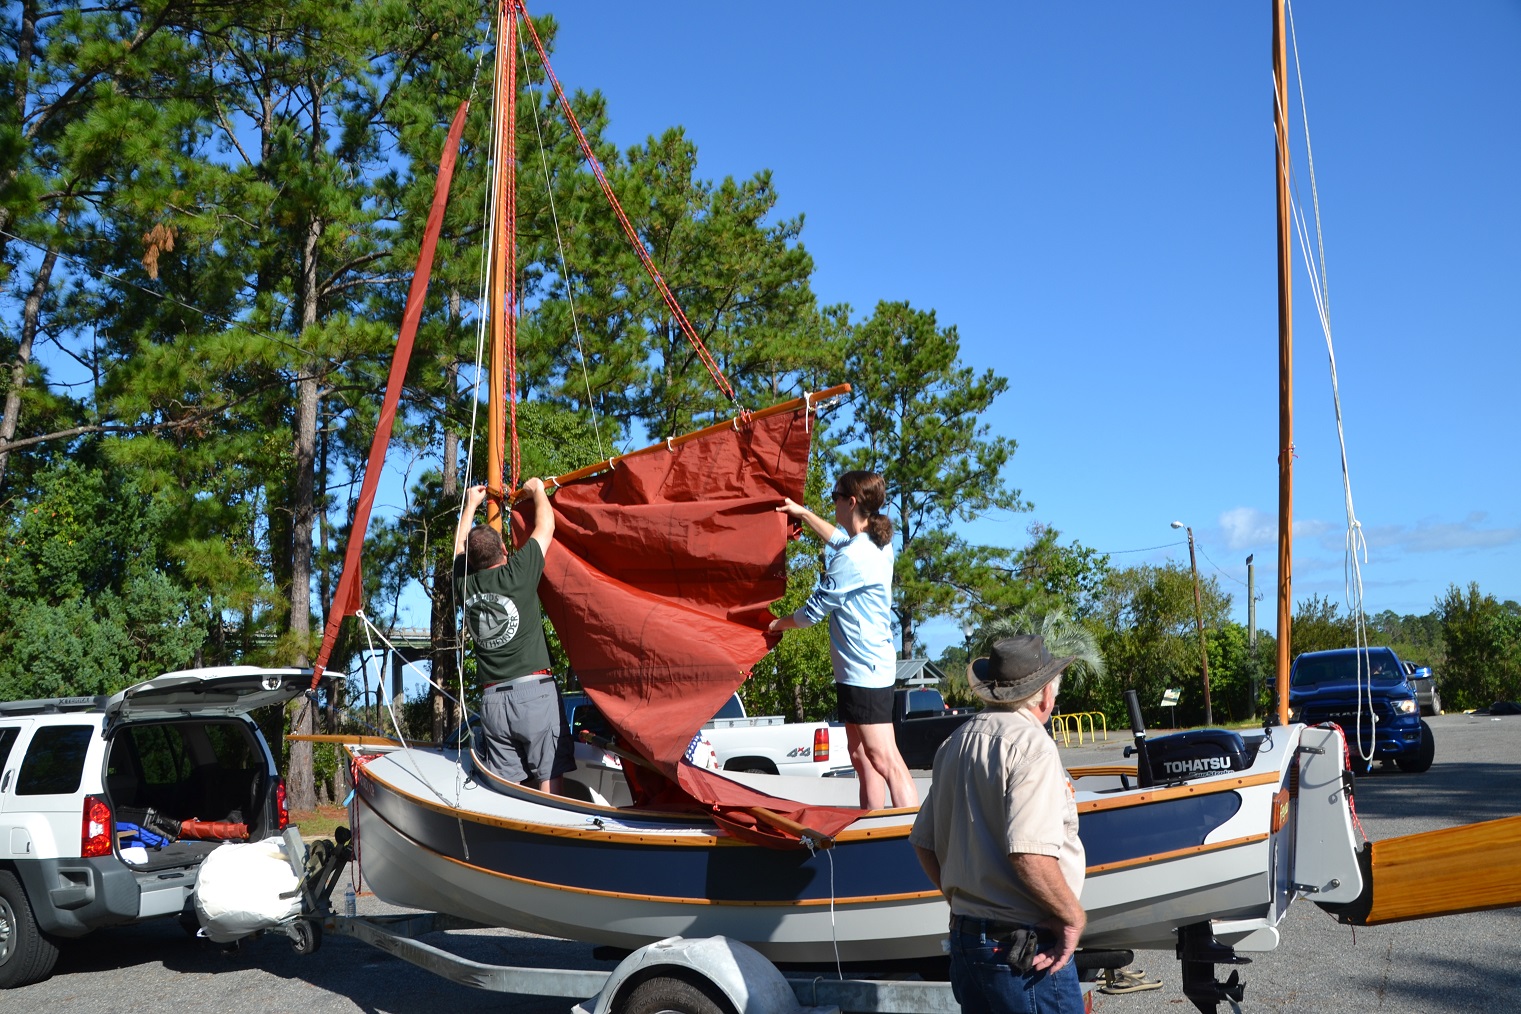
This was the first time that the rigging had been fully set so it took a while. With Cheryl and I both working on it it took about an hour and a half to get fully set up.
Mom and Dad were on hand to help. Mom running the camera and my Dad giving advice. He did spent a career in the US Navy so I guess he is qualified.
Woodbine is a small town and a long way from the ocean so our party did draw quite the crowd. Finally there were no more excuses and it was time to launch.
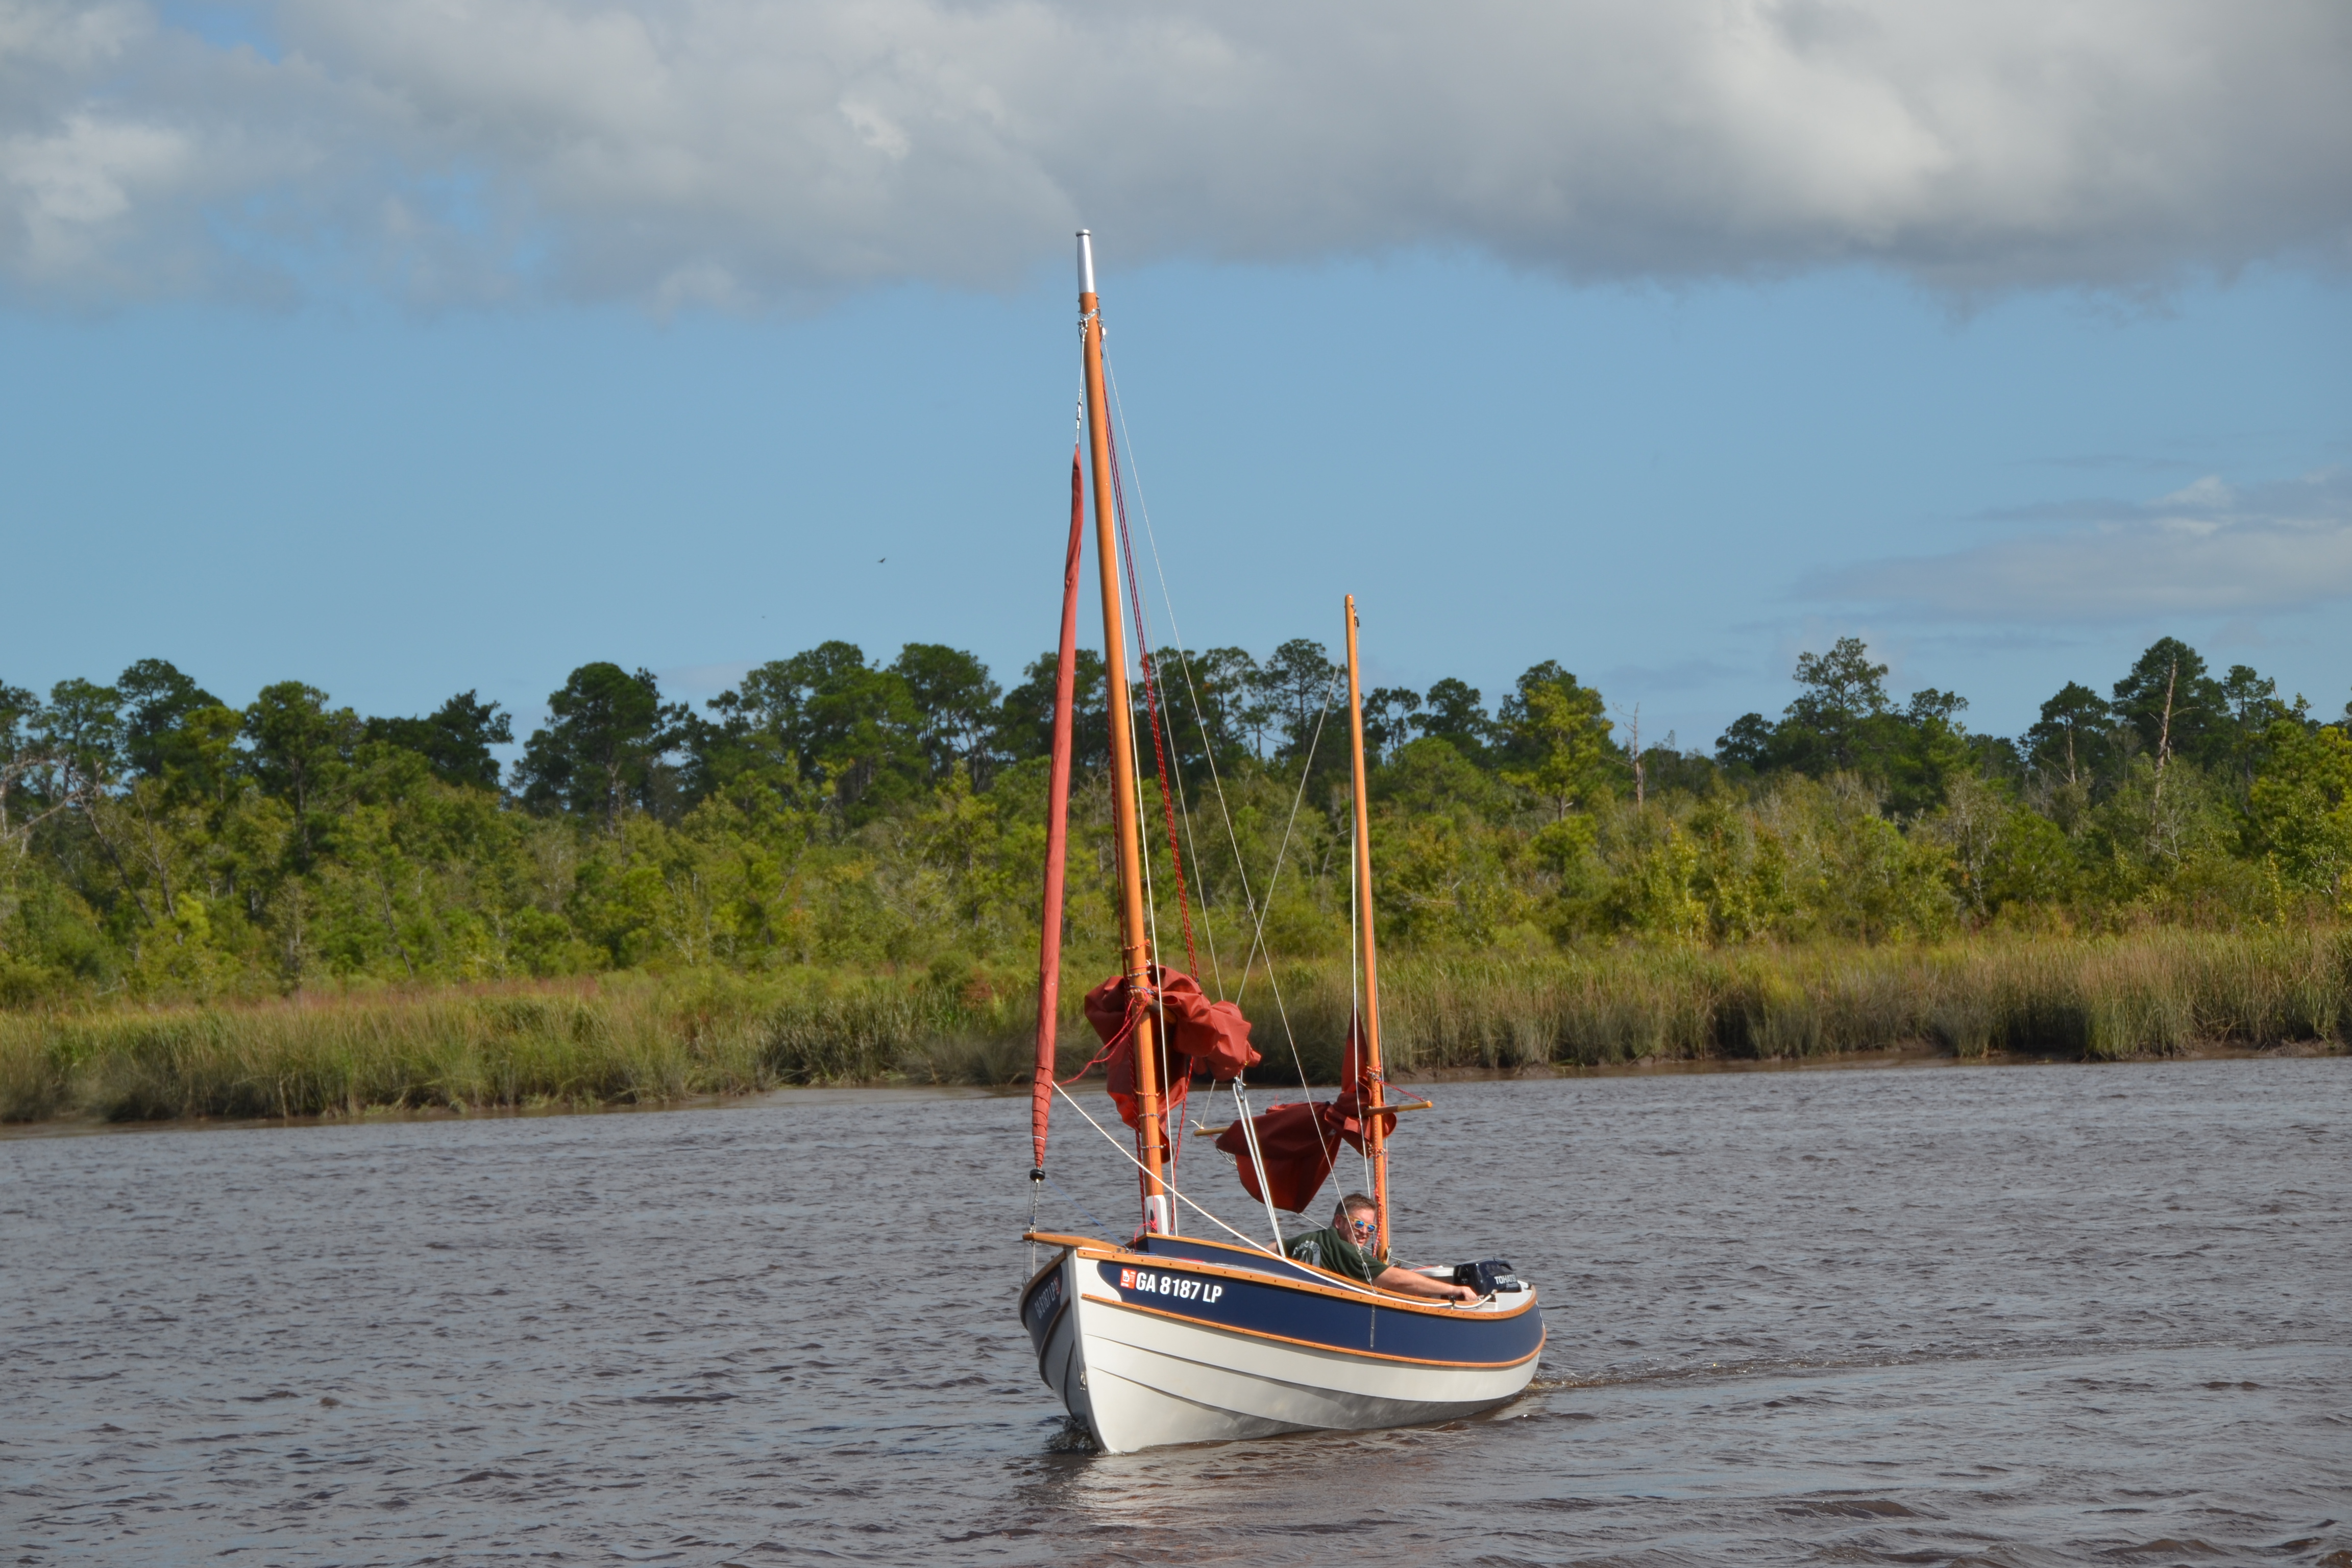
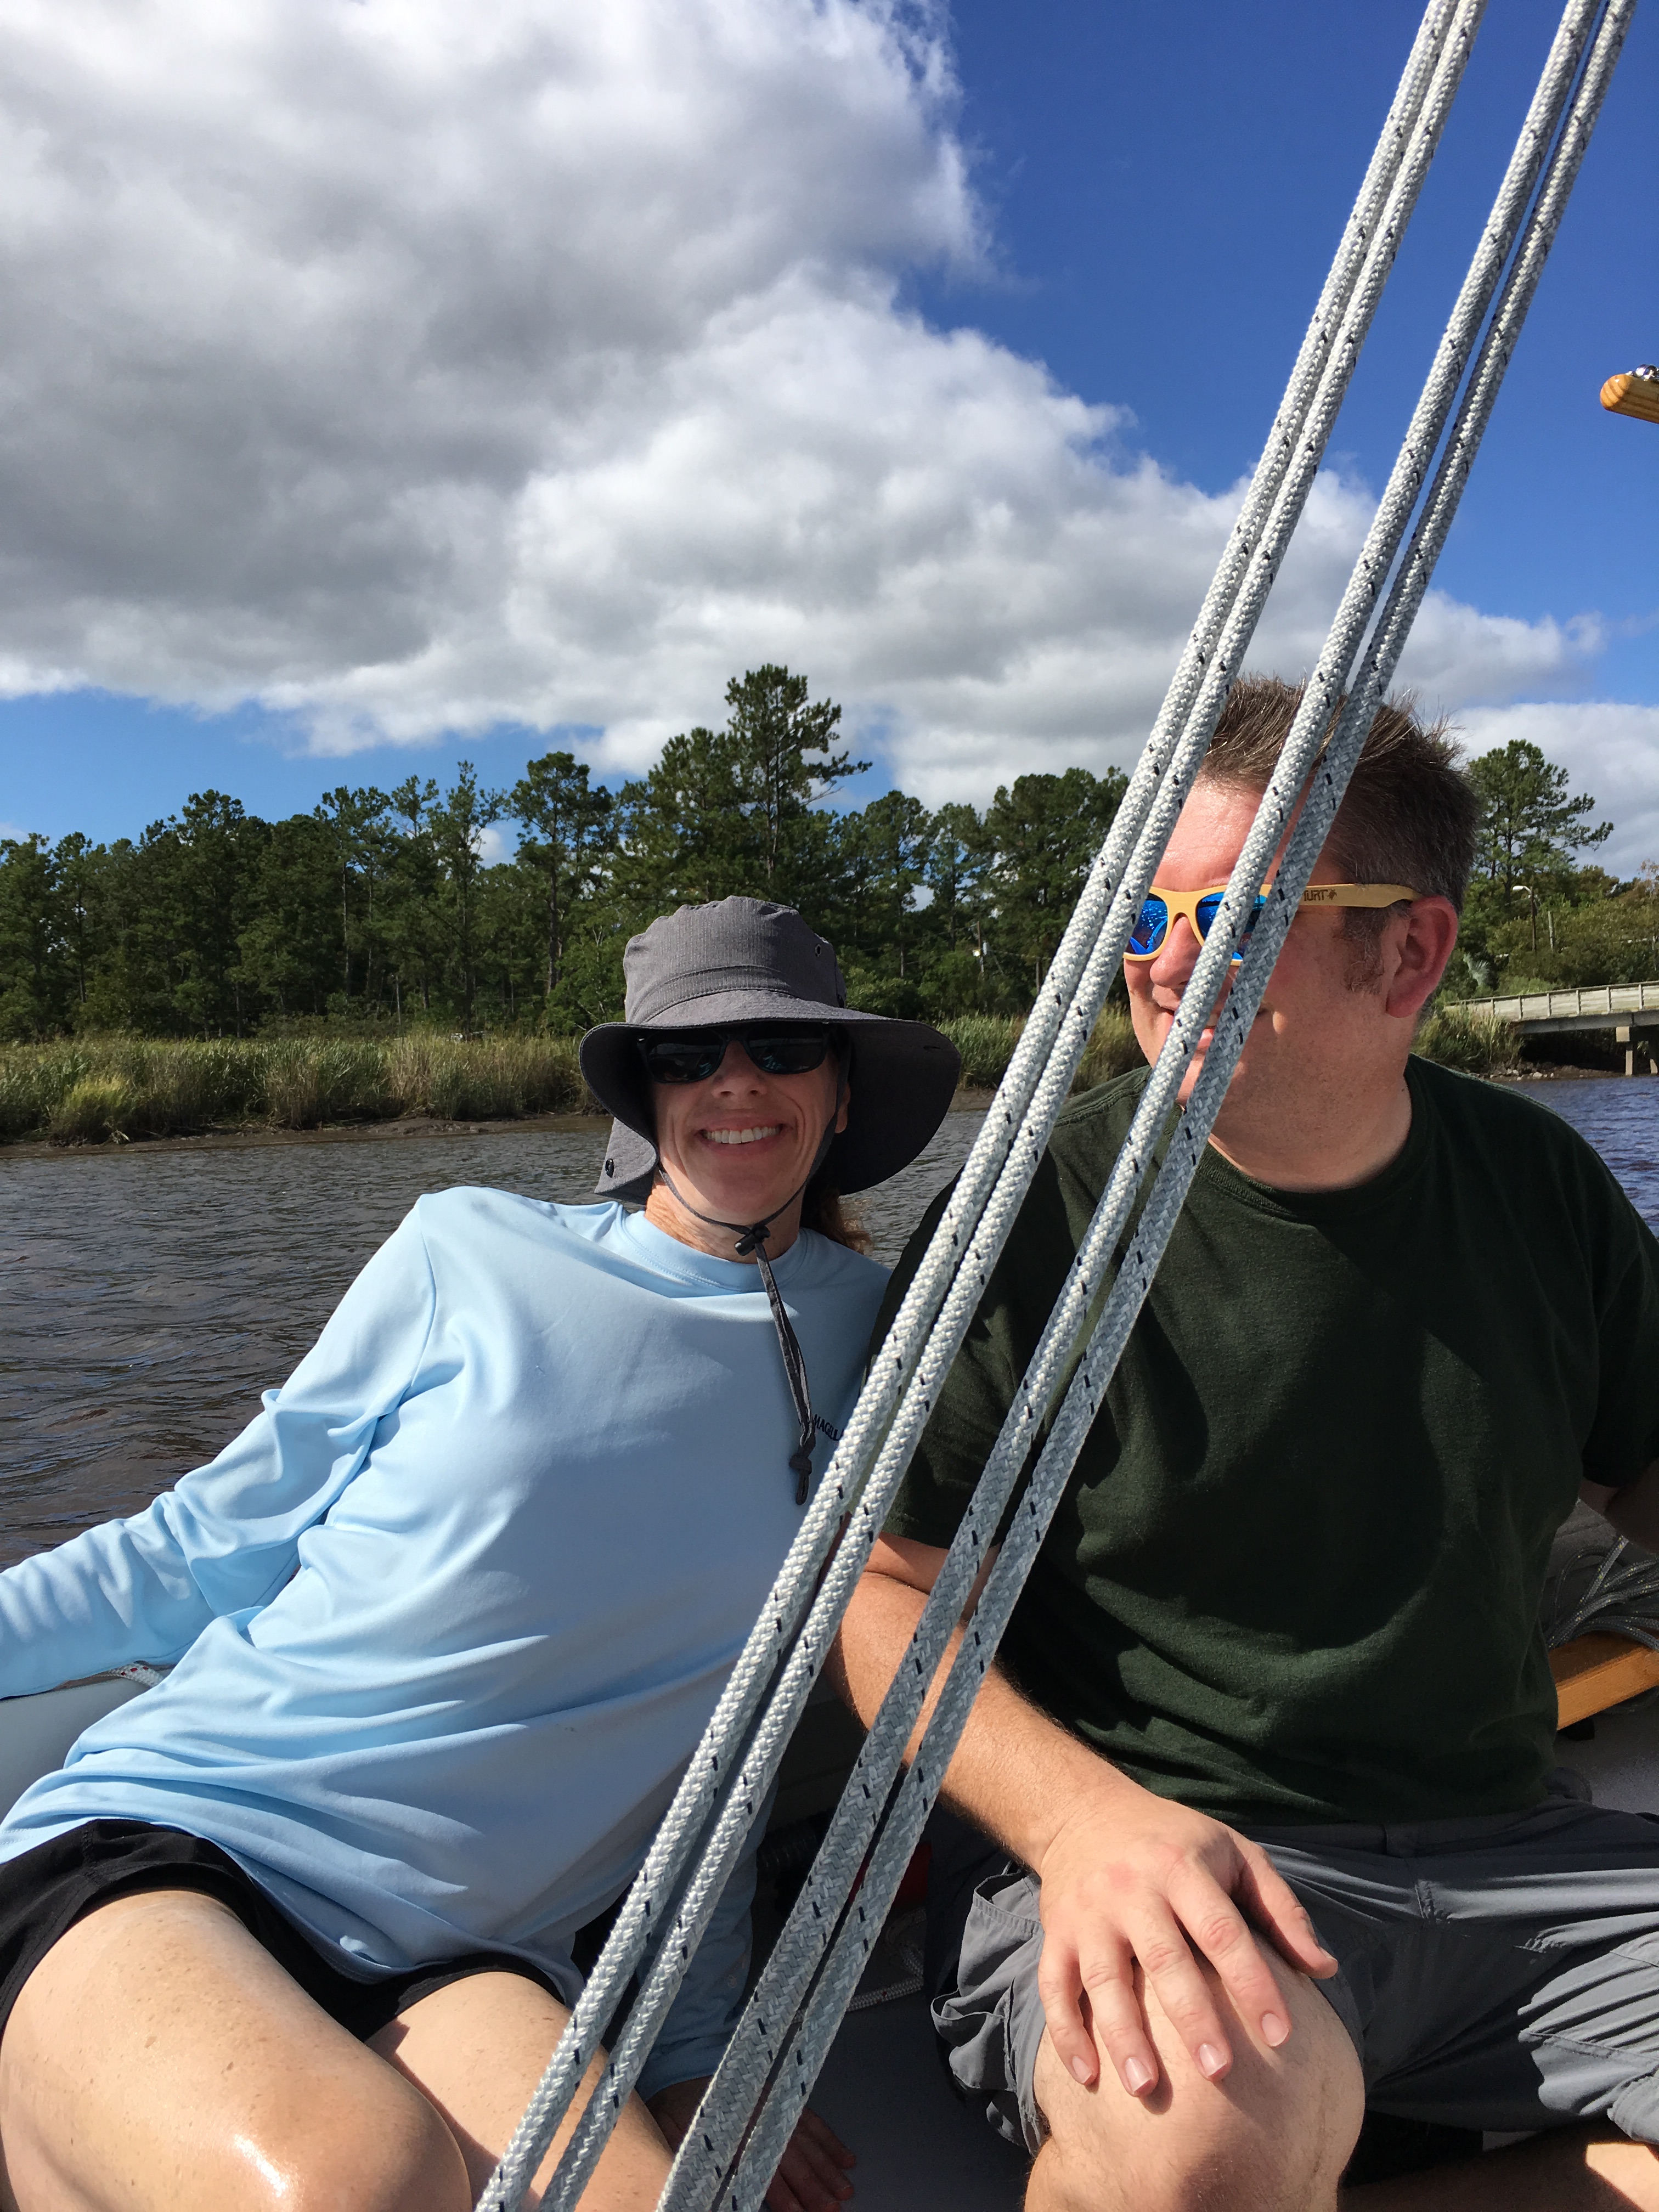
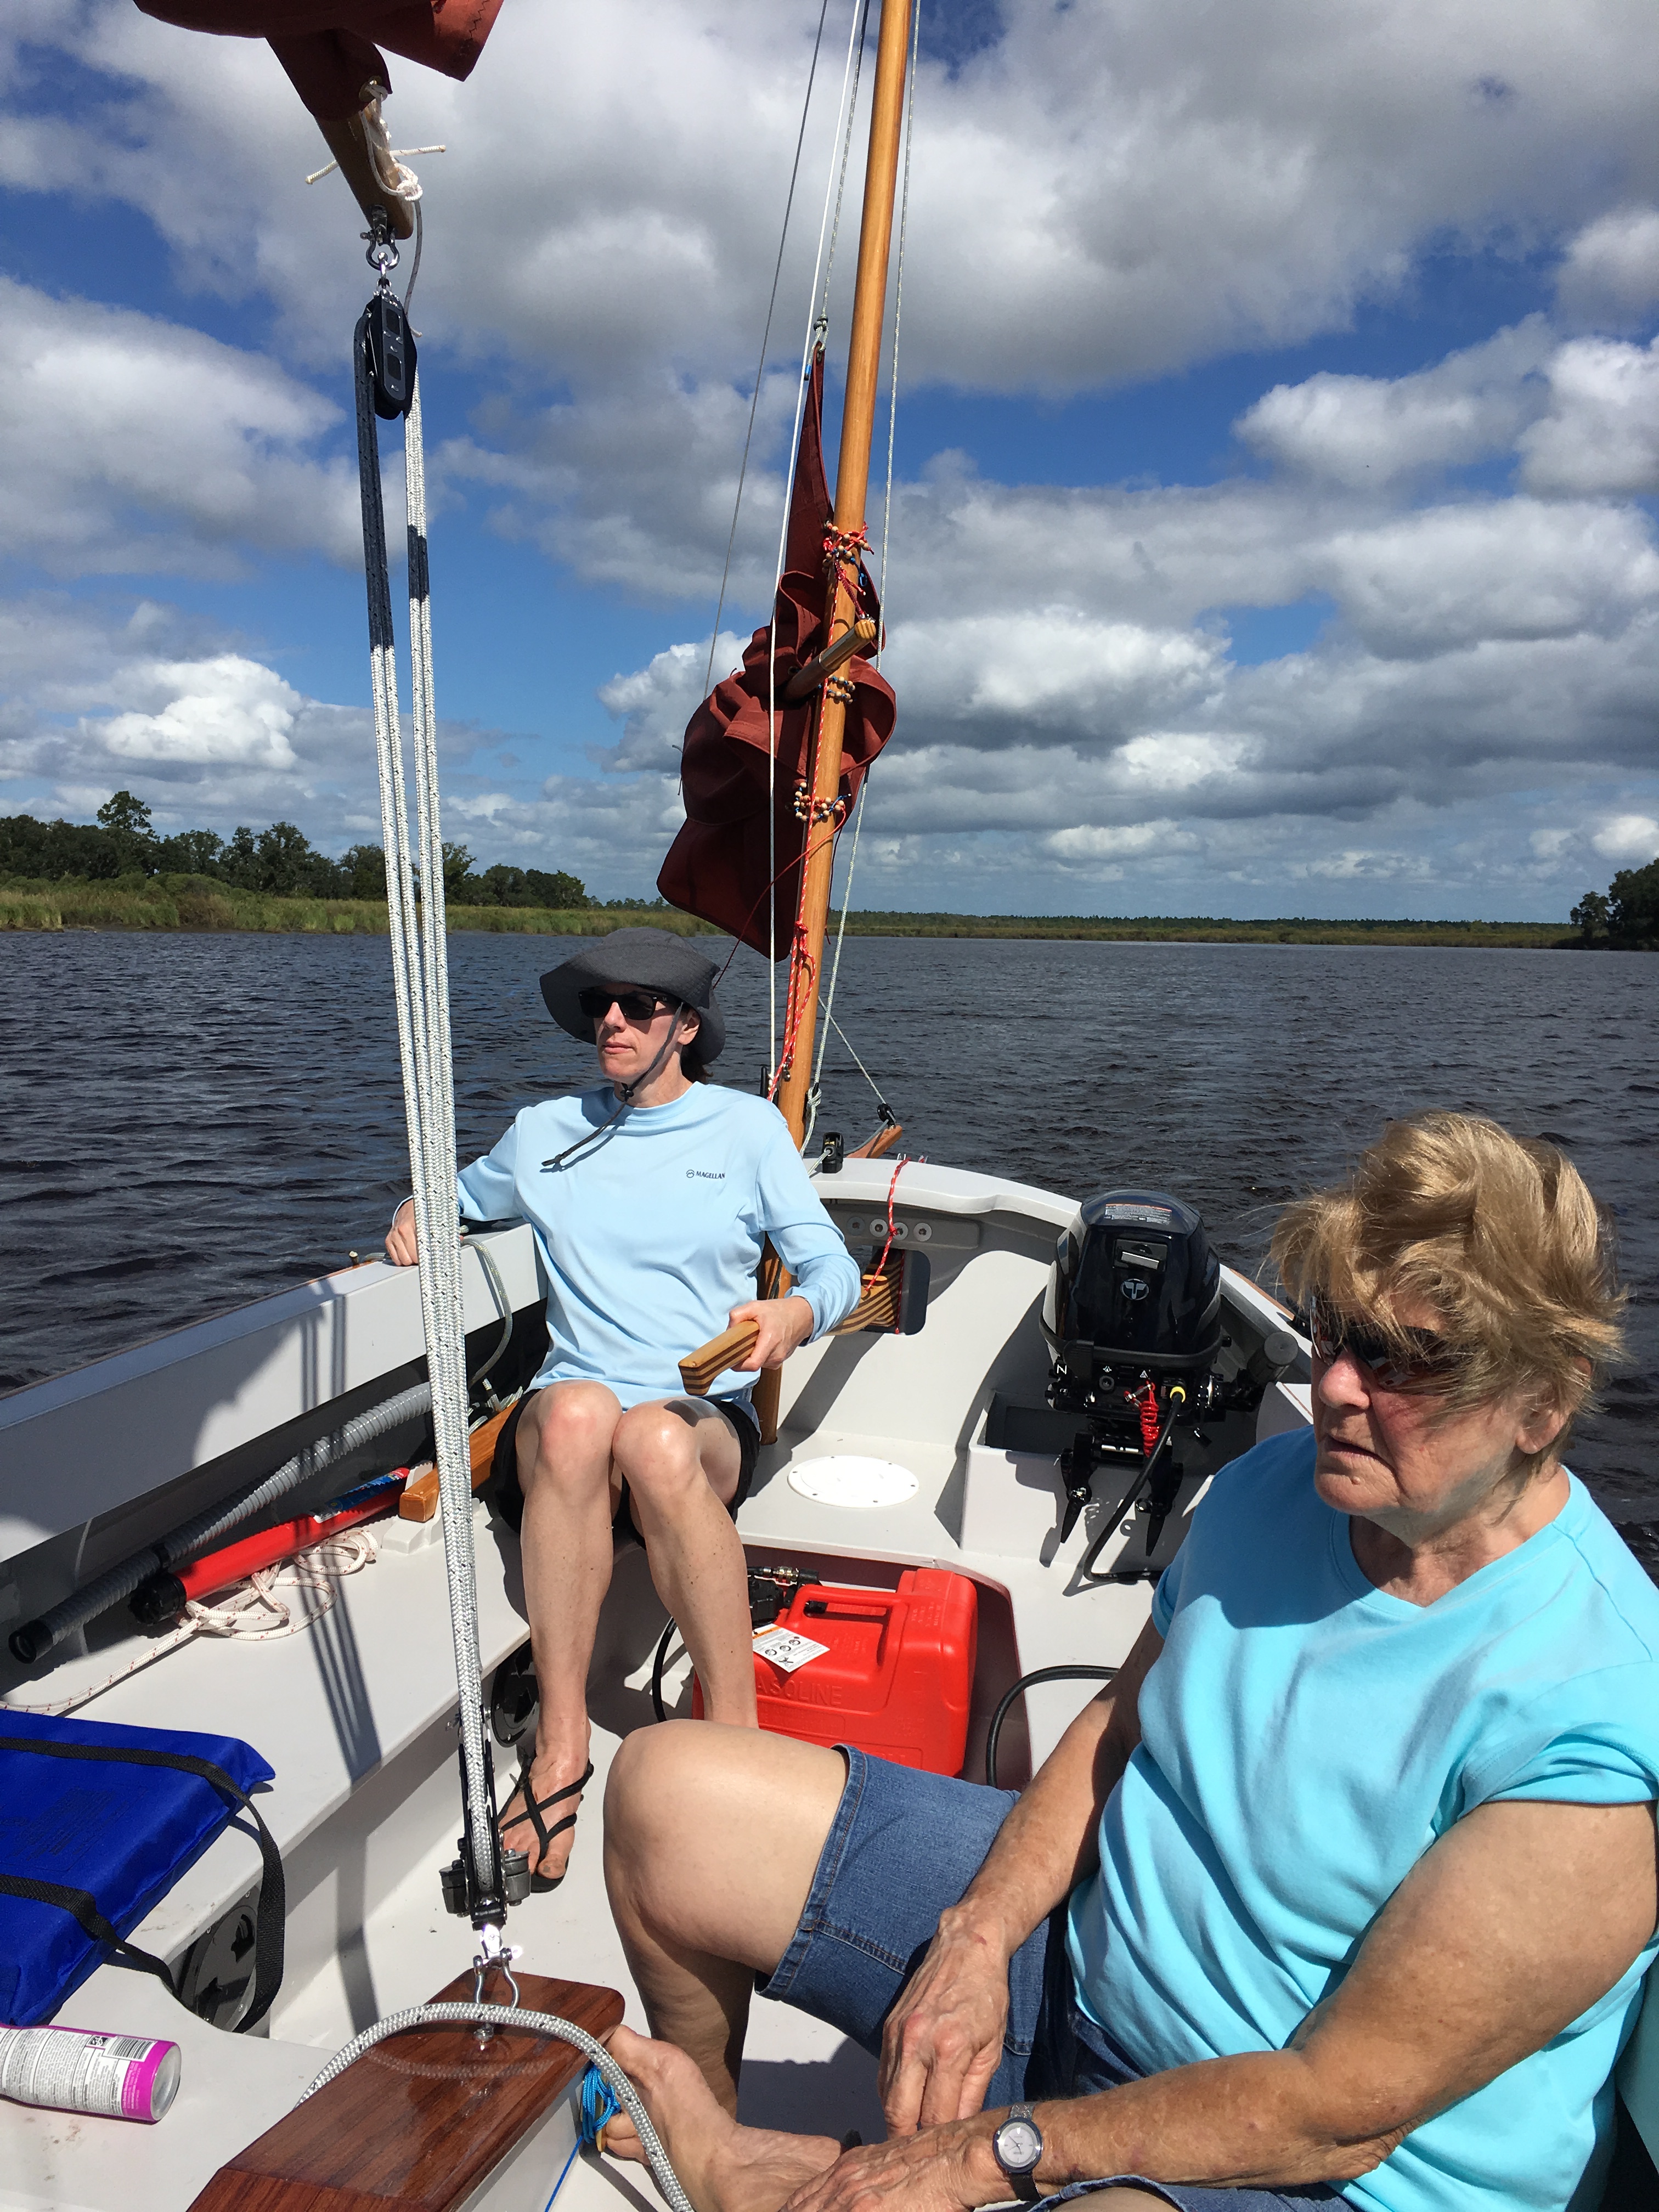
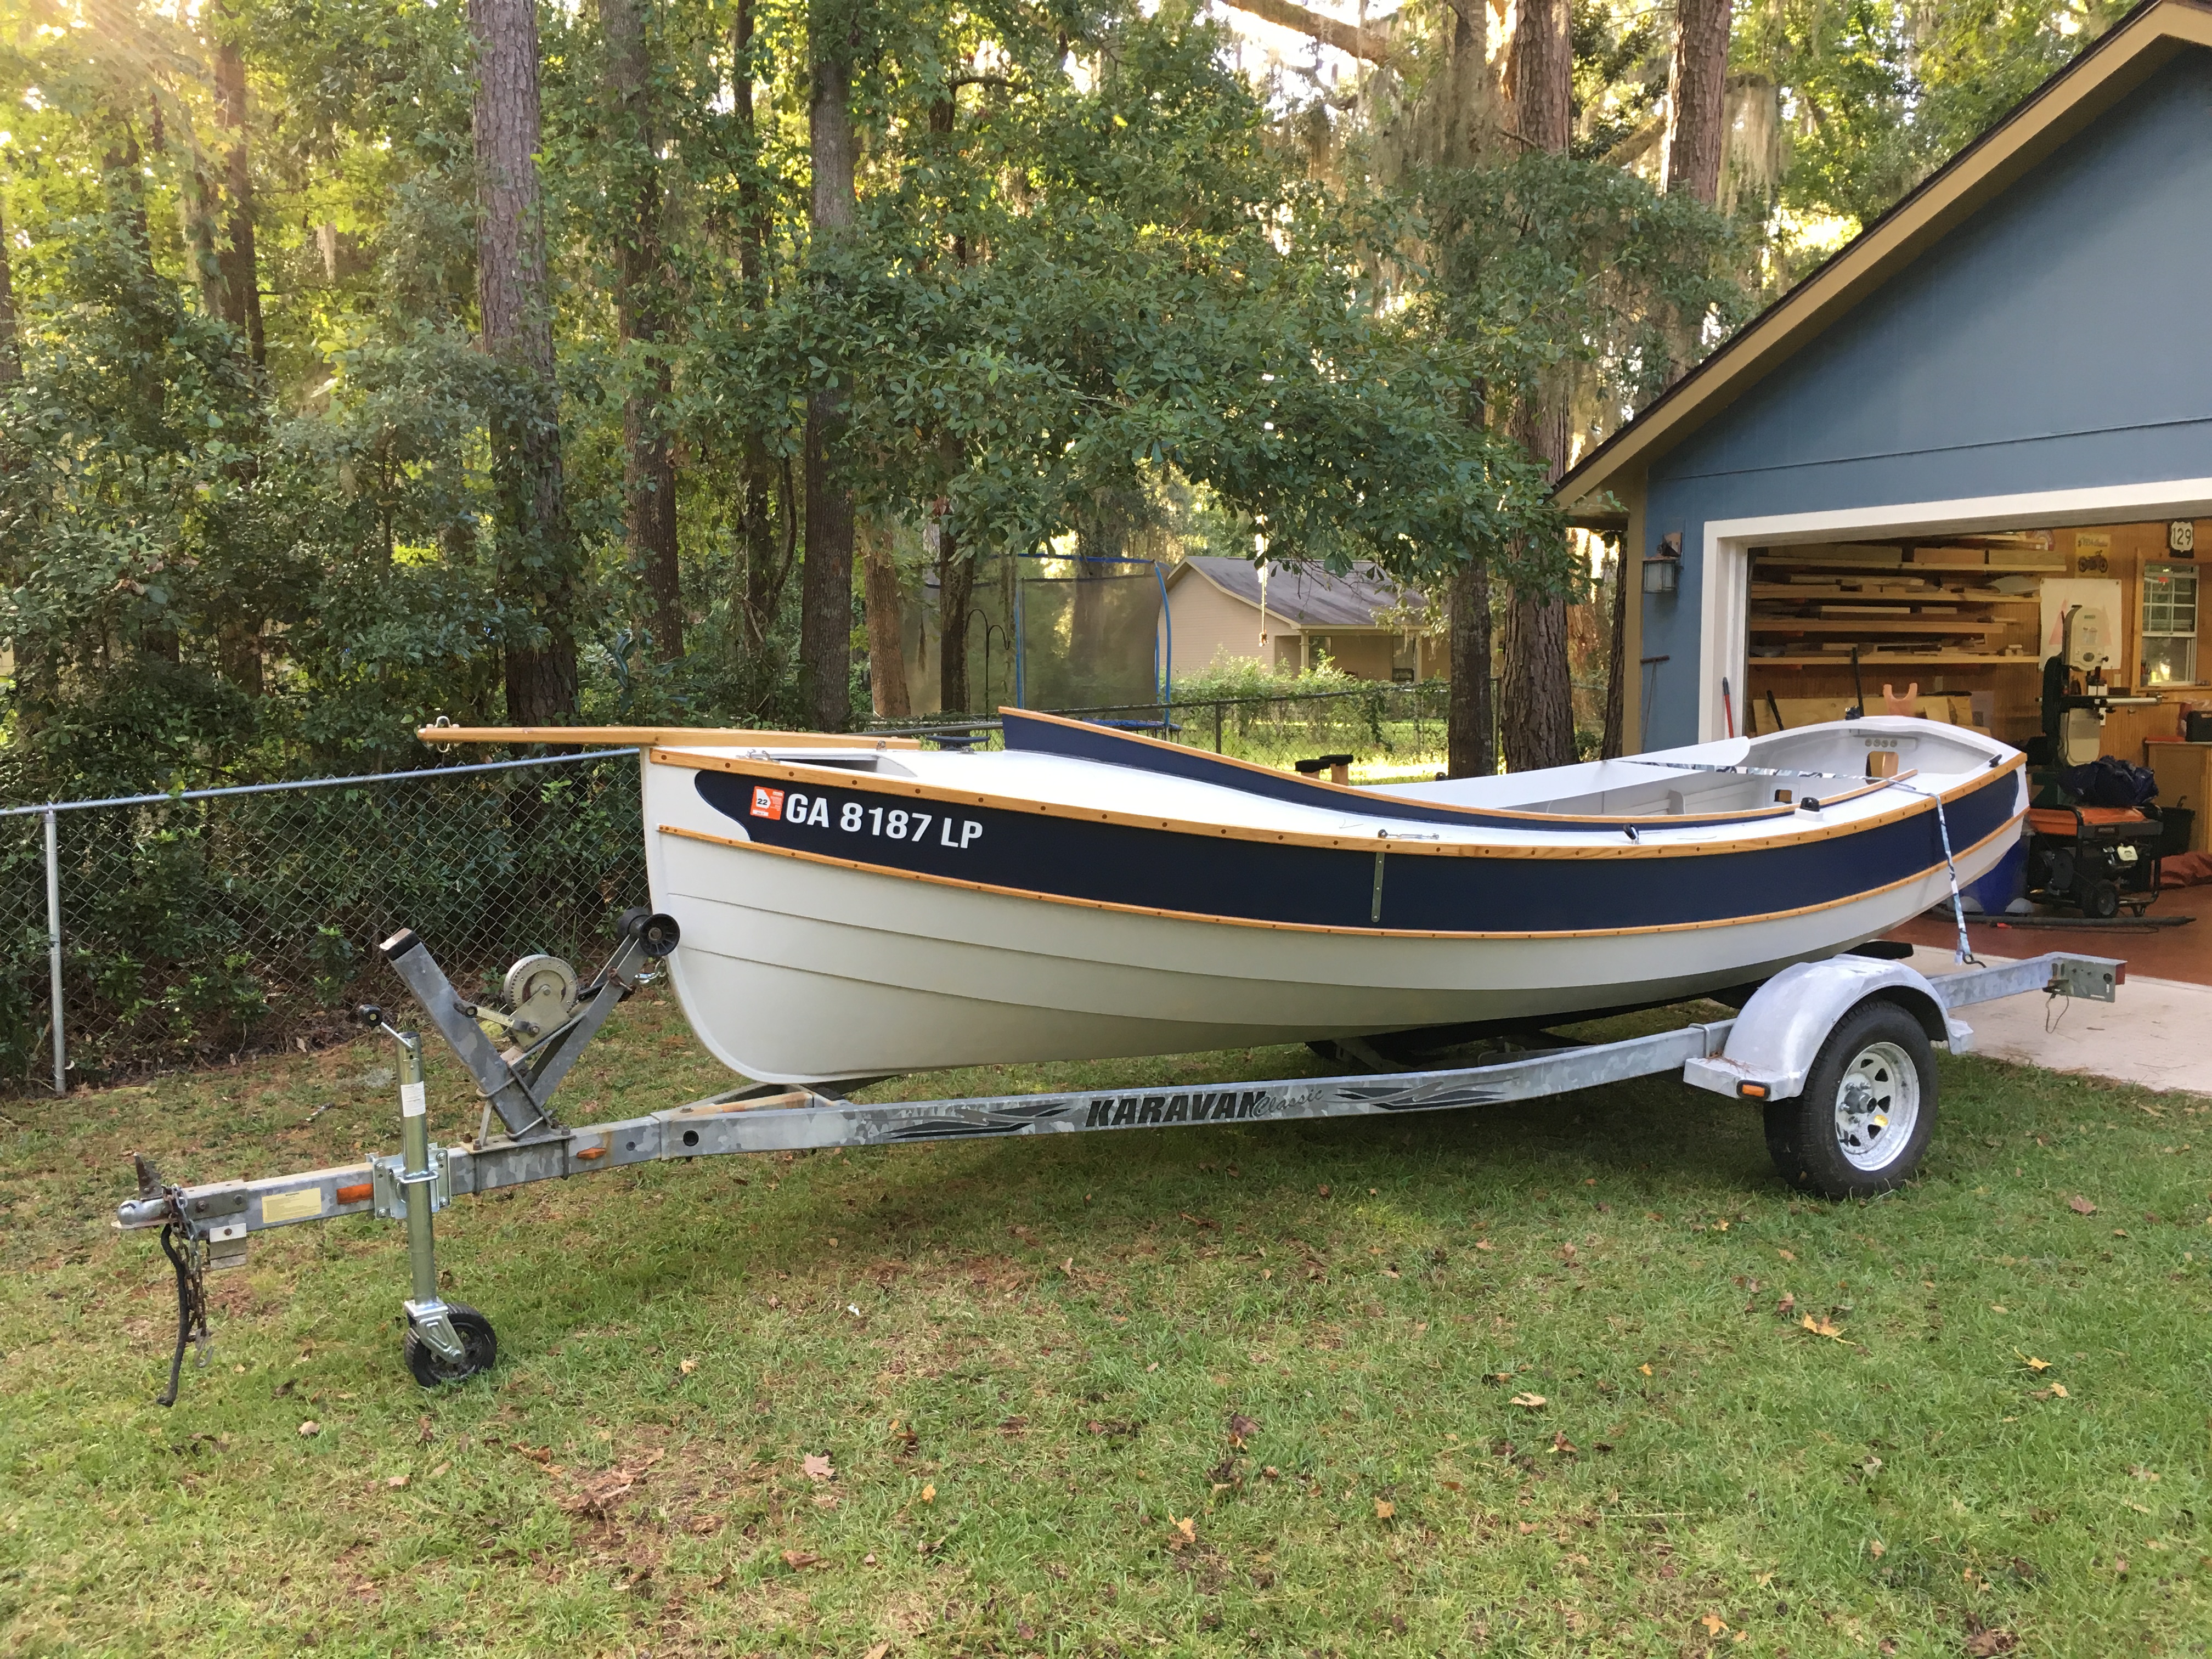
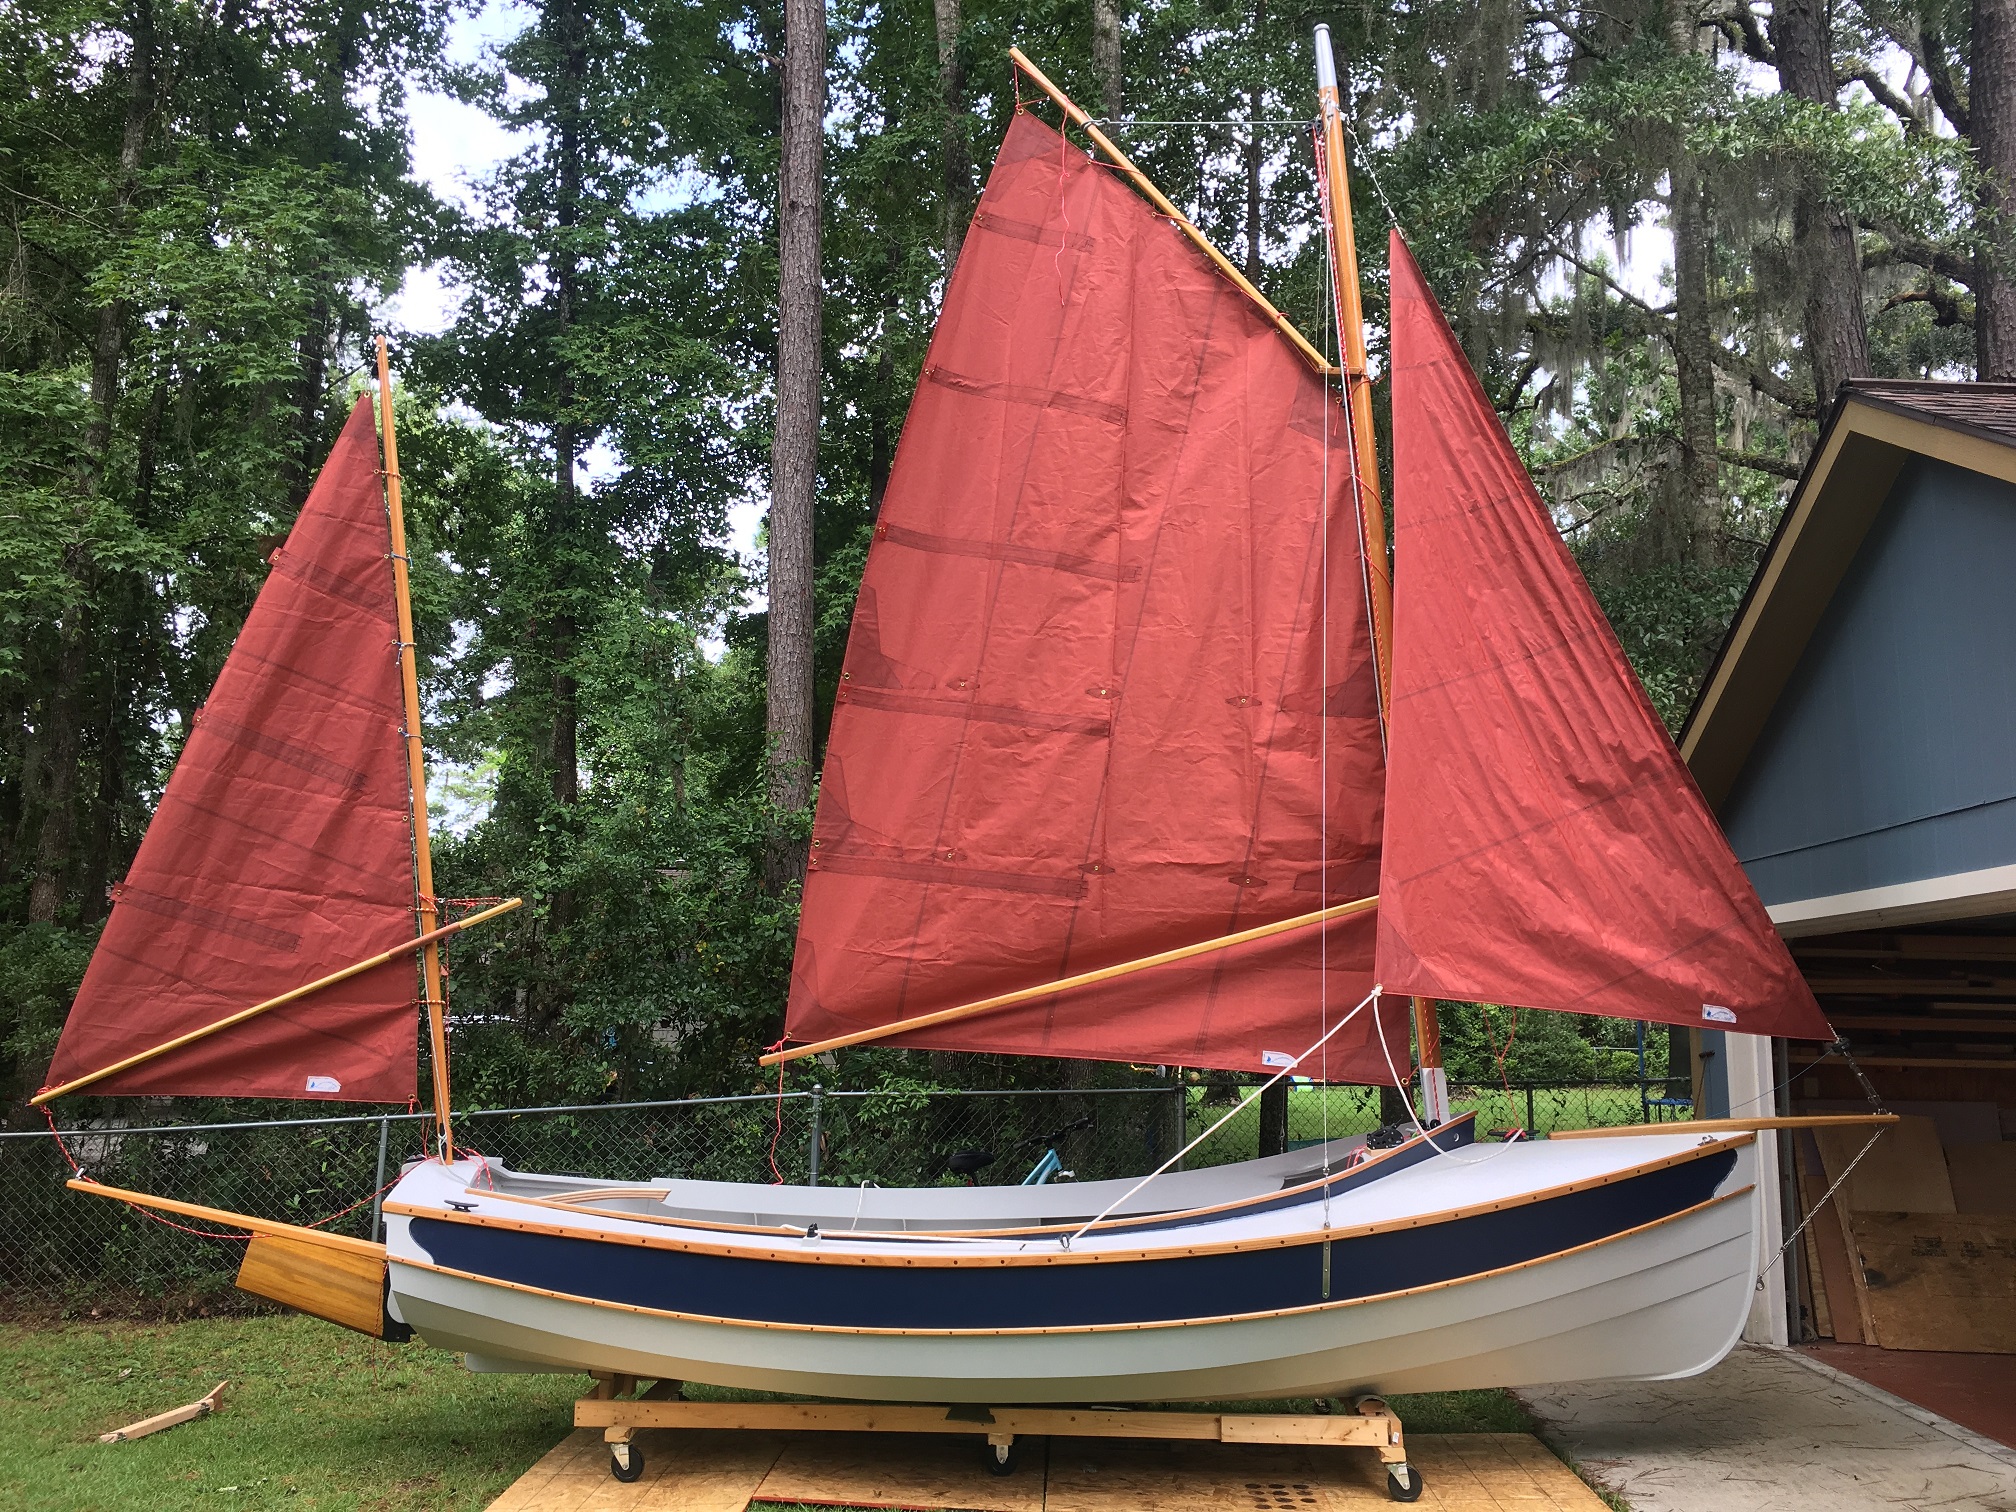
I am happy to report that she floated nicely on her lines and sails like a dream.
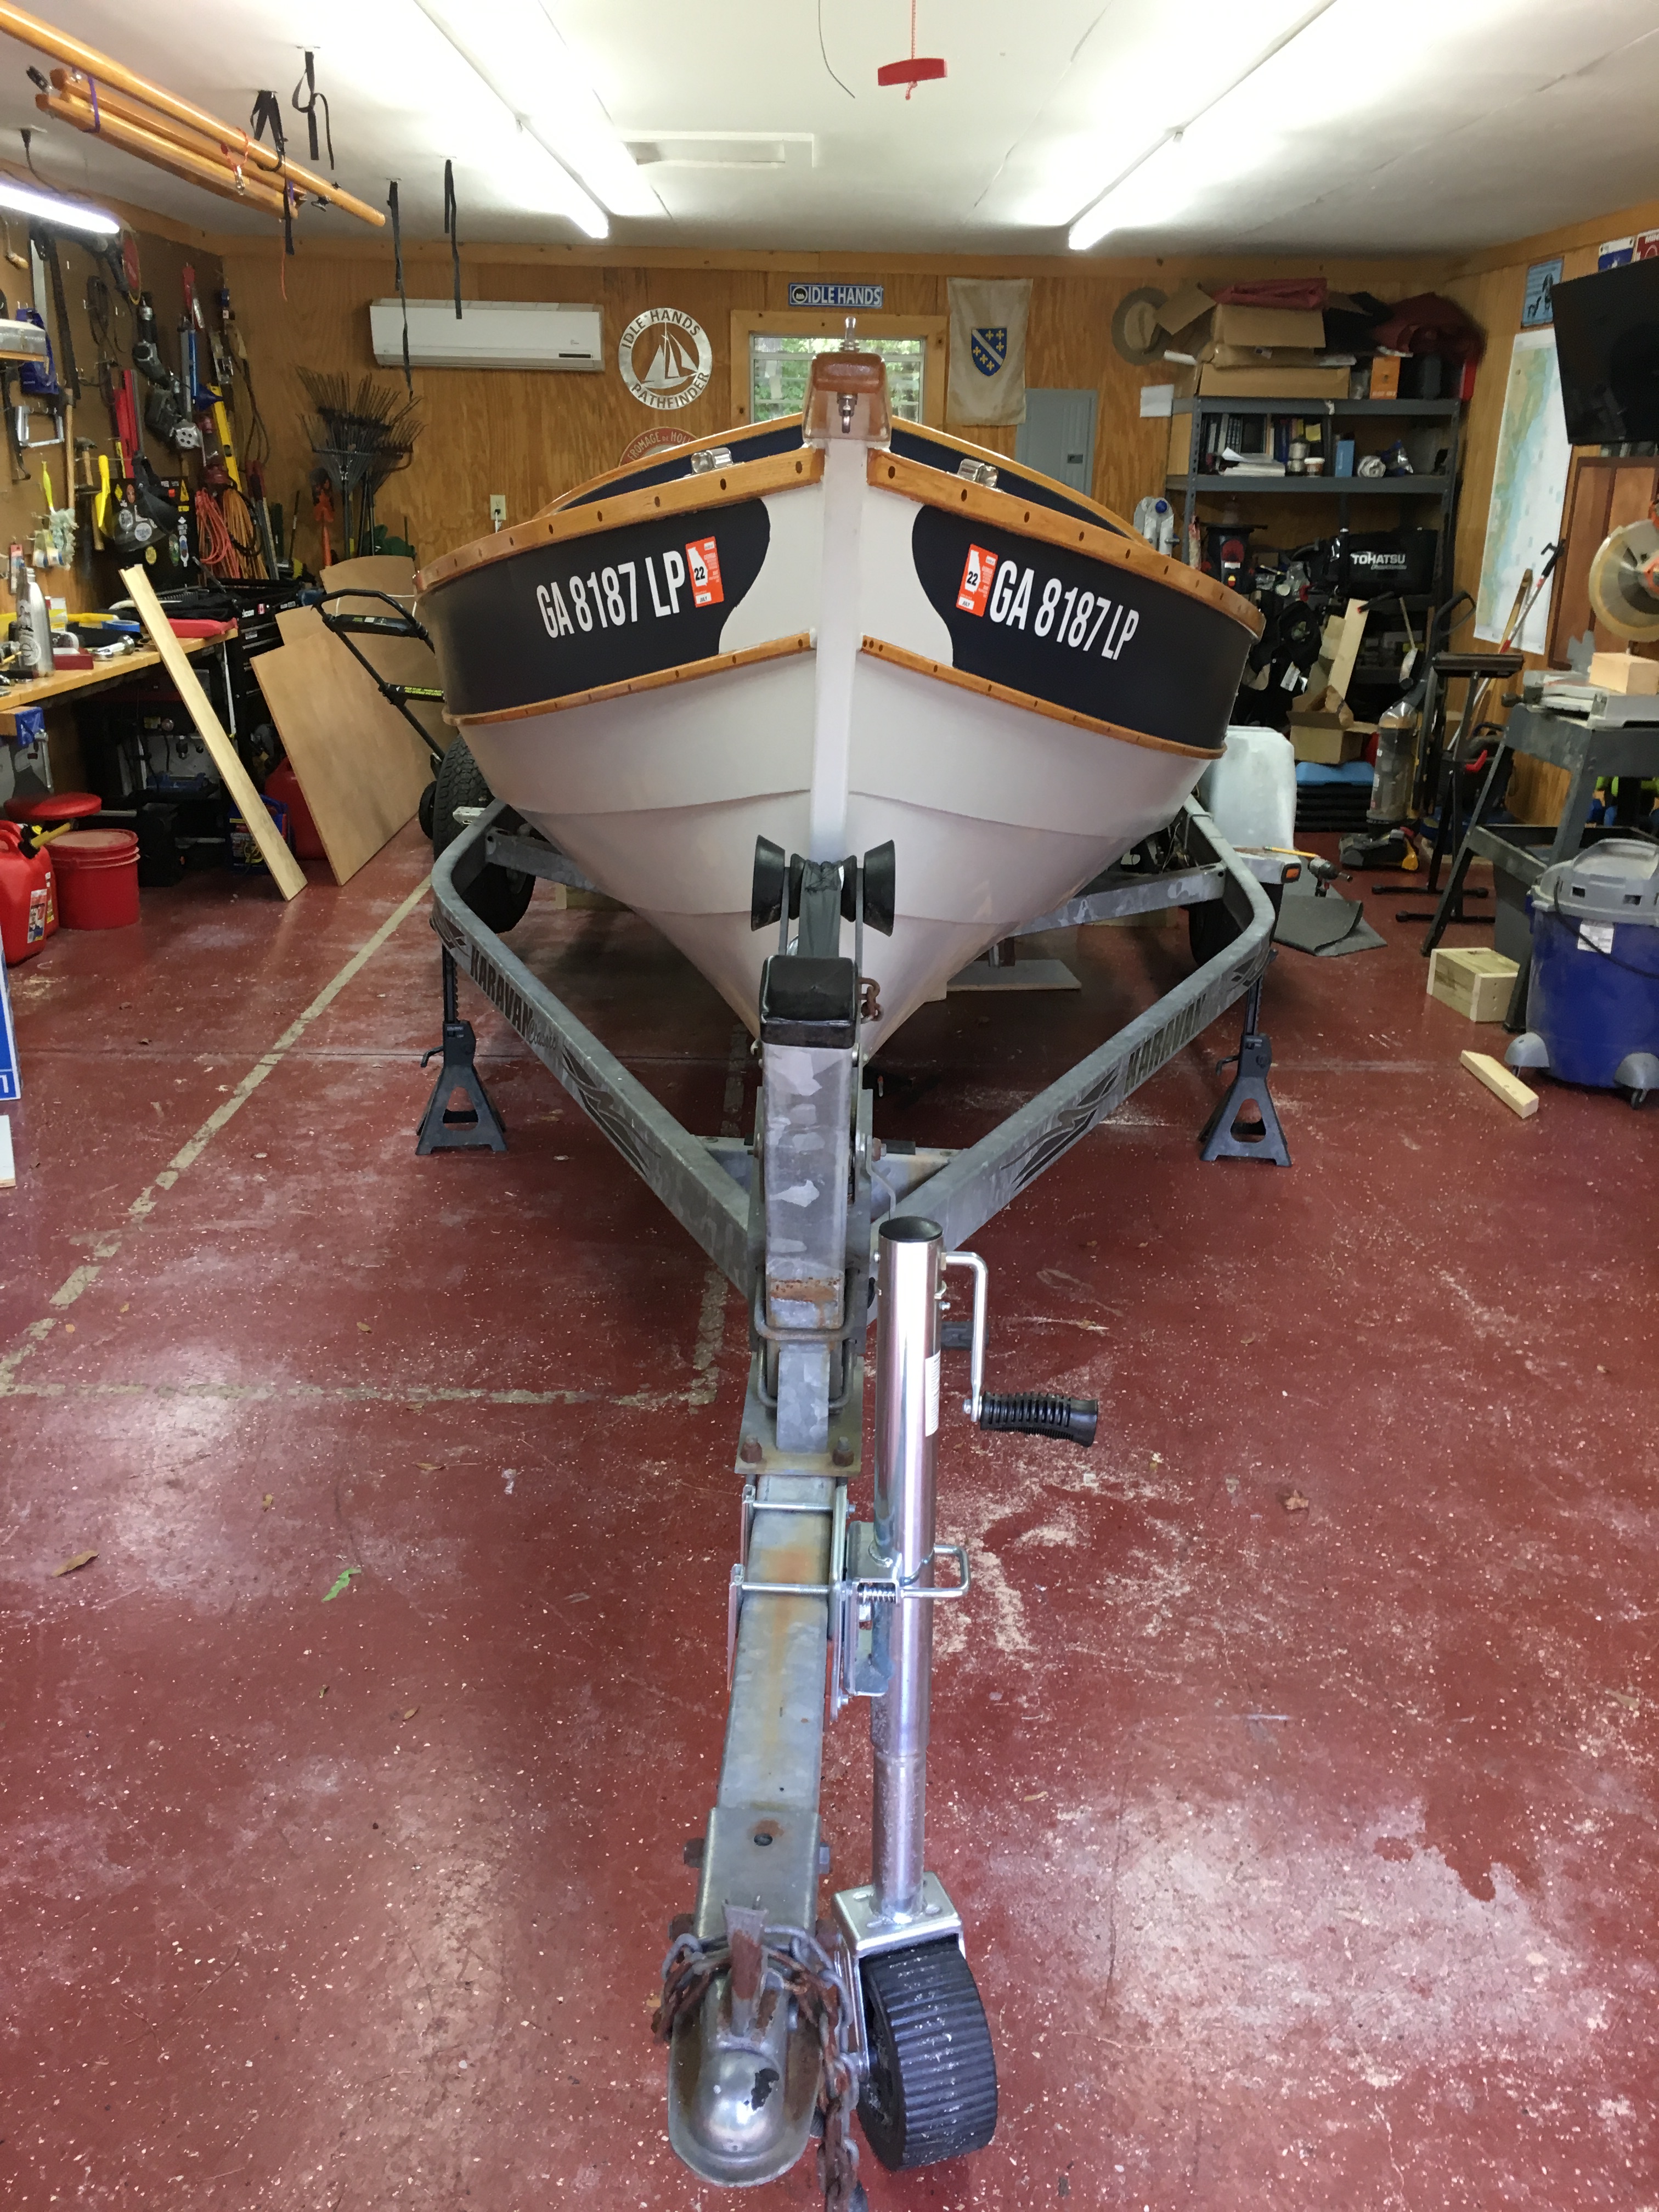
It’s now two days before launch on the 22th of September 2019. There were only two hurdles left before I could get my long term project wet for the first time – hanging the centerboard and loading Freya up on her trailer. I wasn’t really worried about the centerboard as it should only be a one bolt operation. A fairly simple task that involved a little heavy lifting. Loading the boat on the other hand is not such an easy task. It was the middle of the week and all of my large buddies were working and, since I had a tight deadline, it was up to me.
Like most people these days whenever I need to learn a new task the first place I head to is YouTube. Louis from “Tips from a Shipwright” had the information I needed. A plan took shape after watching Louis take his boat off of the trailer. It seemed a little sketchy so an official 911 (emergency services) caller was required. Fortunately my dad was up to the task. Cell phone in hand he was more than happy to watch me lift five years worth of work three feet in the air. First step though was getting her turned the right way.
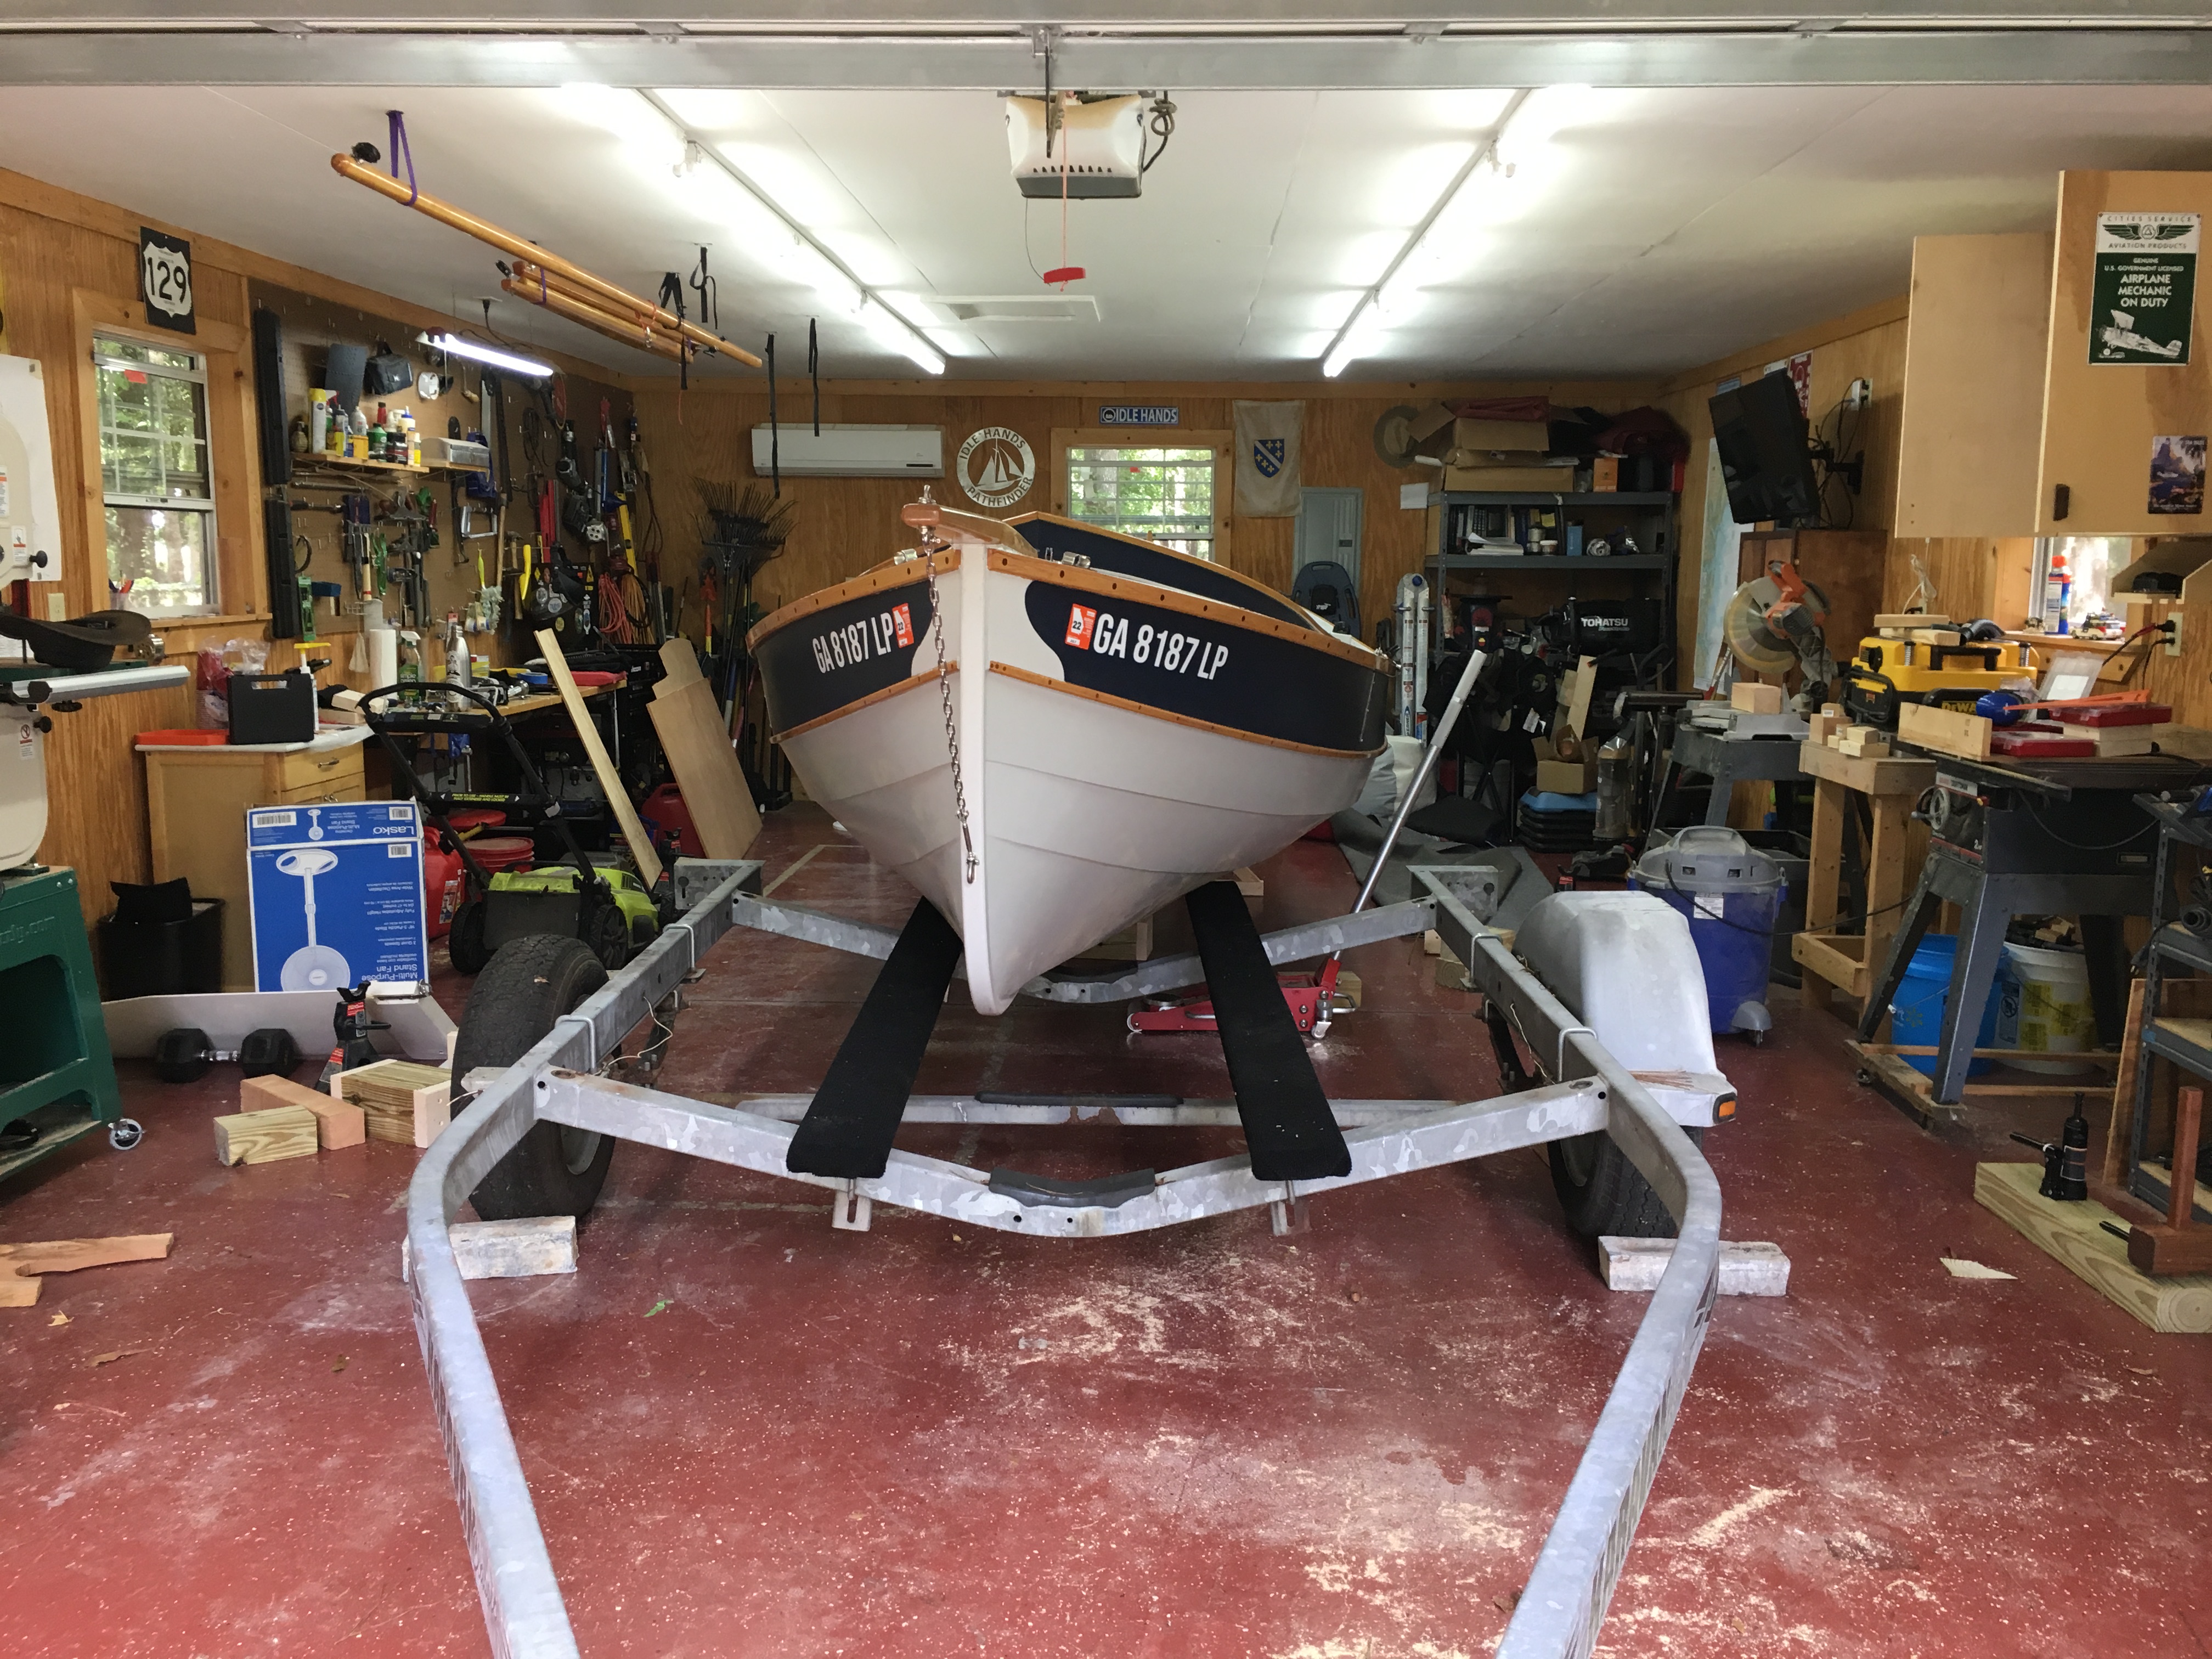
Once properly positioned, she went back in the shop. I had made some custom stands and cut up a few large wood blocks for the operation and combined it with a floor jack, block and tackle, and jack to do the trick.
Freya was a lot higher in the air than was comfortable but overall she was pretty stable. Inch by inch we backed the trailer in, moving the jacks and bracing as necessary.
Touchdown! and it wasn’t even lunchtime yet. The hard part is now out of the way and it was time to wrap it up and mount the center board. Remember what I said about it being an easy task?
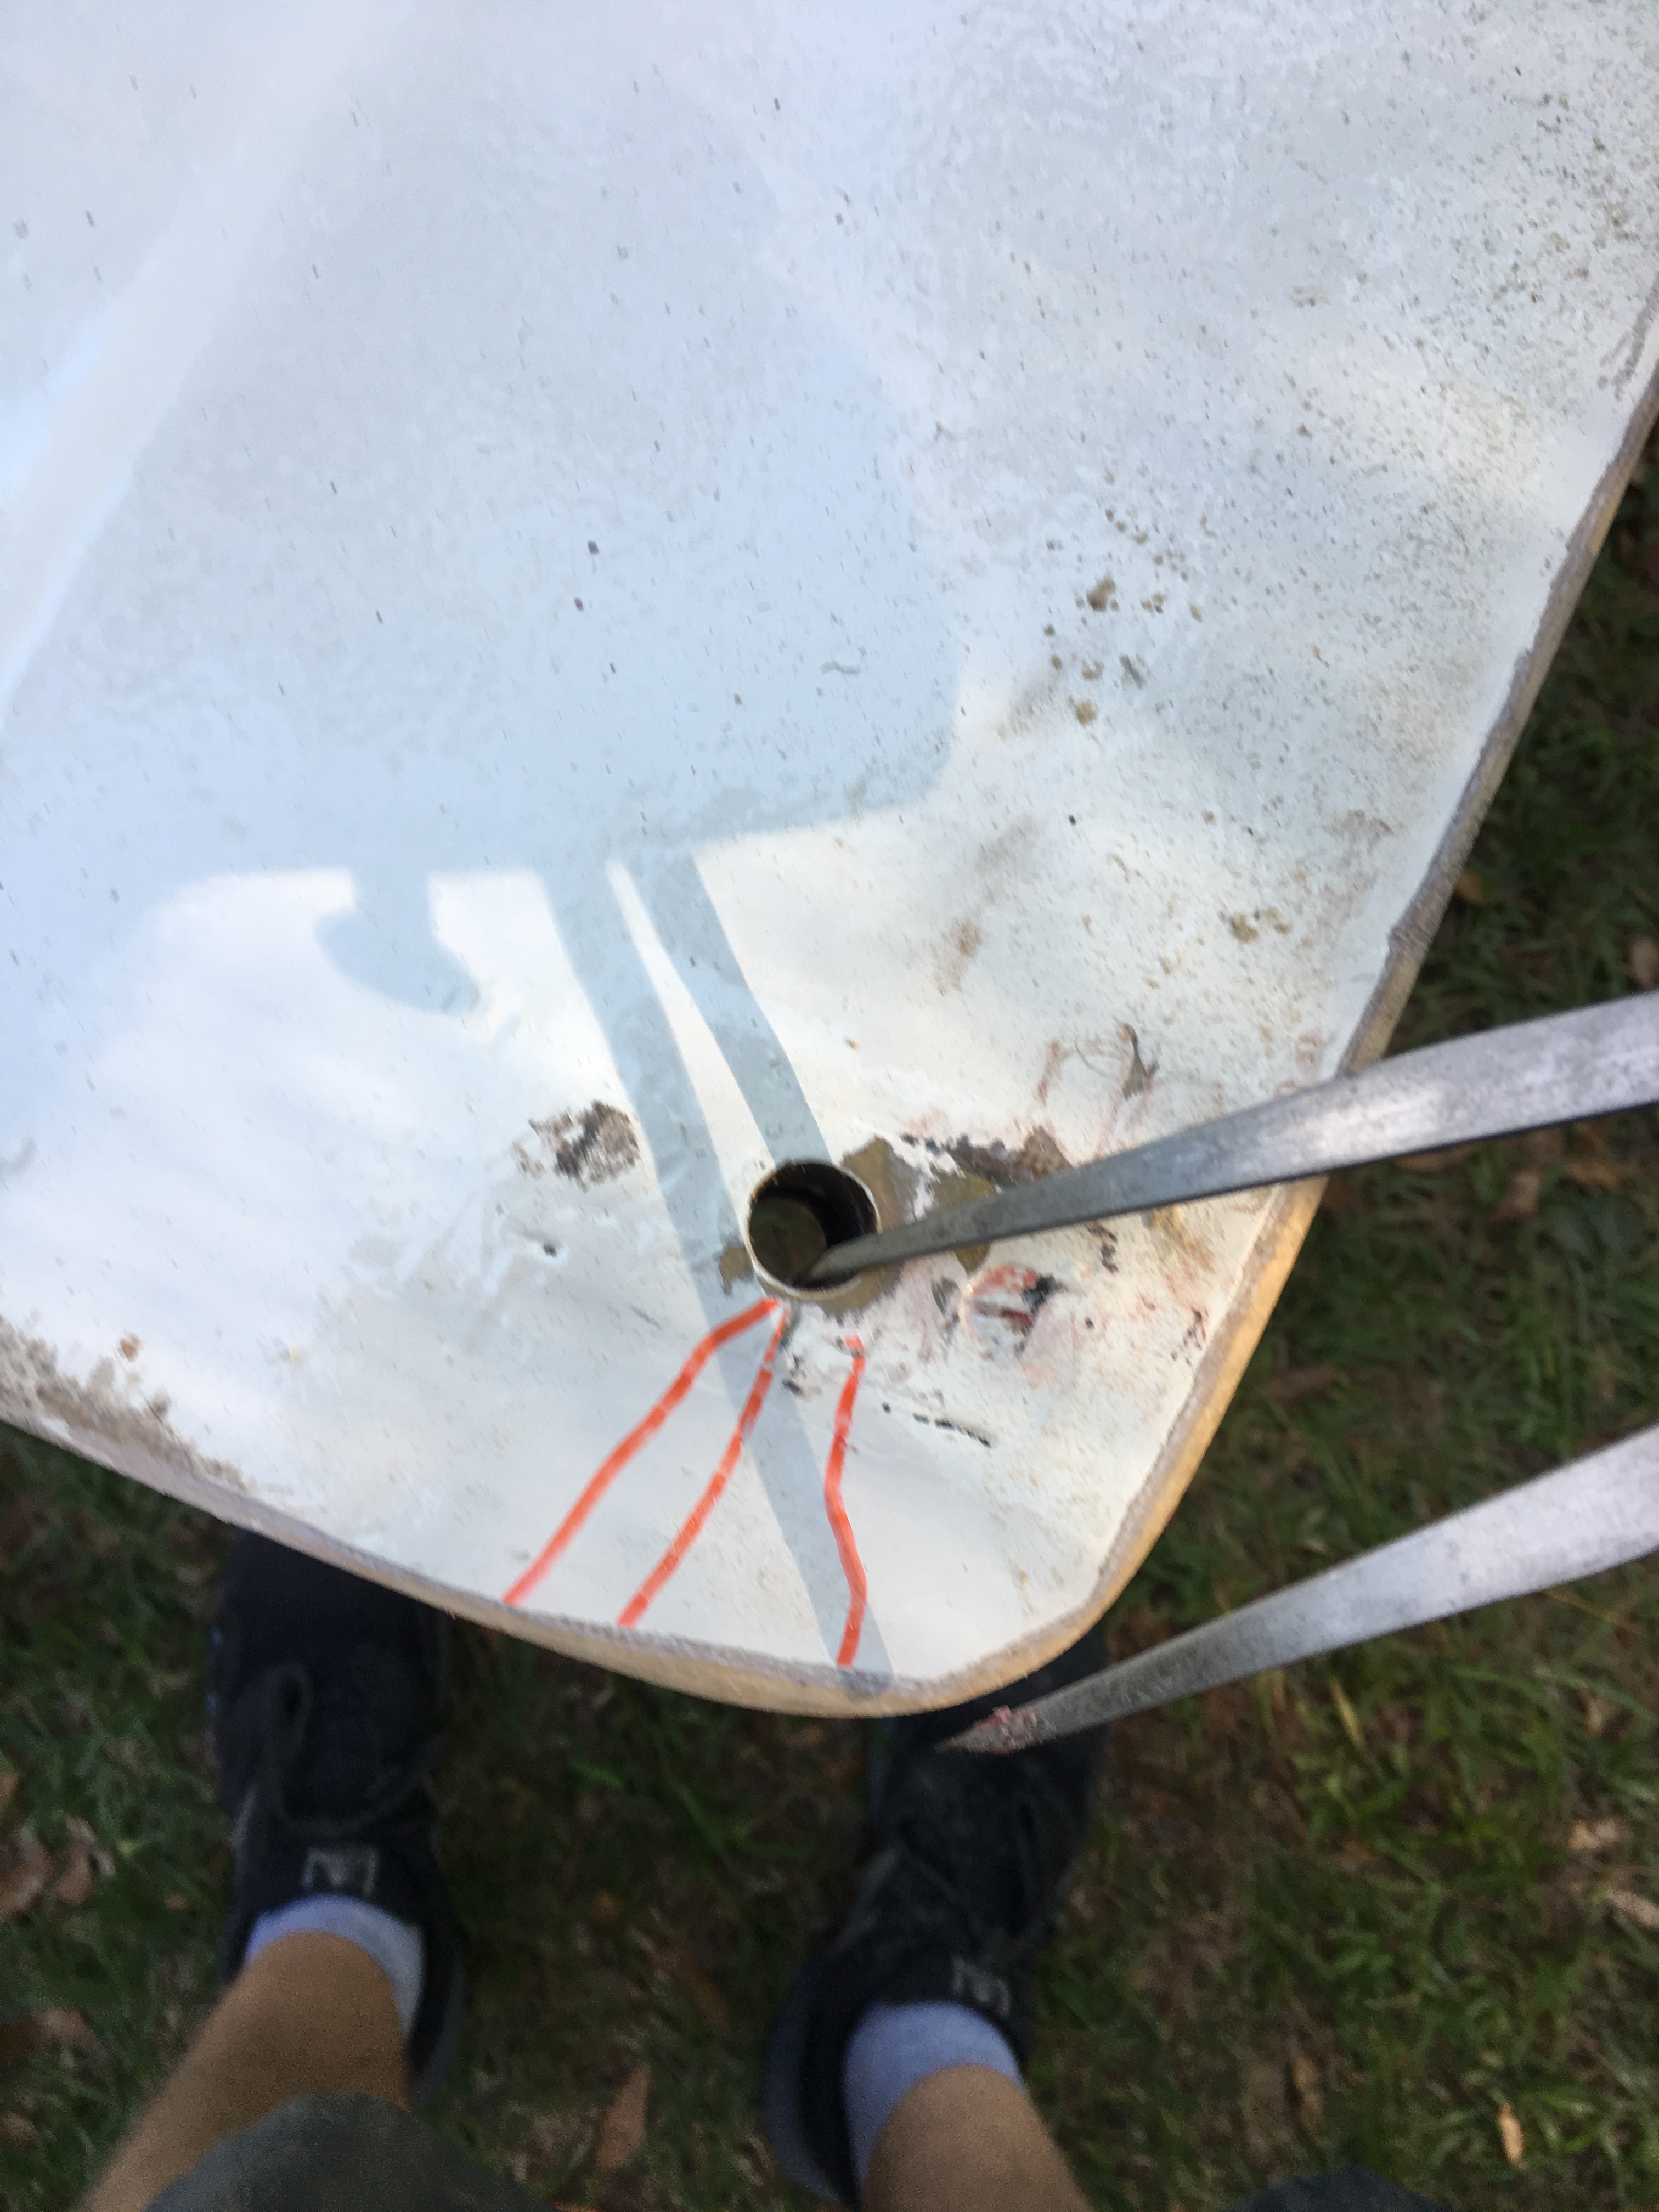
Like most “easy jobs” this one took much longer than it should have. The problem? that sharp corner on the center board. The clearance check was done when there was no paint or fiberglass on either the board or the center case. Now that they both had been sealed and painted they no longer cleared. A quick swipe of the belt sander was all it took.
With the test fit complete, the centerboard was sealed with epoxy and finally mounted.
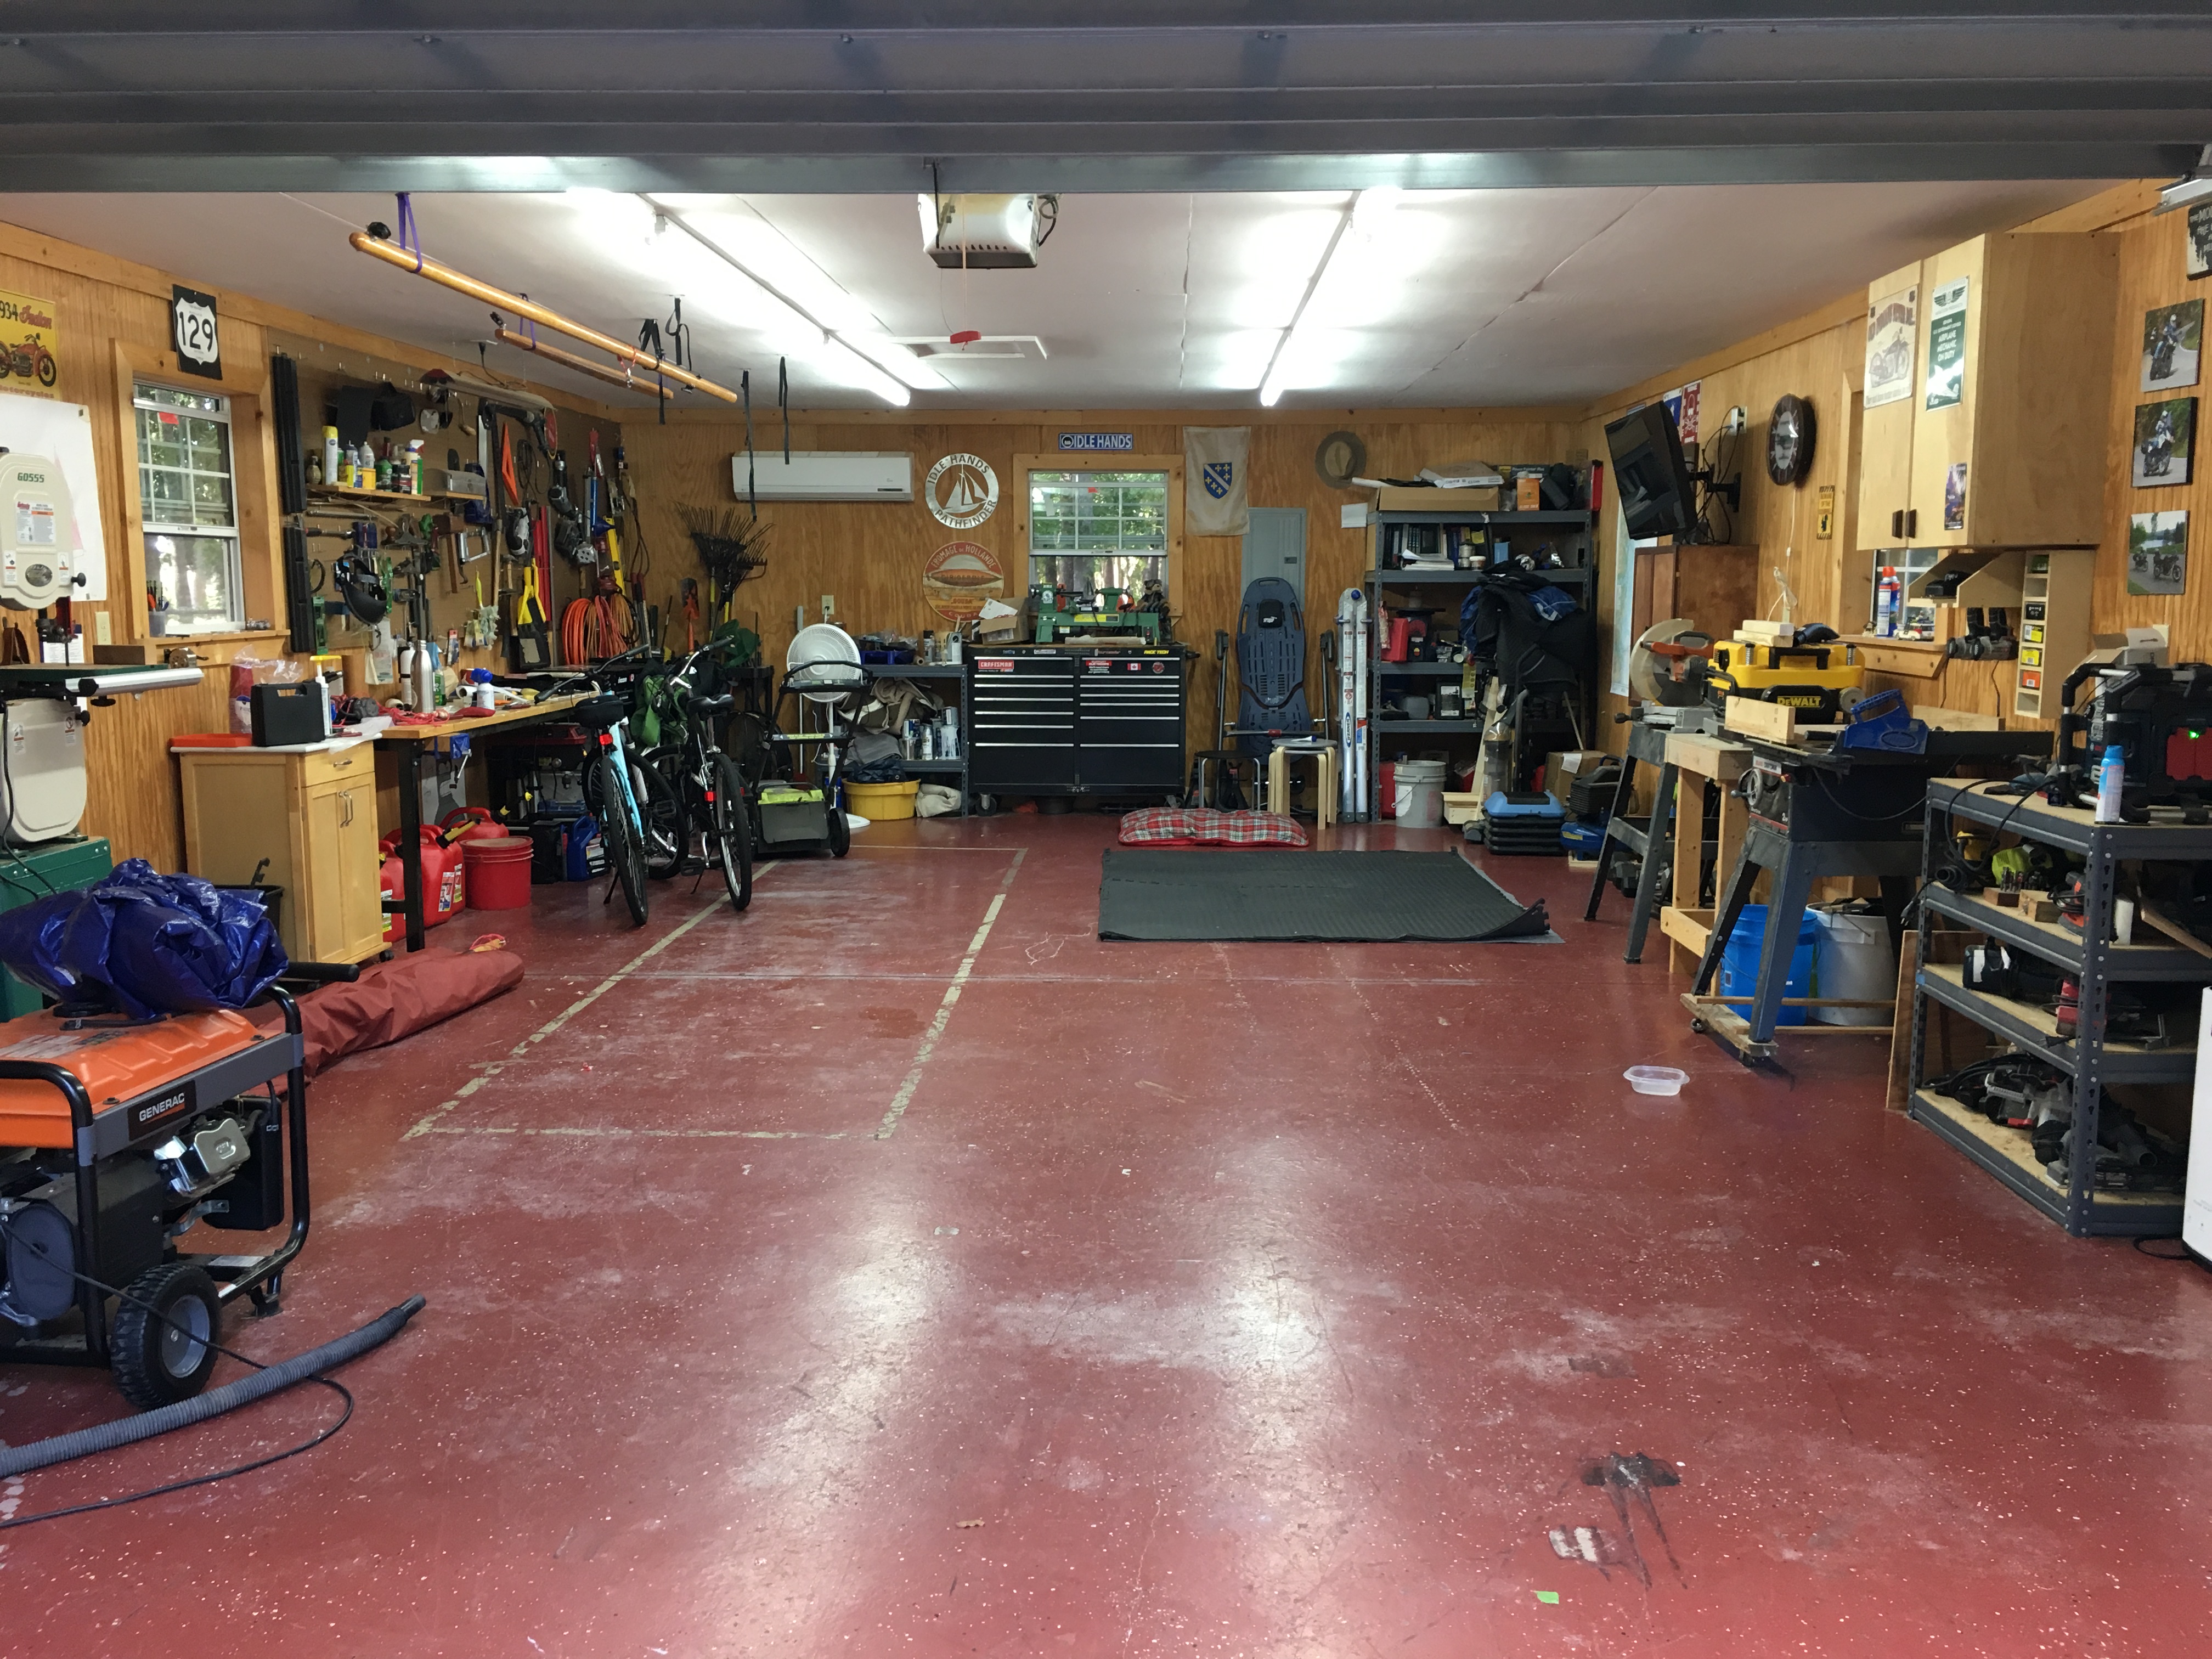
For the first time in a really long time the shop was empty. I’ve had Freya out here and there over the years but only for the day. Now she was free to come and go.
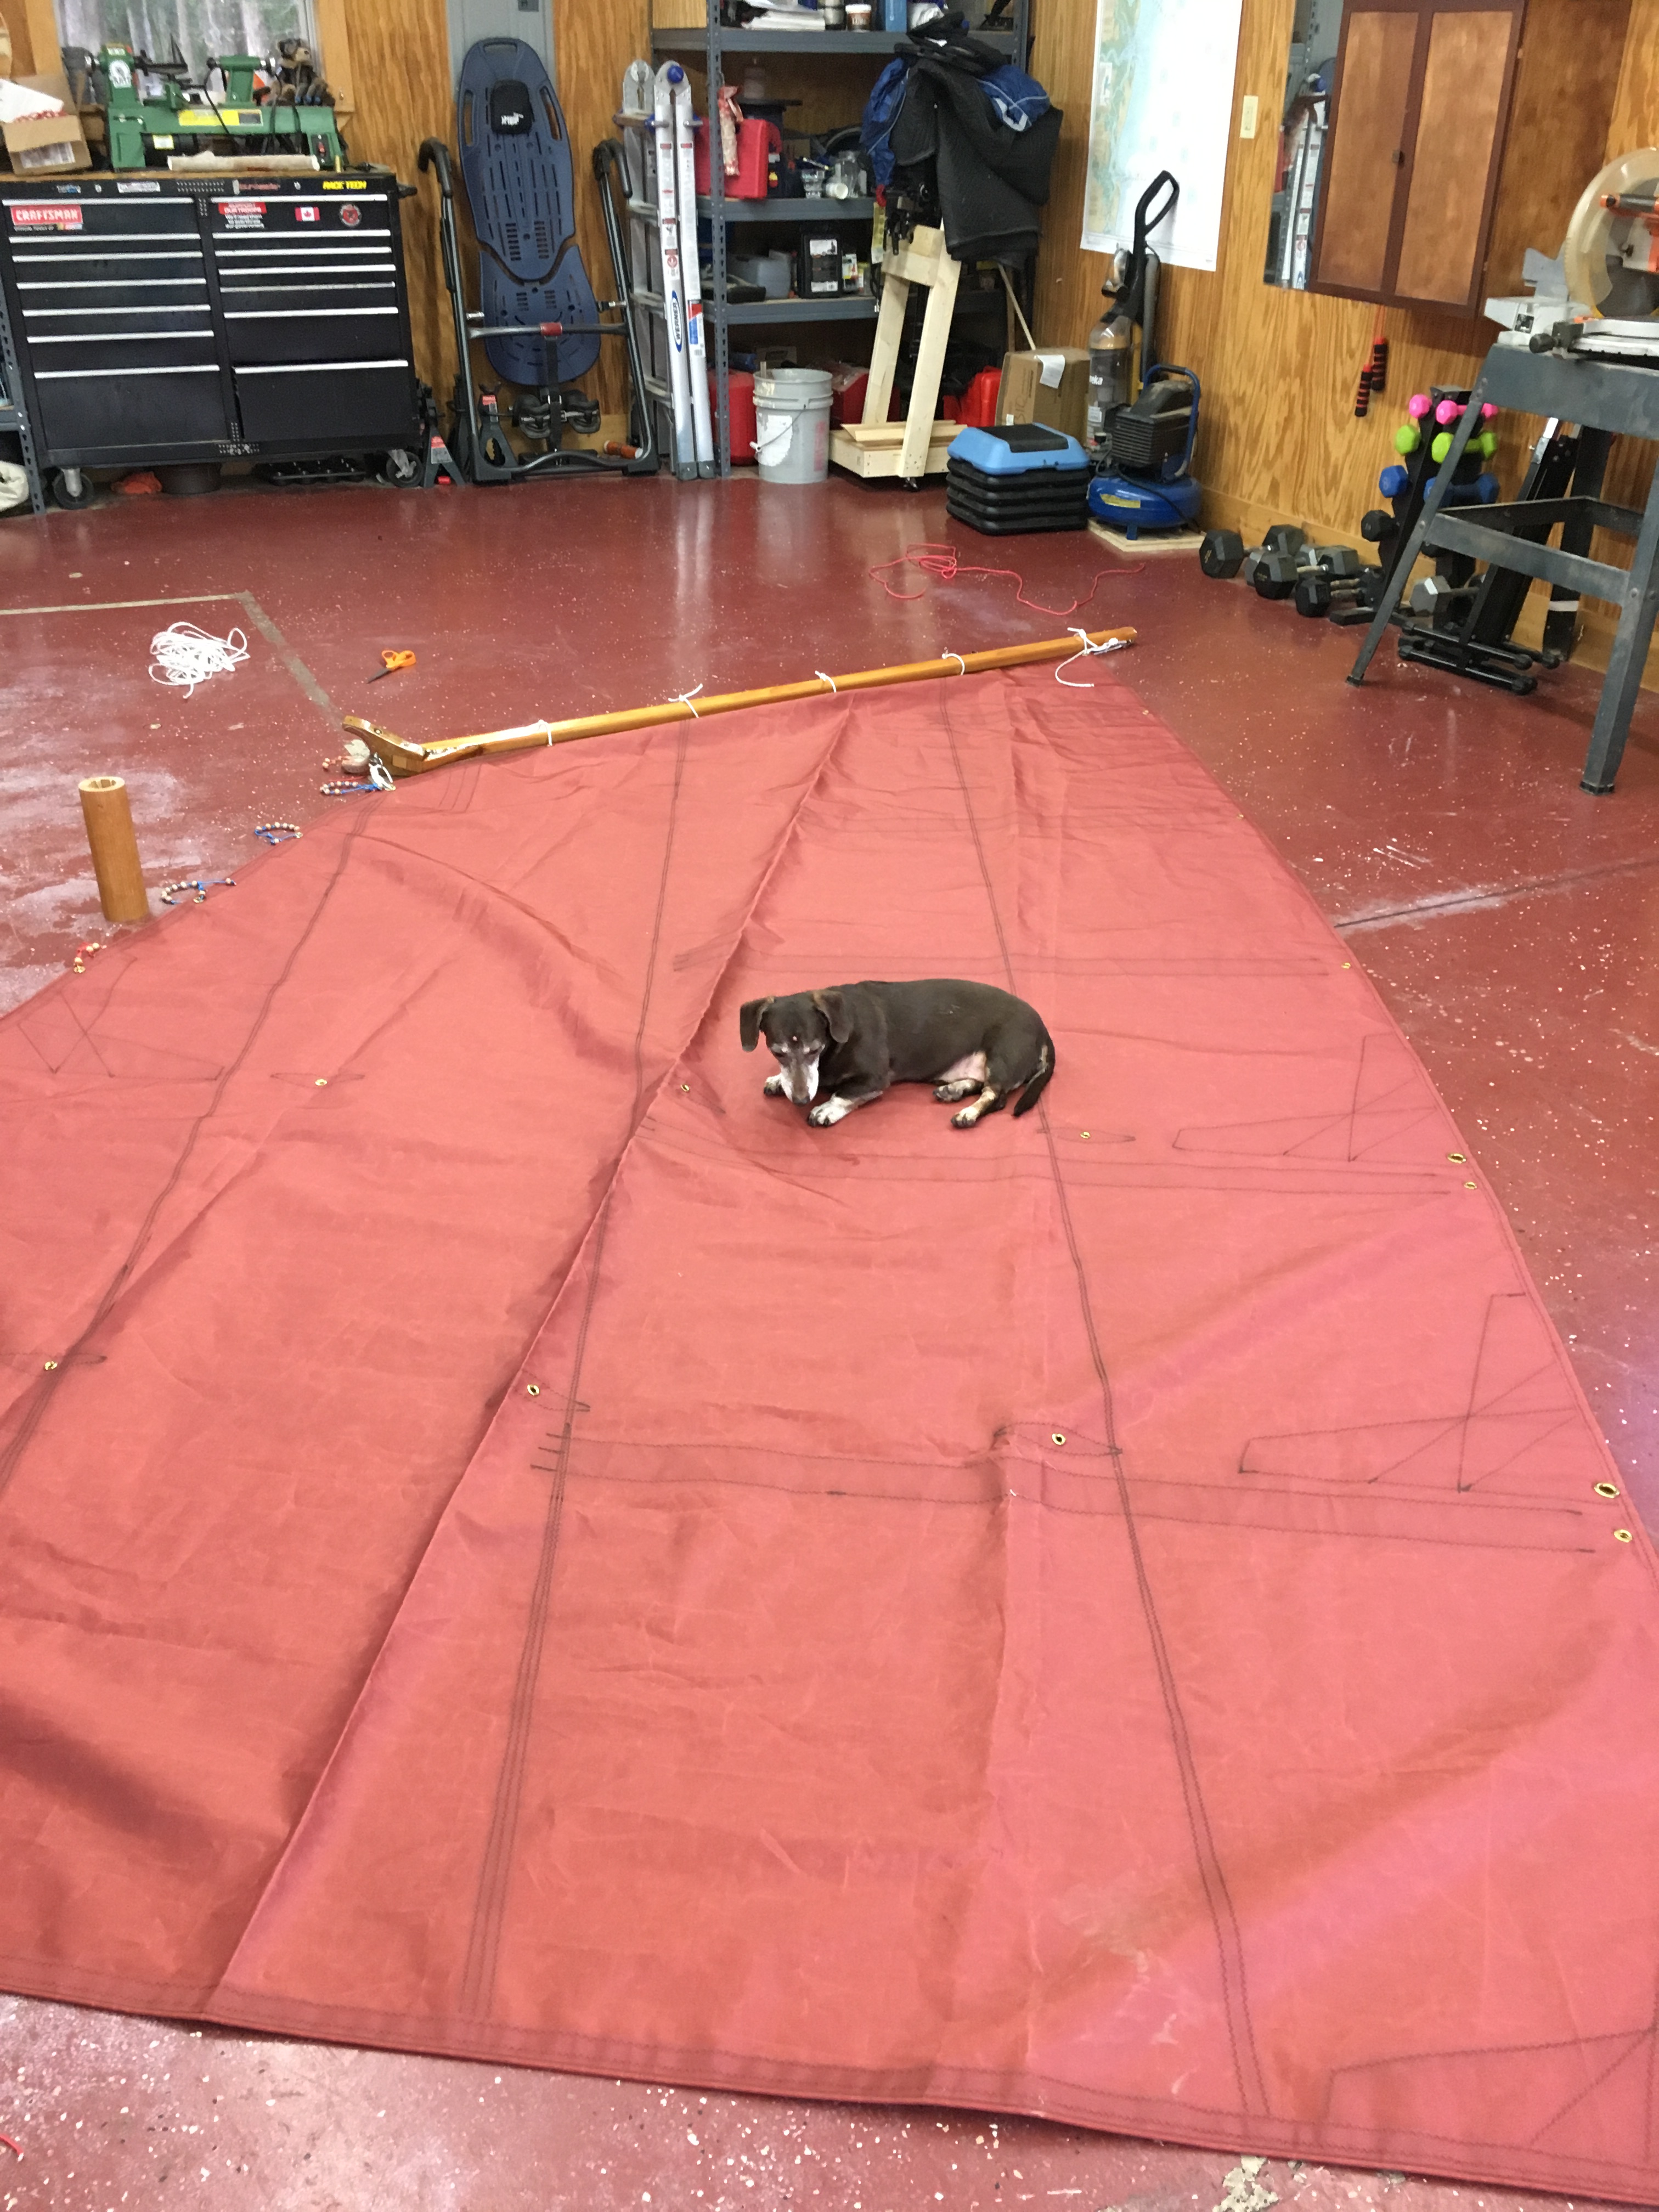
Now that the shop was empty it was time to bend the sails on for real then pack the boat up. Launch day is tomorrow.
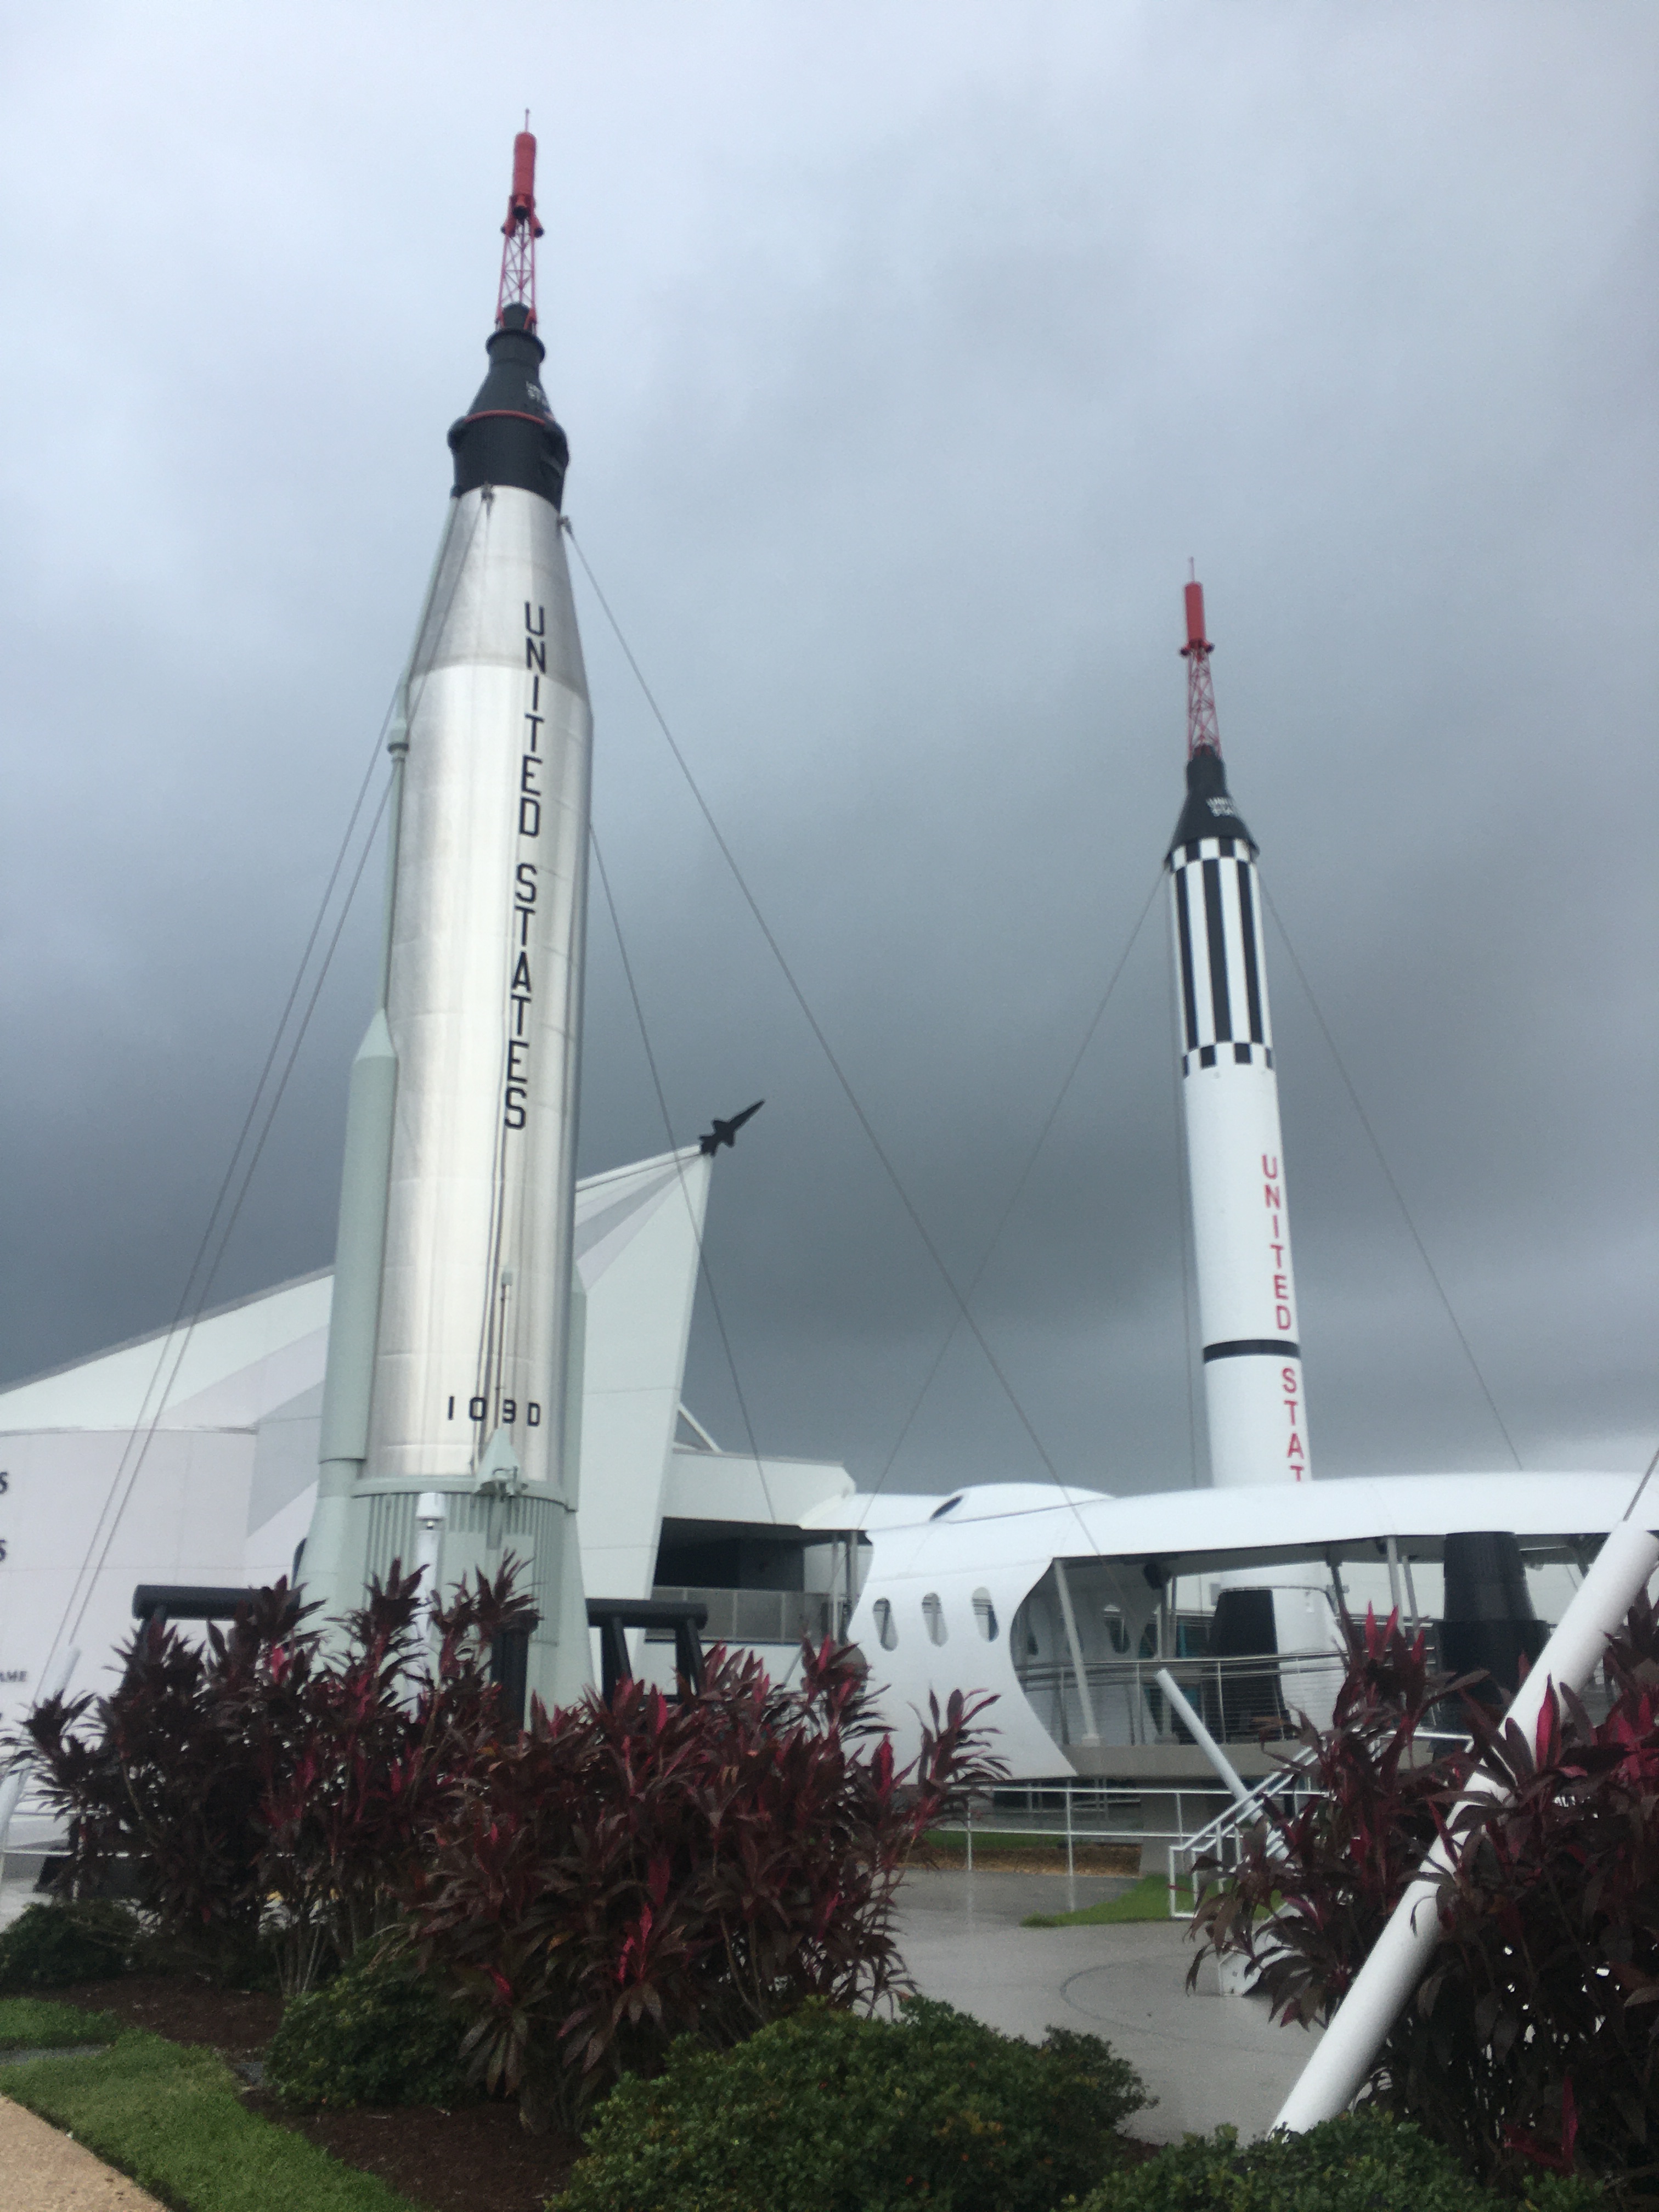
I sat at the desk in my motel room reviewing my presentation one last time. In the background, my personal fight song was playing to help pump me up for the most important hour in my life. I have spent my whole life dreaming of working in the space industry and now, here I was, in a hotel in Cocoa Beach getting ready to walk into my final interview with one of the biggest names in commercial spaceflight. It had taken two years and countless tries to get here and I was ready. This was my one shot. I walked out of the interview an hour later and called Cheryl to tell her the good news. “We are moving to Florida!”.
***Crunch Time***
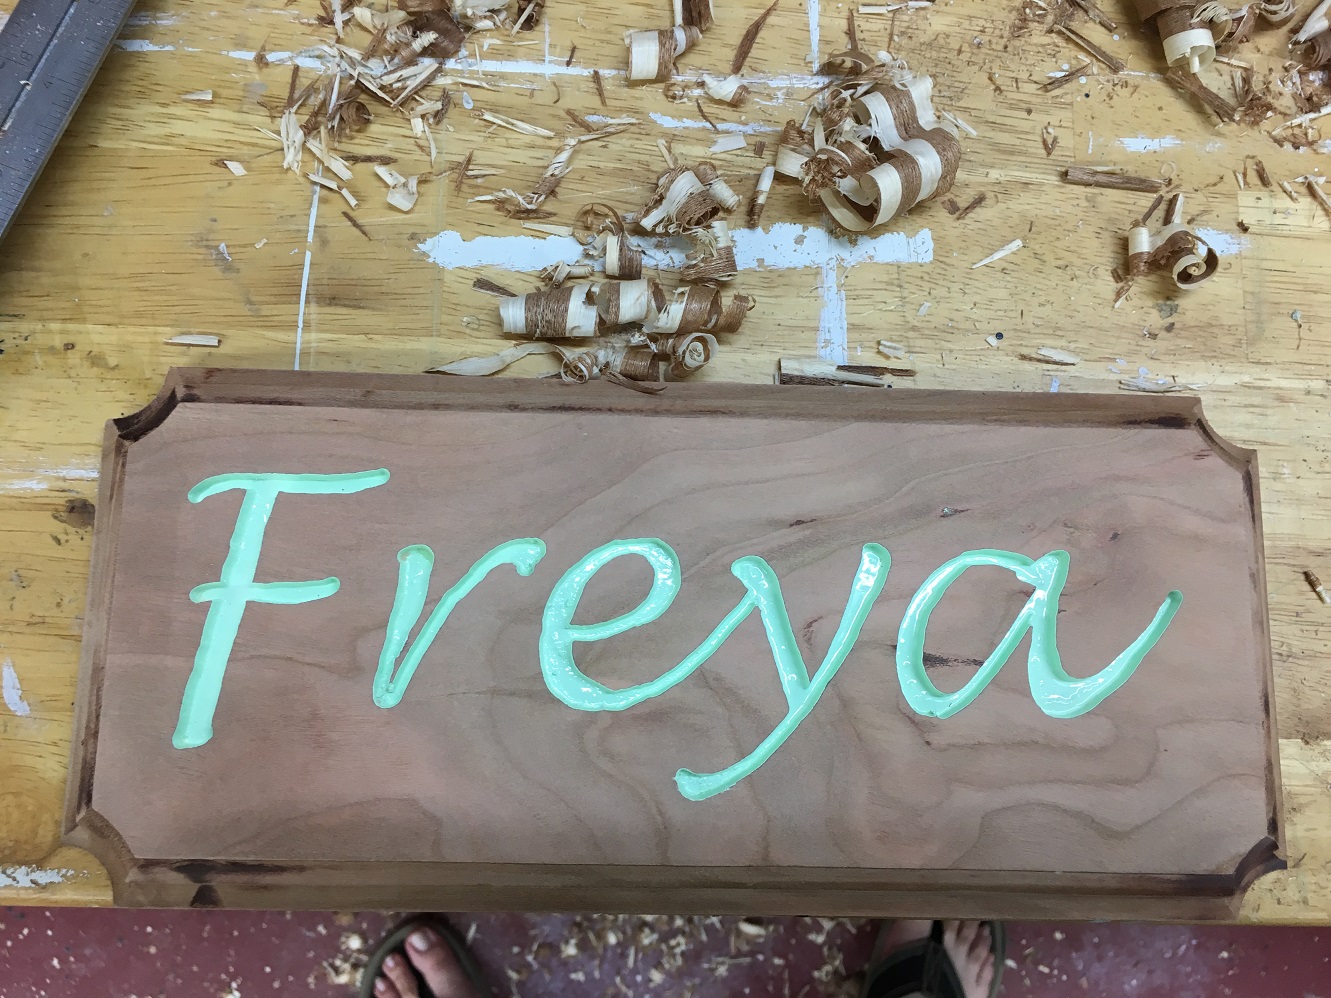
In the aircraft world the last two pages of your work order is the worst. It contains all of the stuff that has been shuffled off, forgotten about, or just plain ignored until time is up and you are forced to deal with it. It’s a one to two day S#$@ show I call crunch time, something I’m sure is the same in other industries as well. That mad rush to tie up all the loose ends before the deadline. With the move coming up we had three months left in Georgia with a ton of work to do on the house to get it ready to sell. This was the kick in the pants I needed to set a date. I figured one month would do it. A tight schedule for sure, but a doable one. First off was the name board.
I had originally planned on calling the pathfinder “Idle Hands” after the name of the blog but over the years that has morphed into the name of my shop. So after much debate we decided on Freya, the Viking goddess of sex and war. I carved the plate out of a piece of cherry wood leftover from an earlier project.
Sorting out the nameboard was the last of the woodworking tasks so now it was time to varnish.
To prep for varnish, the shop was swept, dusted, vacuumed, and mopped and then the longest part of the whole build was started. I used 6 coats of Total Boat Lust on the fiberglassed areas and 10 on the bare wood. With the AC on in the shop and a dehumidifier running I was able to get everything done in just a little over two weeks of daily varnishing. While I would never want a boat with a lot of varnish I did find I enjoyed the process. Call me a glutton for punishment. I was able to work about three pieces at a time on the varnishing racks and, as each piece came off, the hardware was installed and the whole thing went into the done pile.
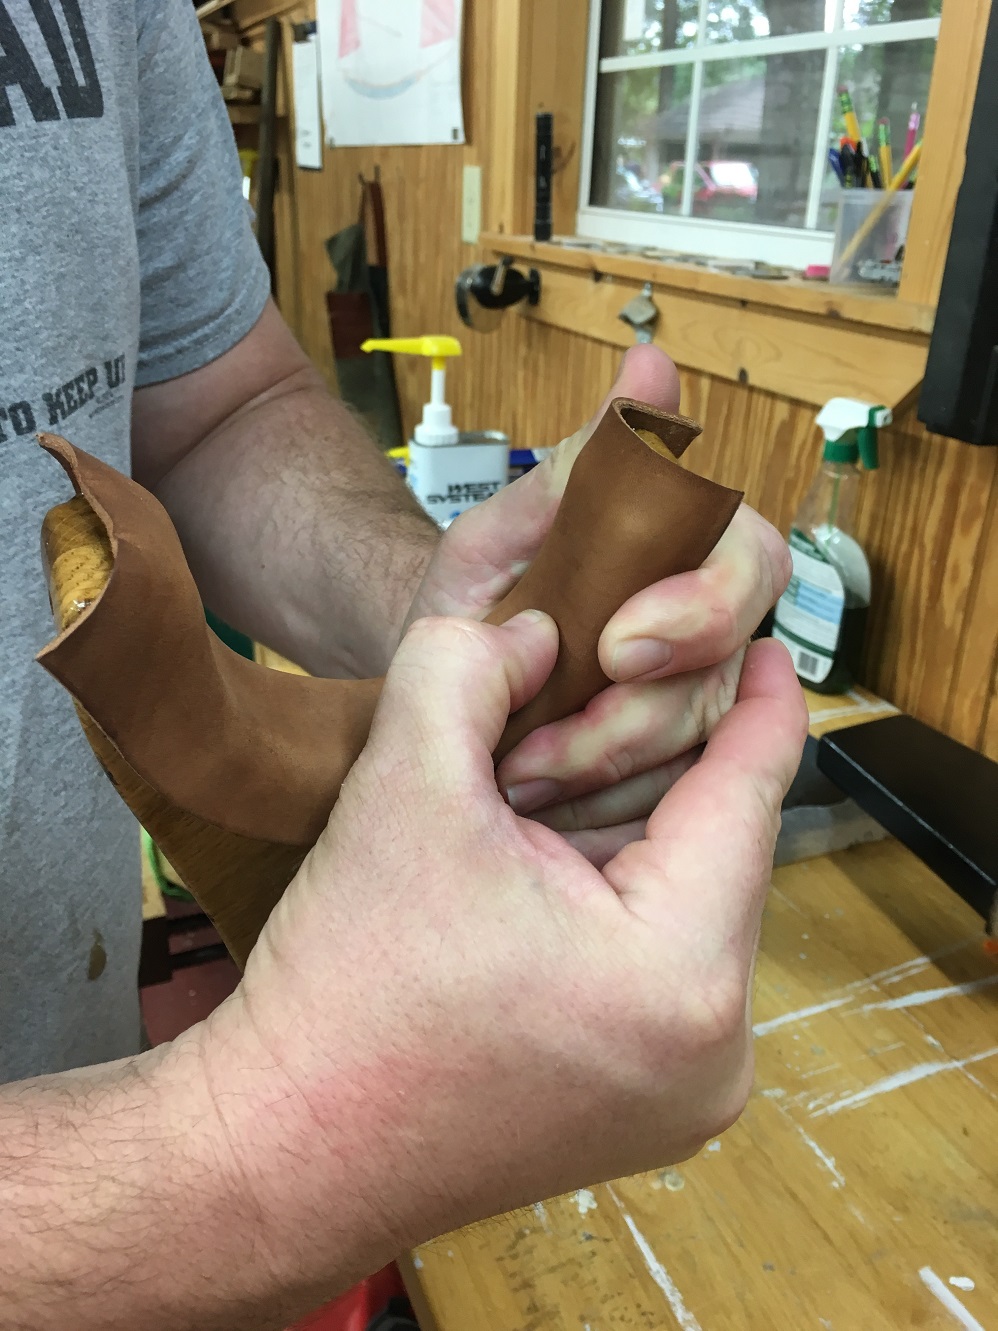
All of the contact points between the various sticks received a protective coating of oar leather.
The engine was de-preserved and went through its first break in run. After that into the boat she went. There has been some questions about how much the engine will interfere with the tiller but I think there is plenty of room. I have found out since then the asymmetrical thrust that comes from mounting the engine off of the center line is a much bigger problem than the short amount of throw you lose with the engine in the well.
The final step was rigging the sails. It had been a three week whirlwind of boat work but my to-do list was down to three items. Rig the sails, place her on the trailer, and launch. It was a few days before launch and there wasn’t a wisp of a breeze. The perfect day to hoist the sails. Gaff rigs look really cool but man, there is a lot of ropes and pulleys involved. It took several hours to get it sorted out and hard mounted and by then the breeze had started to pick up. As the wind hit the sails I heard the familiar snivel and pop of the sails catching the breeze. All three came alive and shifted with the gentle wind and Freya moved under her own power for the first time. Four and a half years in the making, three days till launch. Freya was done.
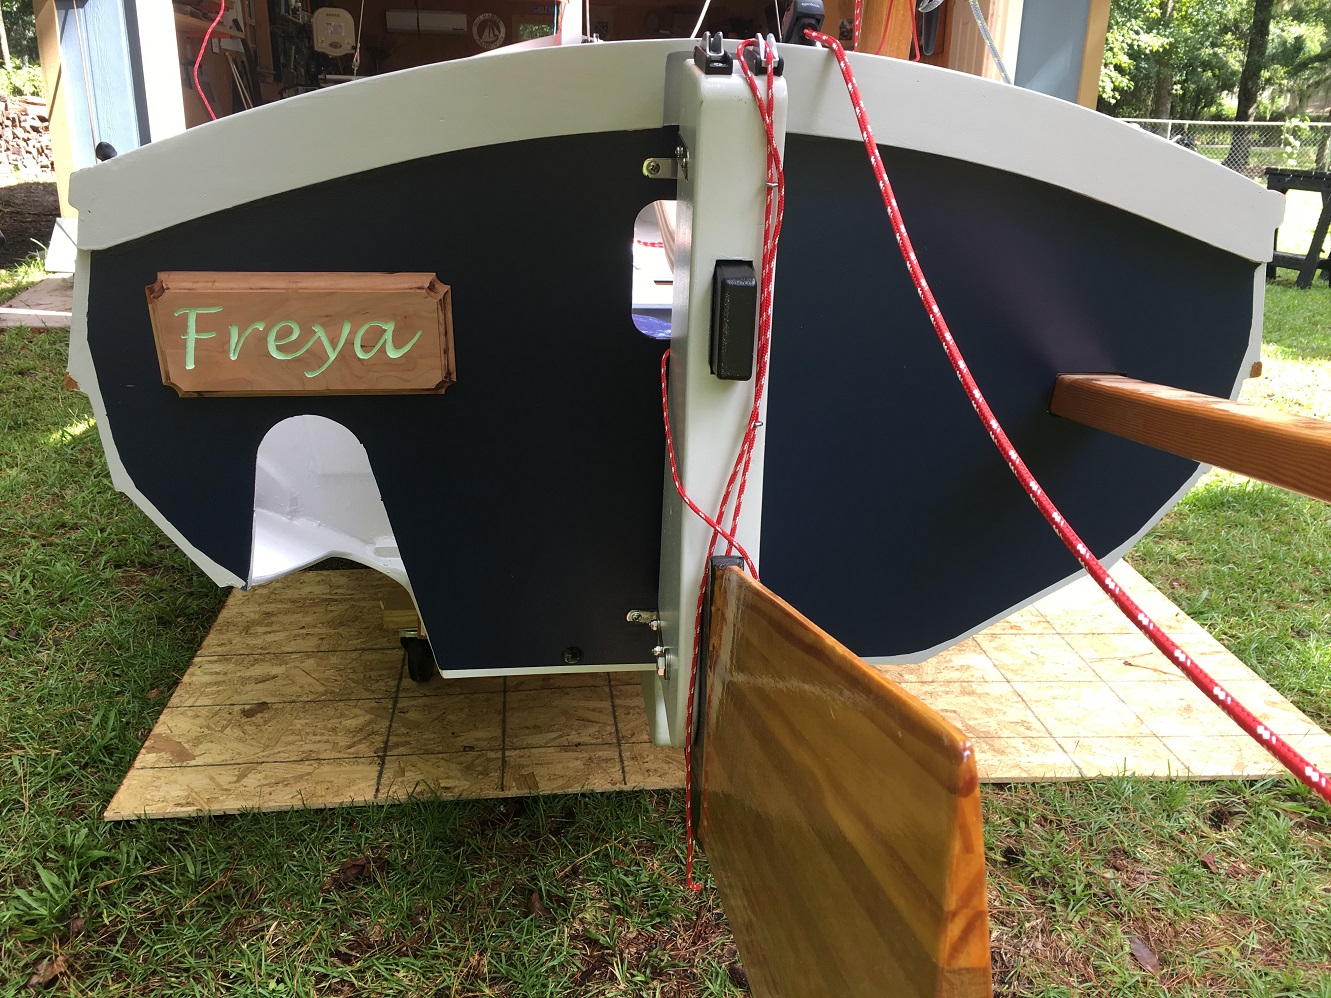
The rudder is another one of those pieces that was mostly built early in the project and has been laying around for months, if not years. Rough cut out and fitted to set the location of the gudgeons and the height of the till quite a while ago, it’s finally time to finish it up.
Now that I am flipping through the thousands of pictures I have taken of the build I realize that no pictures were taken of the build of the rudder or the rudder stock. Hopefully the pictures of the end product will help.
The blade of the rudder is designed to kick up when beaching or hitting an obstruction underwater. When I was in Texas sailing Peter’s boat, I found it was a perfect depth sounder. As soon as the blade struck bottom up it popped to let me know it was time to find deeper water.
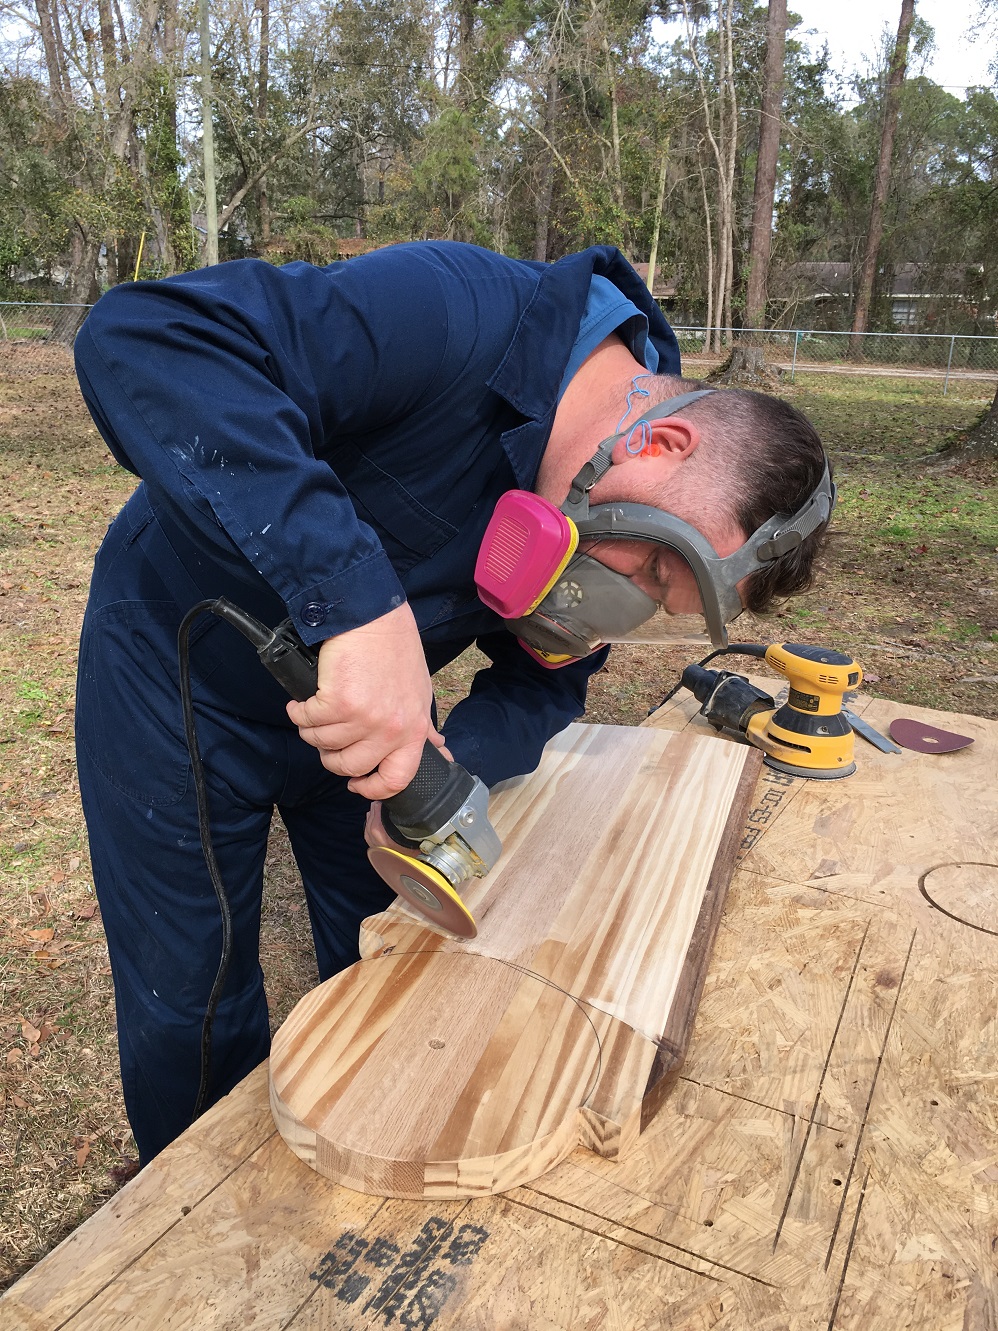
It made sense to build a strong rudder because of the abuse it will take. The first two laminations were of bubinga which is as hard as a woodpecker.s lips. Southern yellow pine and white oak made up the rest. The blank was cut to shape and then taken outside to have an airfoil section cut into it.
The angle grinder with a 40 grit sanding disk made short work of the rough shape with the fine tuning being done with a hand plane and sander.
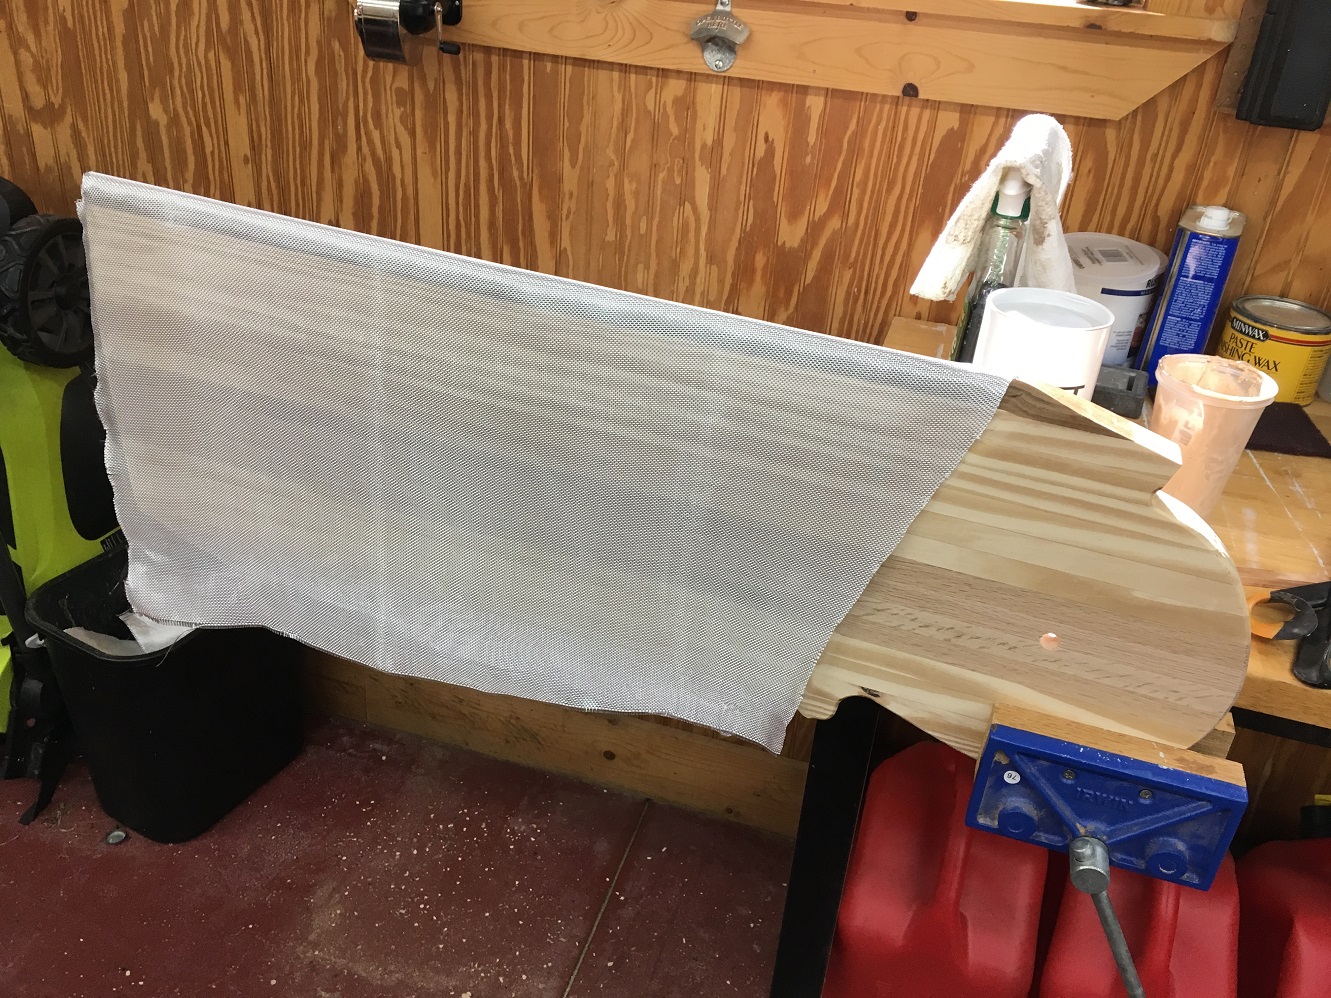
A total of four coats of 6 oz boat cloth was applied. Three layers of cloth over the entire blade and then one strip of tape over the leading edge for just a little more protection.
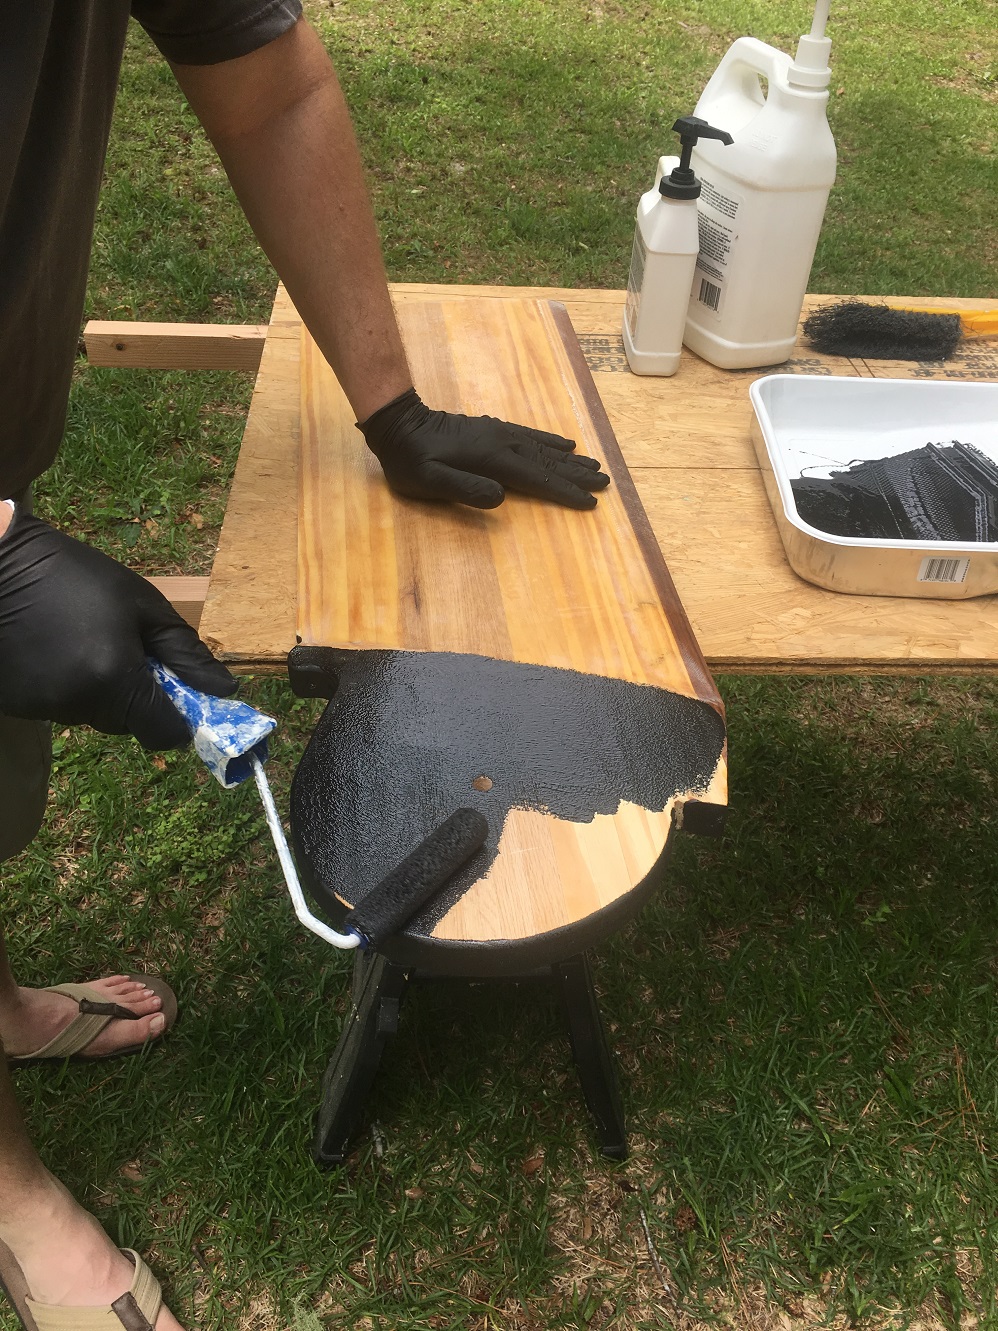
Some of you will recognize what is going on here if you have been reading articles on Duckworks Magazine. This is epoxy mixed with a graphite powder. Small boat folks have been using this for everything from a damage resistant bottom coat to a low friction coating for sliding surfaces. I figured it would work well to protect the rudder blade from friction damage. Three coats total were applied to the blade and two to the inside of the rudder stock. Finally it was time to varnish.
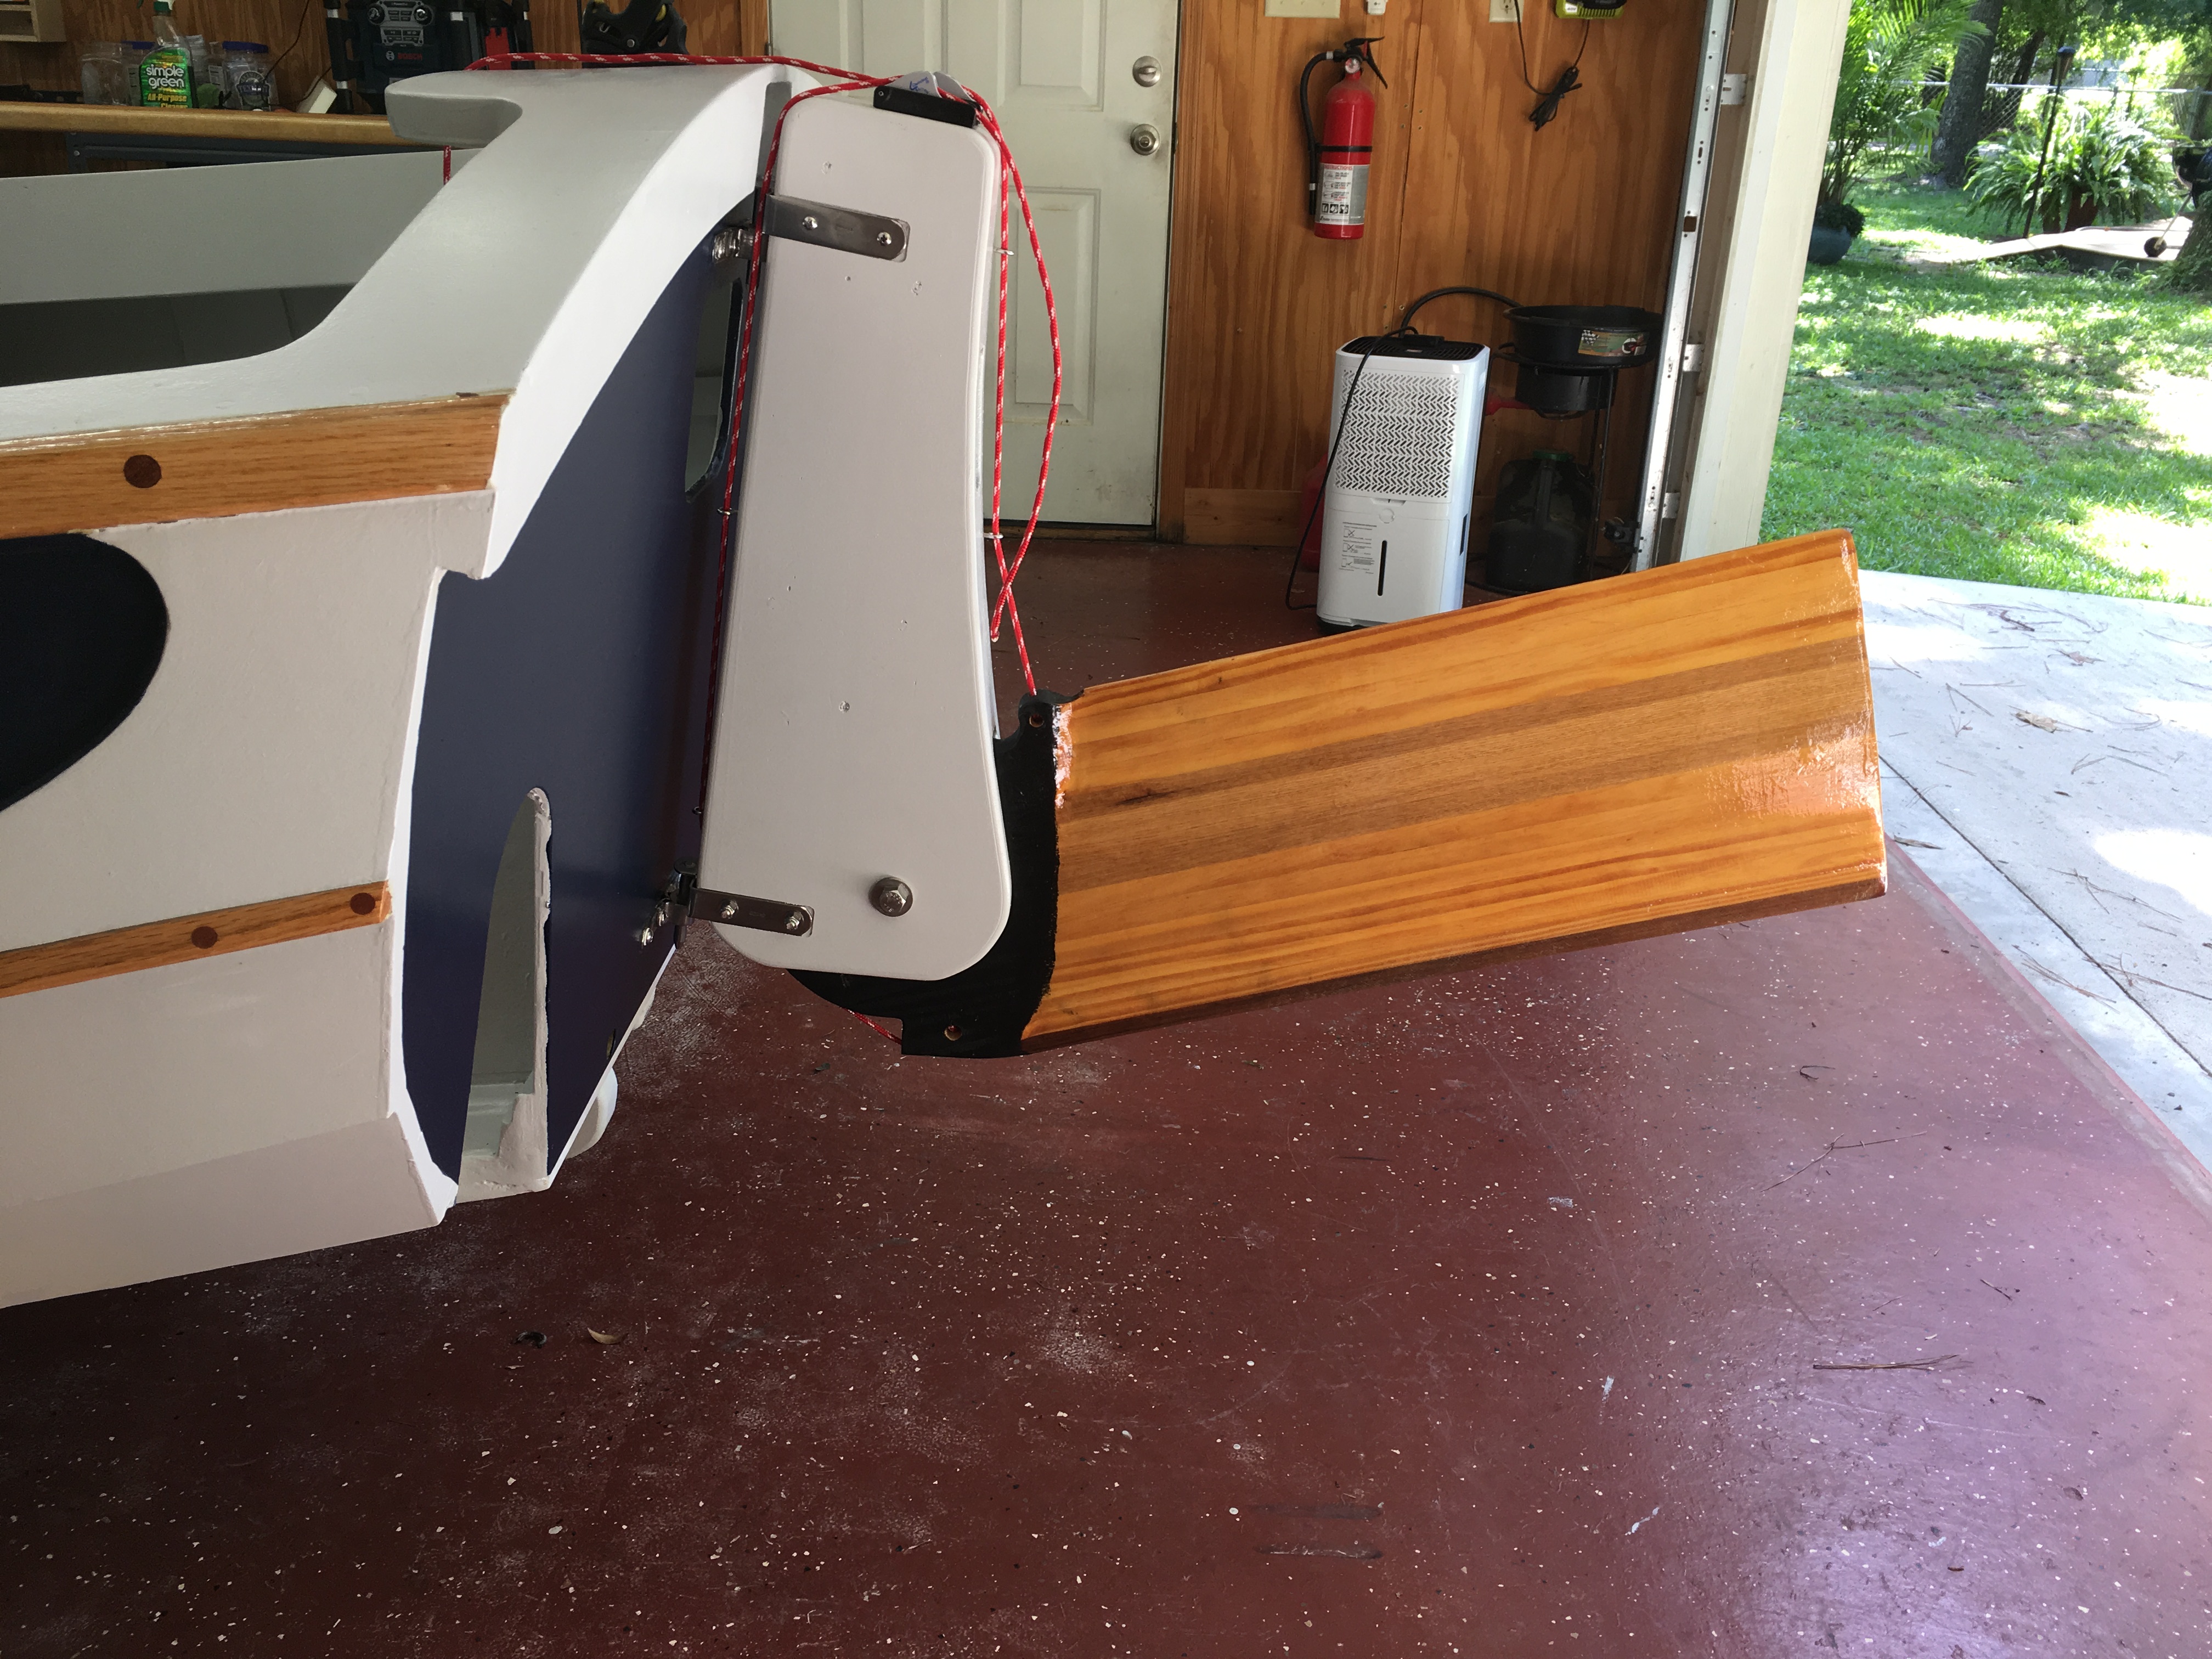
The end result turned out pretty good. The initial fit of the rudder inside the stock is tight but workable with natural wear and tear loosening it up over time.
I had reached a pretty big milestone with the rudder completed – there was nothing left to build, sand, paint, or varnish. All of the parts were done. As they say in southeast Georgia, “all I lack is finishing up”. Four and a half years of building lay scattered around the shop. The boat is on its cradle and the masts, booms and gaff slung from the ceiling. The motor was on a stand in the corner ready to go after having its break in runs done. Looking around I realized there was only one thing to do, set a date: September 22, 2019. See you there.
If you are planning on building a boat and are looking for instruction on the hows and whys there is no better resource than Off Center Harbor. For a small annual fee you get access to hours of video instruction on all forms of boatbuilding tasks. For todays task I headed over to their three part series concerning building a beautiful tiller.
My tiller started with a blank that I bought from Duckworks BBS. I had roughed out the length and lift that I wanted and ordered a blank that was close enough. At $60 they are not cheap but they are high quality and cut several hours off of the build. Personally it was worth it.
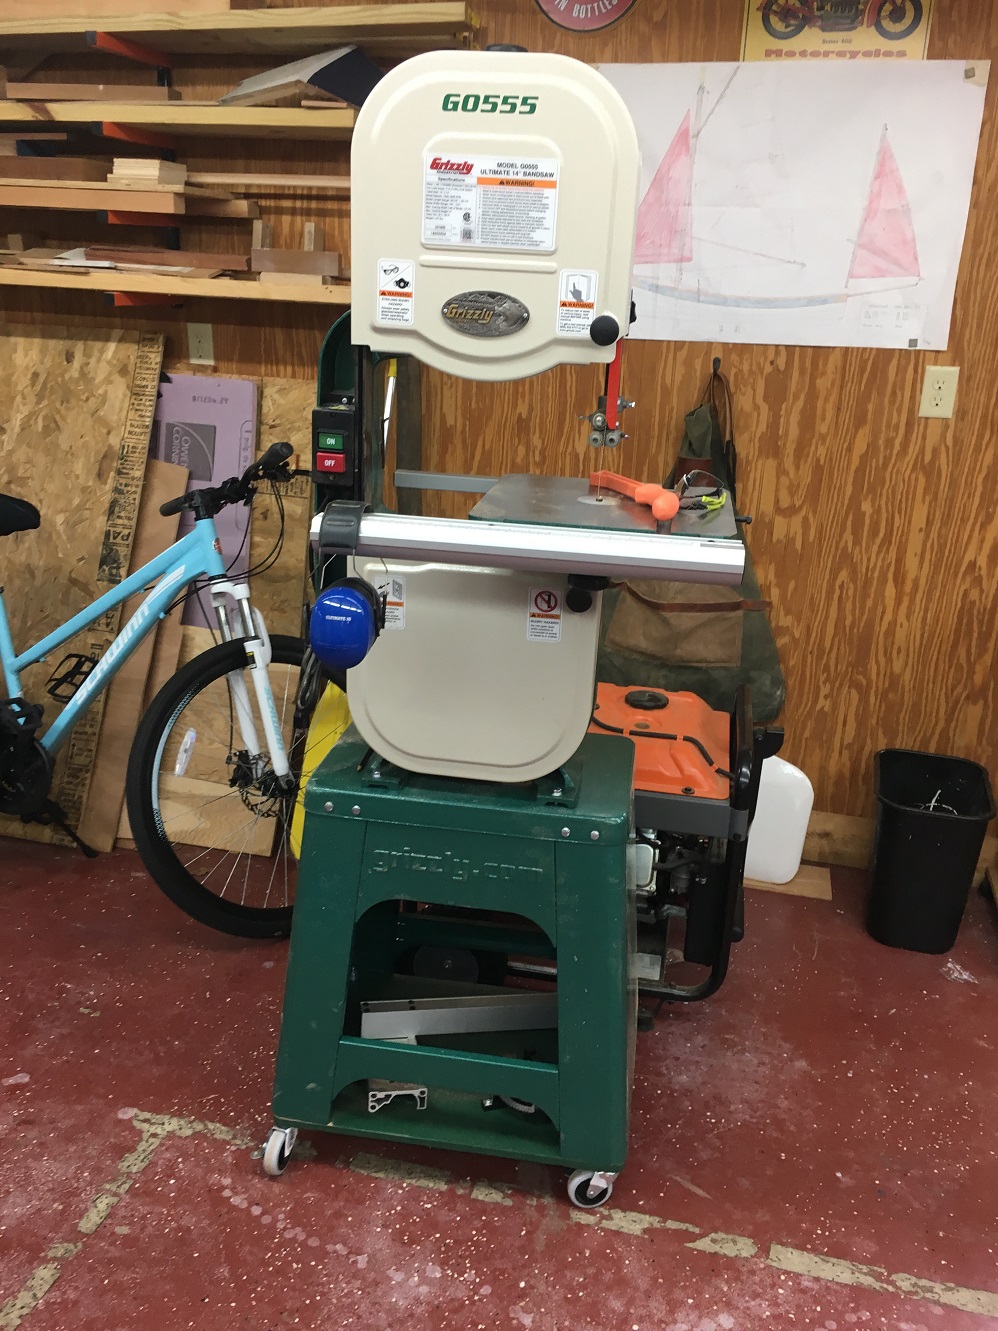
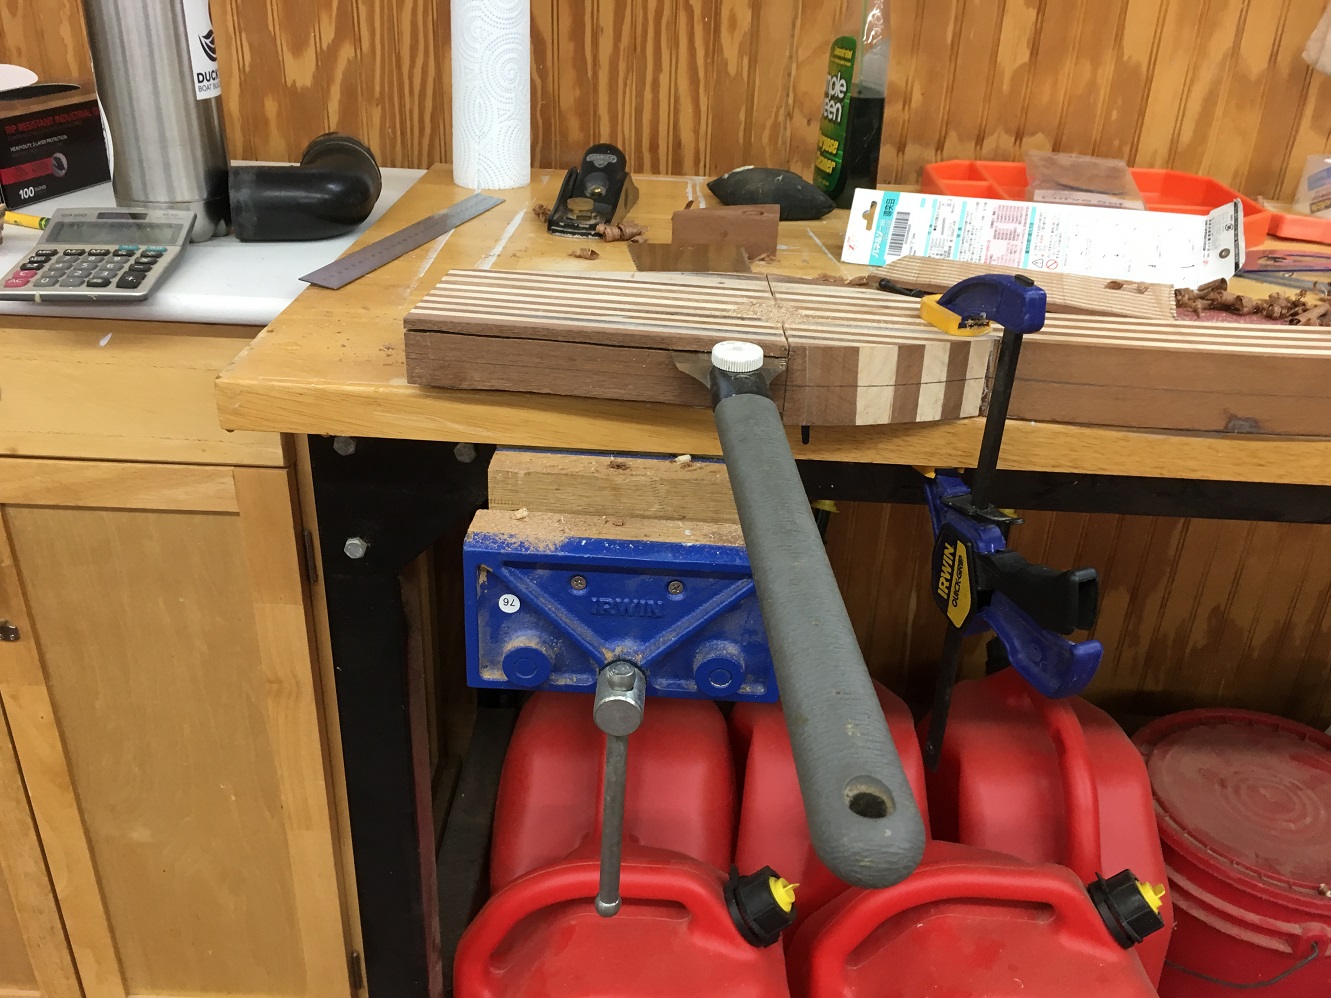
To fit the aft end into the rudder head I needed to build up the back end quite a bit before shaping it to the final size. Making a complex shape like a tiller can be done with hand tools but a nice bandsaw makes it much easier. Fortunately I have an awesome wife!
Bam! Look at this big ol bear! Cheryl was kind enough to get this for my birthday and I have to say it made this project super easy. The first task was re-sawing some ash and mahogany to build up the aft end.
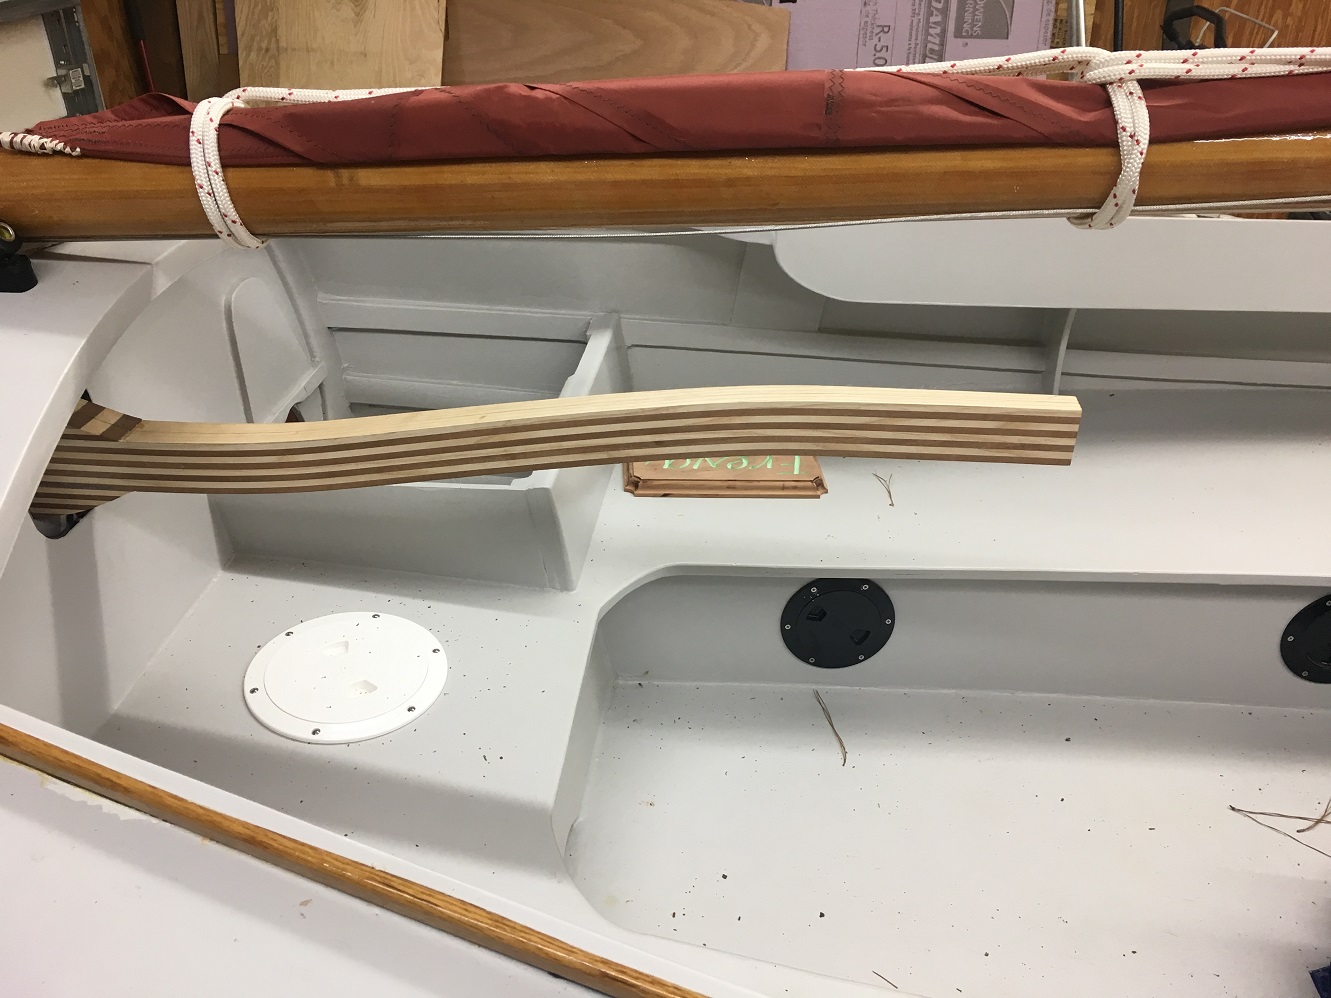
With that done it was time to start roughing out the shape of the tiller. The drawings give you a pretty detailed view of the inside of the rudder head but not much on the tiller. That’s pretty much left to you. I started by roughing out the part that fits into the rudder head.
I pretty quickly abandoned the plans as my rudder head was just ever so slightly different from what John had drawn. After lifting a few measurements and rough eyeballing the angle of the tiller I started cutting.
The Japanese pull cut saw was the perfect tool for the job. The next fiddly bit was getting the tiller fitted closely to the socket in the rudder head. The big deal for this one was to make sure I had the tiller high enough to clear my knees while steering. My top tip for this one is to leave yourself enough meat on the tiller so you can sneak up to it with a plane.
At this point I had to do a lot of “test driving” to make sure I had everything just where I wanted it. Several cold beers gave their lives to ensure the tiller was in the perfect spot. At this point all it needed was prettying up.
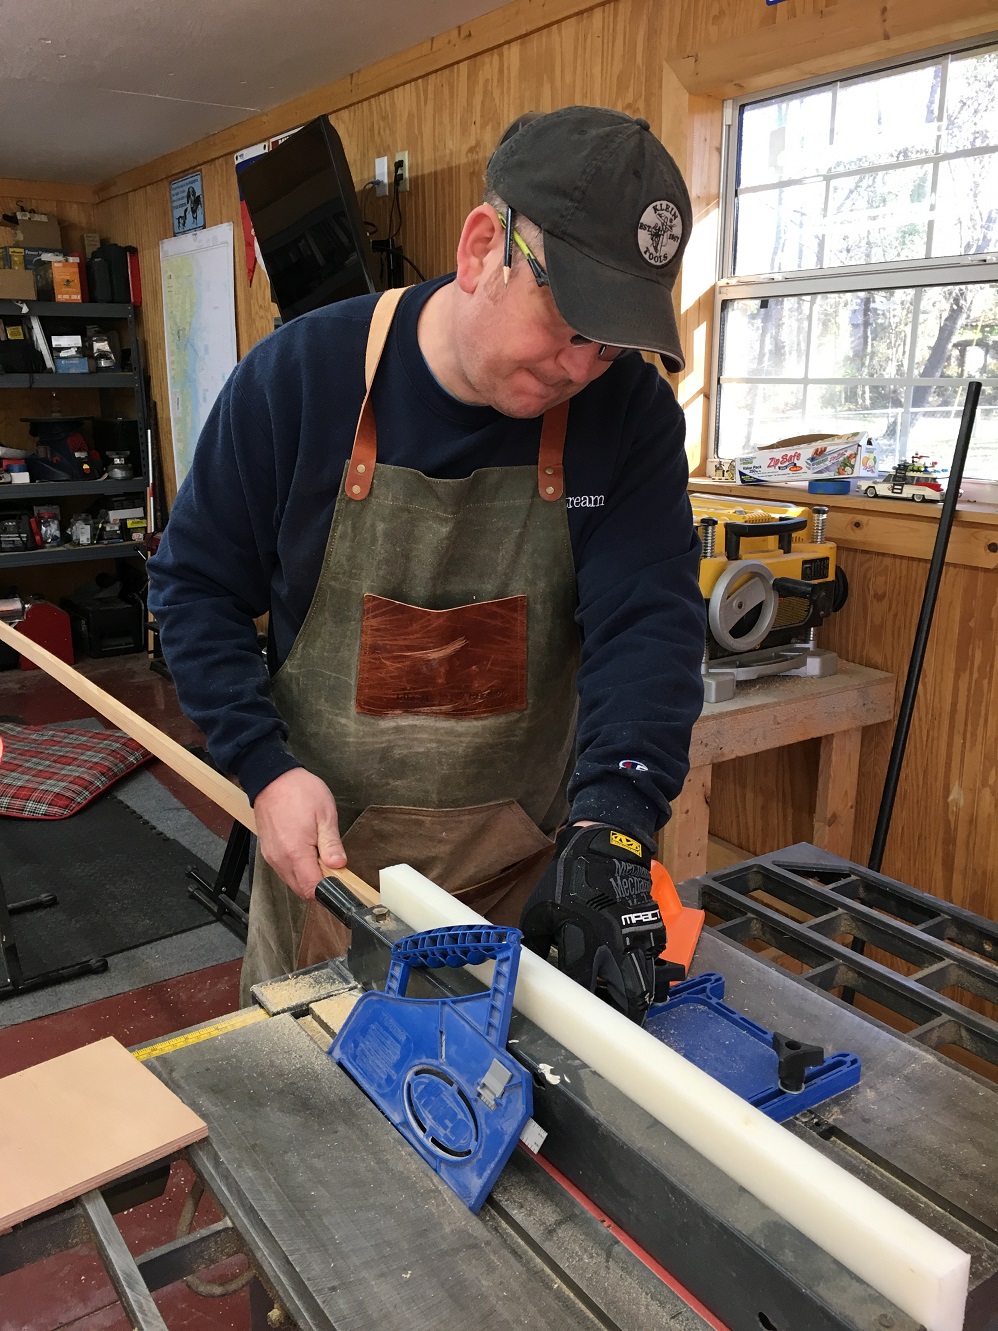
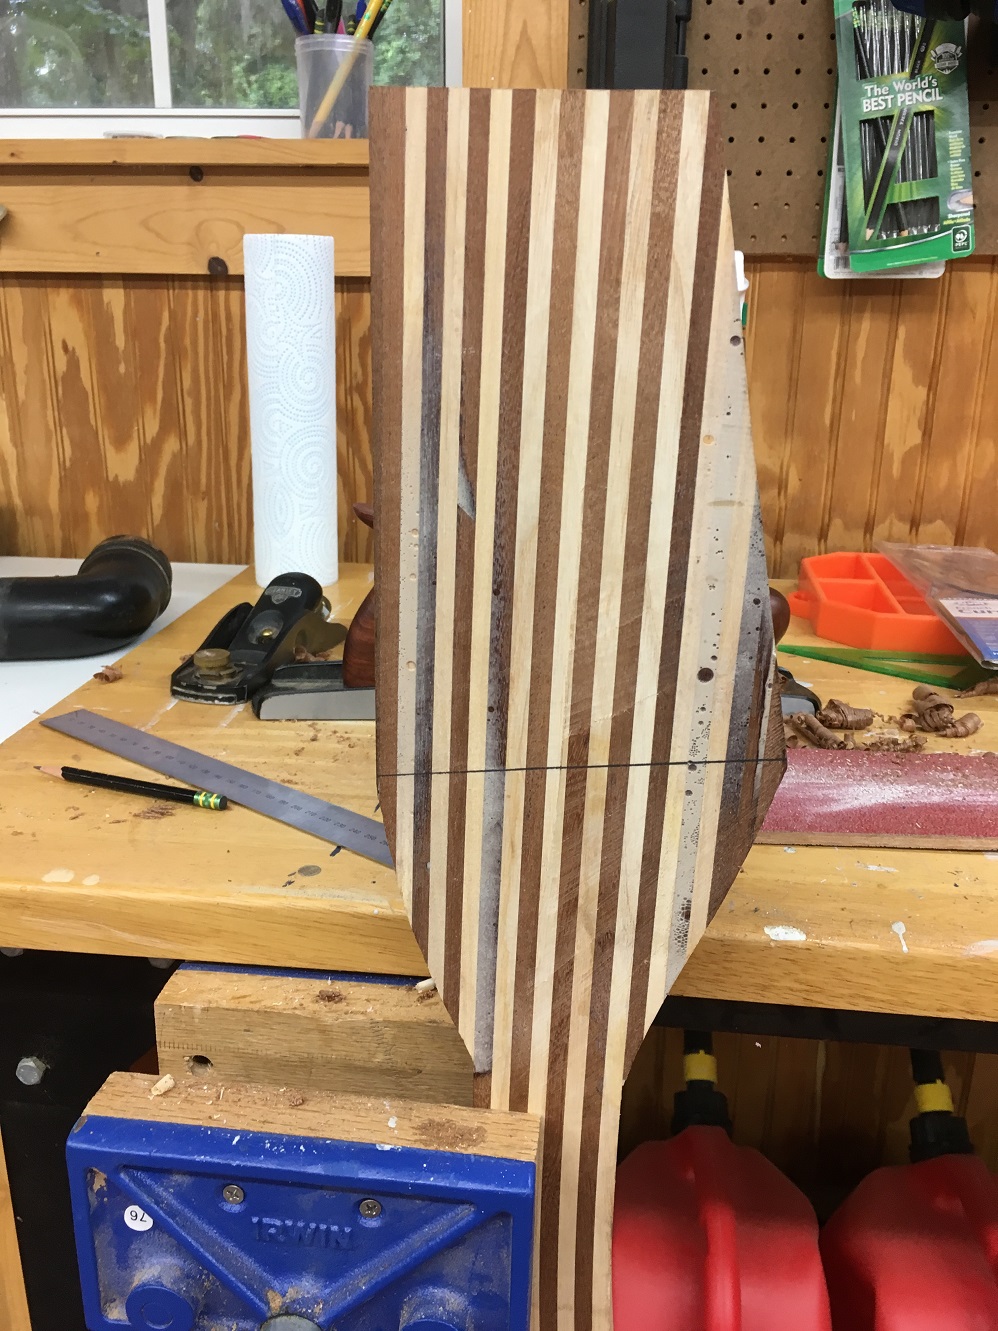
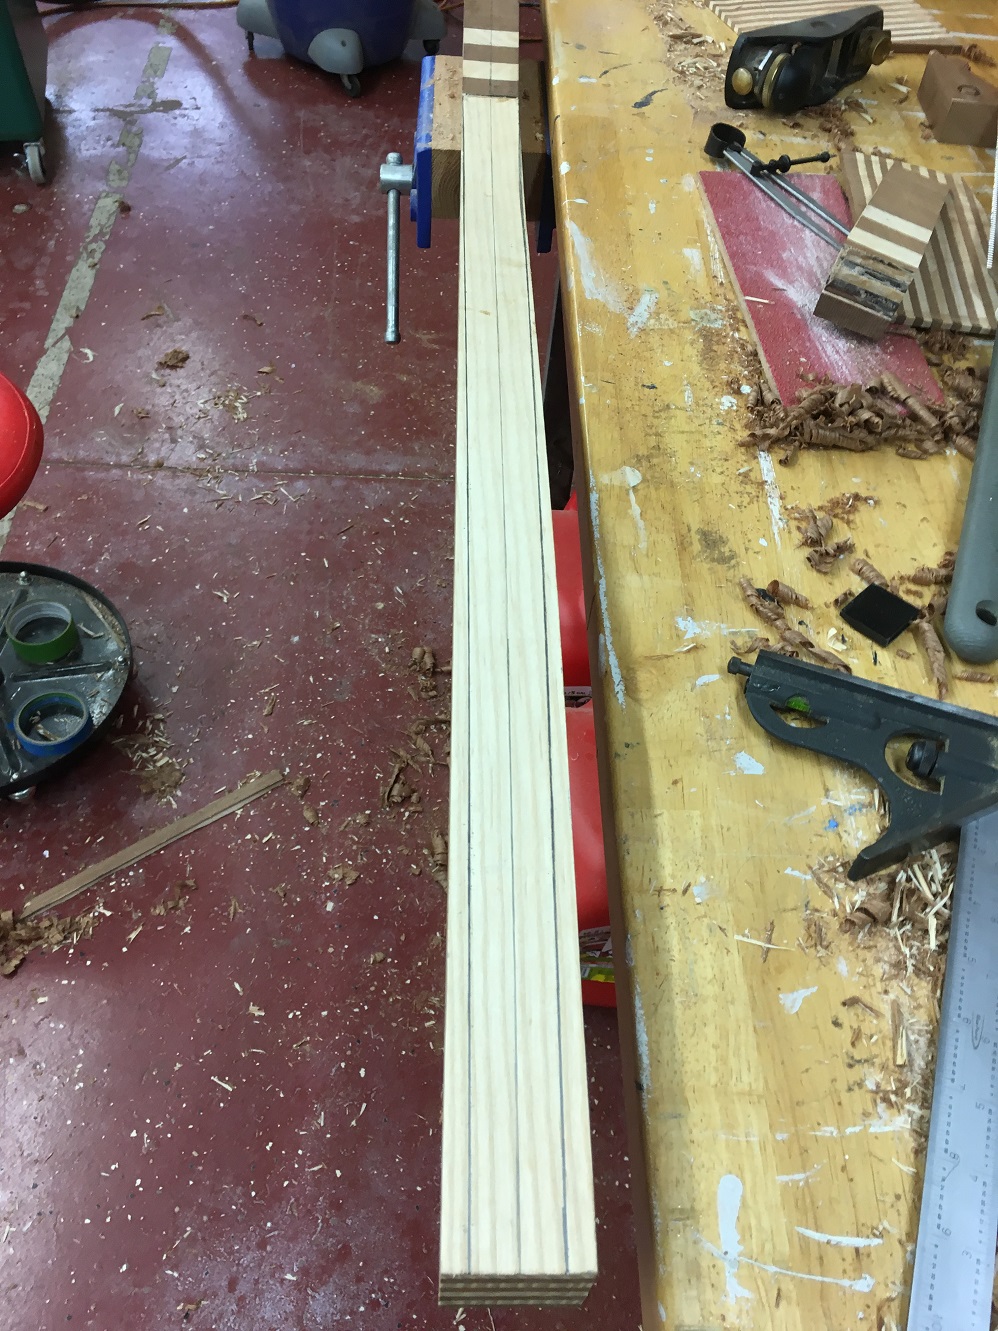
I went directly off of the how to video from Off Center Harbor for this one and it worked out well. I used my metal ruler to layout my vertical taper and then sawed off the side with the big Grizzly. For the detail on the front end I just played around with some shapes until I got what I liked. It took a little while to get the guts up to cut it but I think the end result speaks for itself.
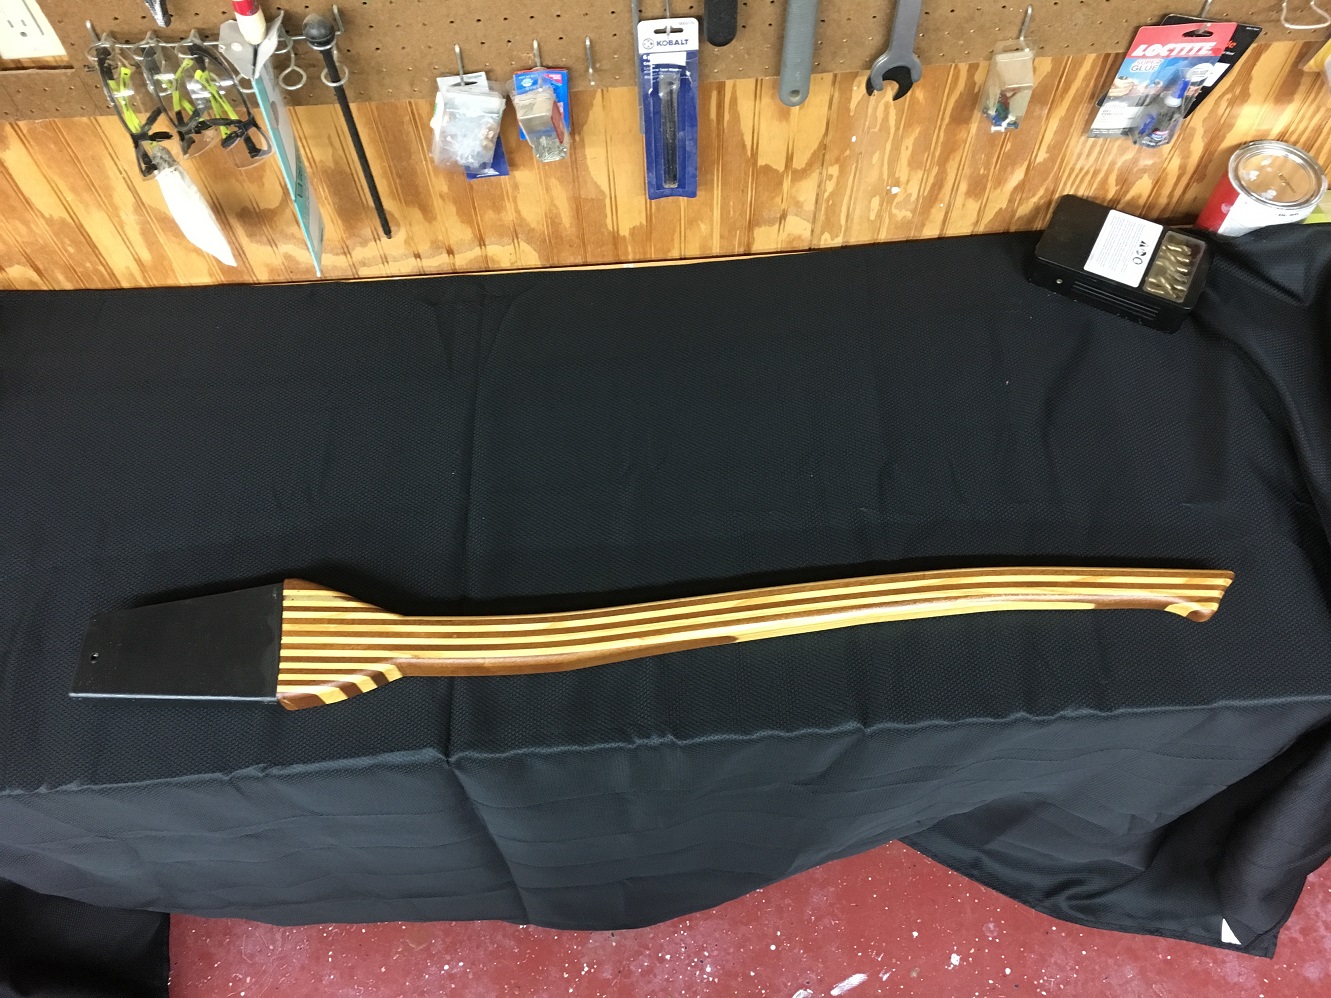
Not to shabby huh? The black section is the part that sockets into the rudder head. I used epoxy thickened with graphite powder here and in the rudder head where the parts rub against each other. This technique has been showing up on the forums lately and I figured I would give it a try. This particular part turned into my favorite one of the build. Even though the band saw played a big part in the construction process this turned into a fantastic hand tool exercise. Jack planes, rabbit planes, compass plane, spoke shaves, and hand saws shaped this into something beautiful. It really has set my focus on future projects.
With my last post, the boat was structurally done but still needed to be sealed and painted. Over the course of the build I have spent a lot of time talking about sanding, sealing, and painting. It is done, take my word for it. So while the paint cures, I’d like to write about some of the stuff that I have been doing in between the big jobs. Lets start off with the centerboard.
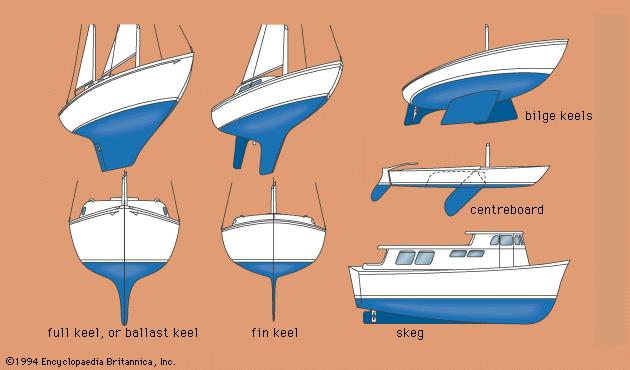
For a sailboat to sail any other direction than downwind you need something to prevent the wind from blowing the boat sideways. Large sailboats use a weighted keel that is usually permanently affixed to the bottom of the boat. Most of them look like some form of symmetrical airplane wing built really heavy and stuck under water. When you are sailing and start turning into the wind the keel resists the sideways push of the air and generates lift that allows the sailboat to gracefully sail upwind. On a boat like the Pathfinder a fixed keel would be too deep to be able to trailer the boat easily. To correct that all we have to do is make the keel retractable. You build a watertight box (the center case) to house the centerboard in and rig lifting tackle so you can raise and lower your board at will. The center case then gets mounted to the bottom of the hull and you build the rest of the boat around it. That means it gets built first, and you have to build the centerboard as well to make sure you get the right fit. That also means the centerboard will be rolling around the shop from day one to the day before launch getting in the way, being moved around etc. Now with the end in sight it was time to finish what I had started.
This is a shot of the interior of the center case from years ago.
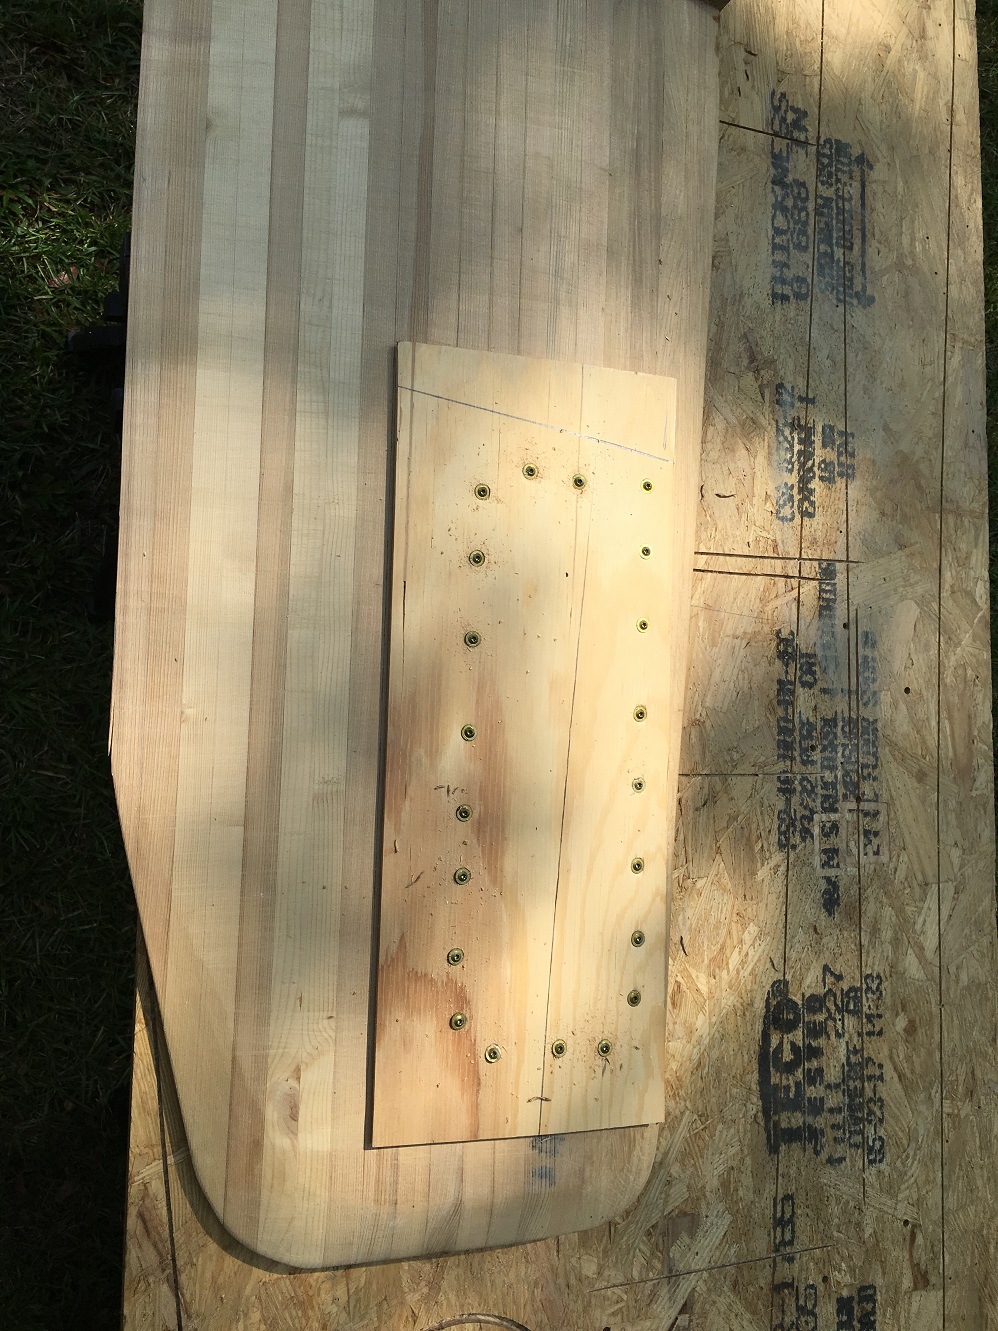
Checking the fit of the centerboard.
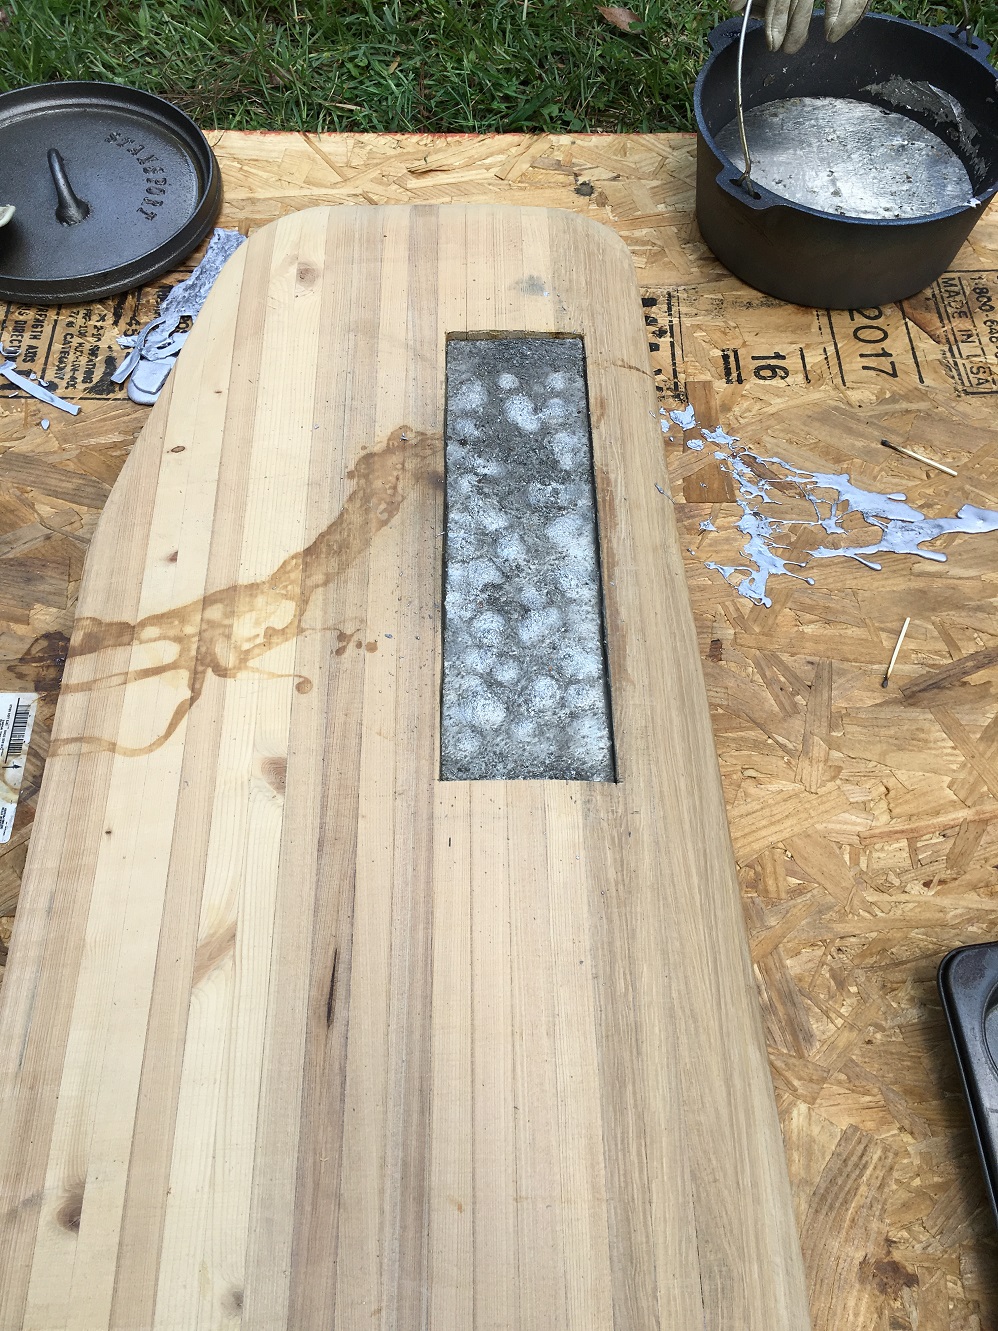
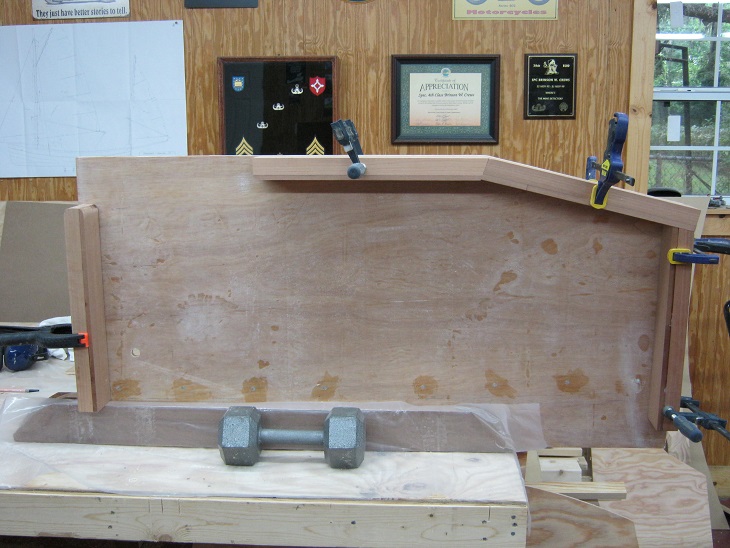
The center board on the pathfinder is also the main source of ballast for the boat. The plans call for a fairly sizeable chunk to be cut out and lead poured in its place. I was lucky enough to have plenty of lead from my buddy Jason and of course, I waited to the hottest part of the year to pour it.
The hole was cut to size and I plugged the back side with plywood.
I then leveled the opening on secure ground to ensure the board would not shift when the lead was poured. I used the propane burner that I use for steaming wood and a cheap “made in china” cast iron pot to melt the lead. The lead pour turned out a lot easier than I thought with the only problem being the sheer weight of the pot. I had overstuffed it a little and it was almost too much to lift. The amount leftover in the pot shows how bad my estimation was.
It took the lead quite a while to cool off so I stuffed the whole thing in the corner again until I was ready to fill and fair it. I went to move it after it cooled and I realized why I waited so long to pour the lead. Damn this thing is heavy!
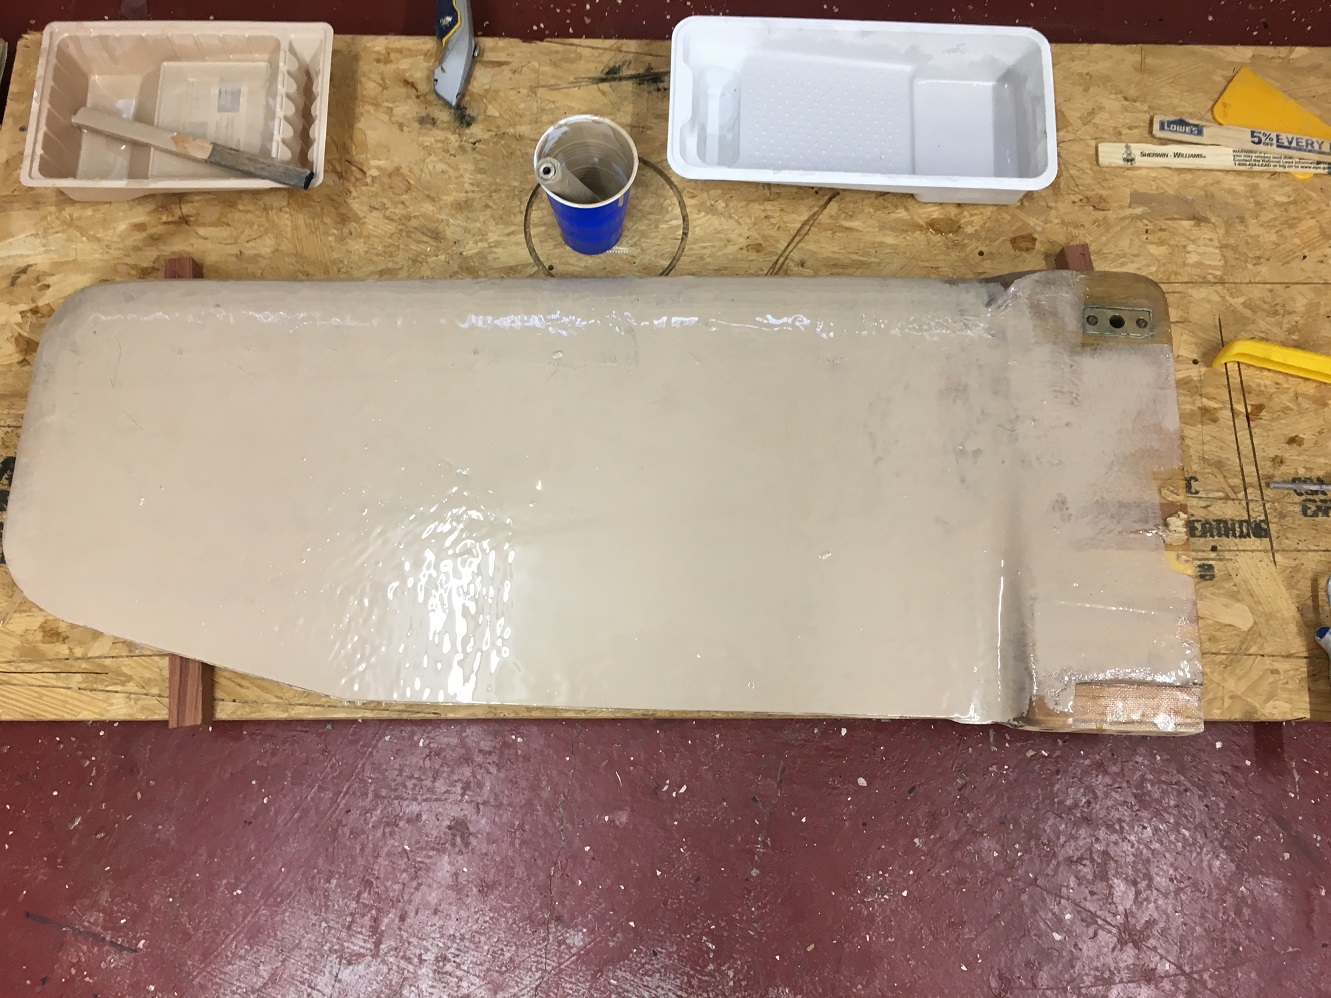
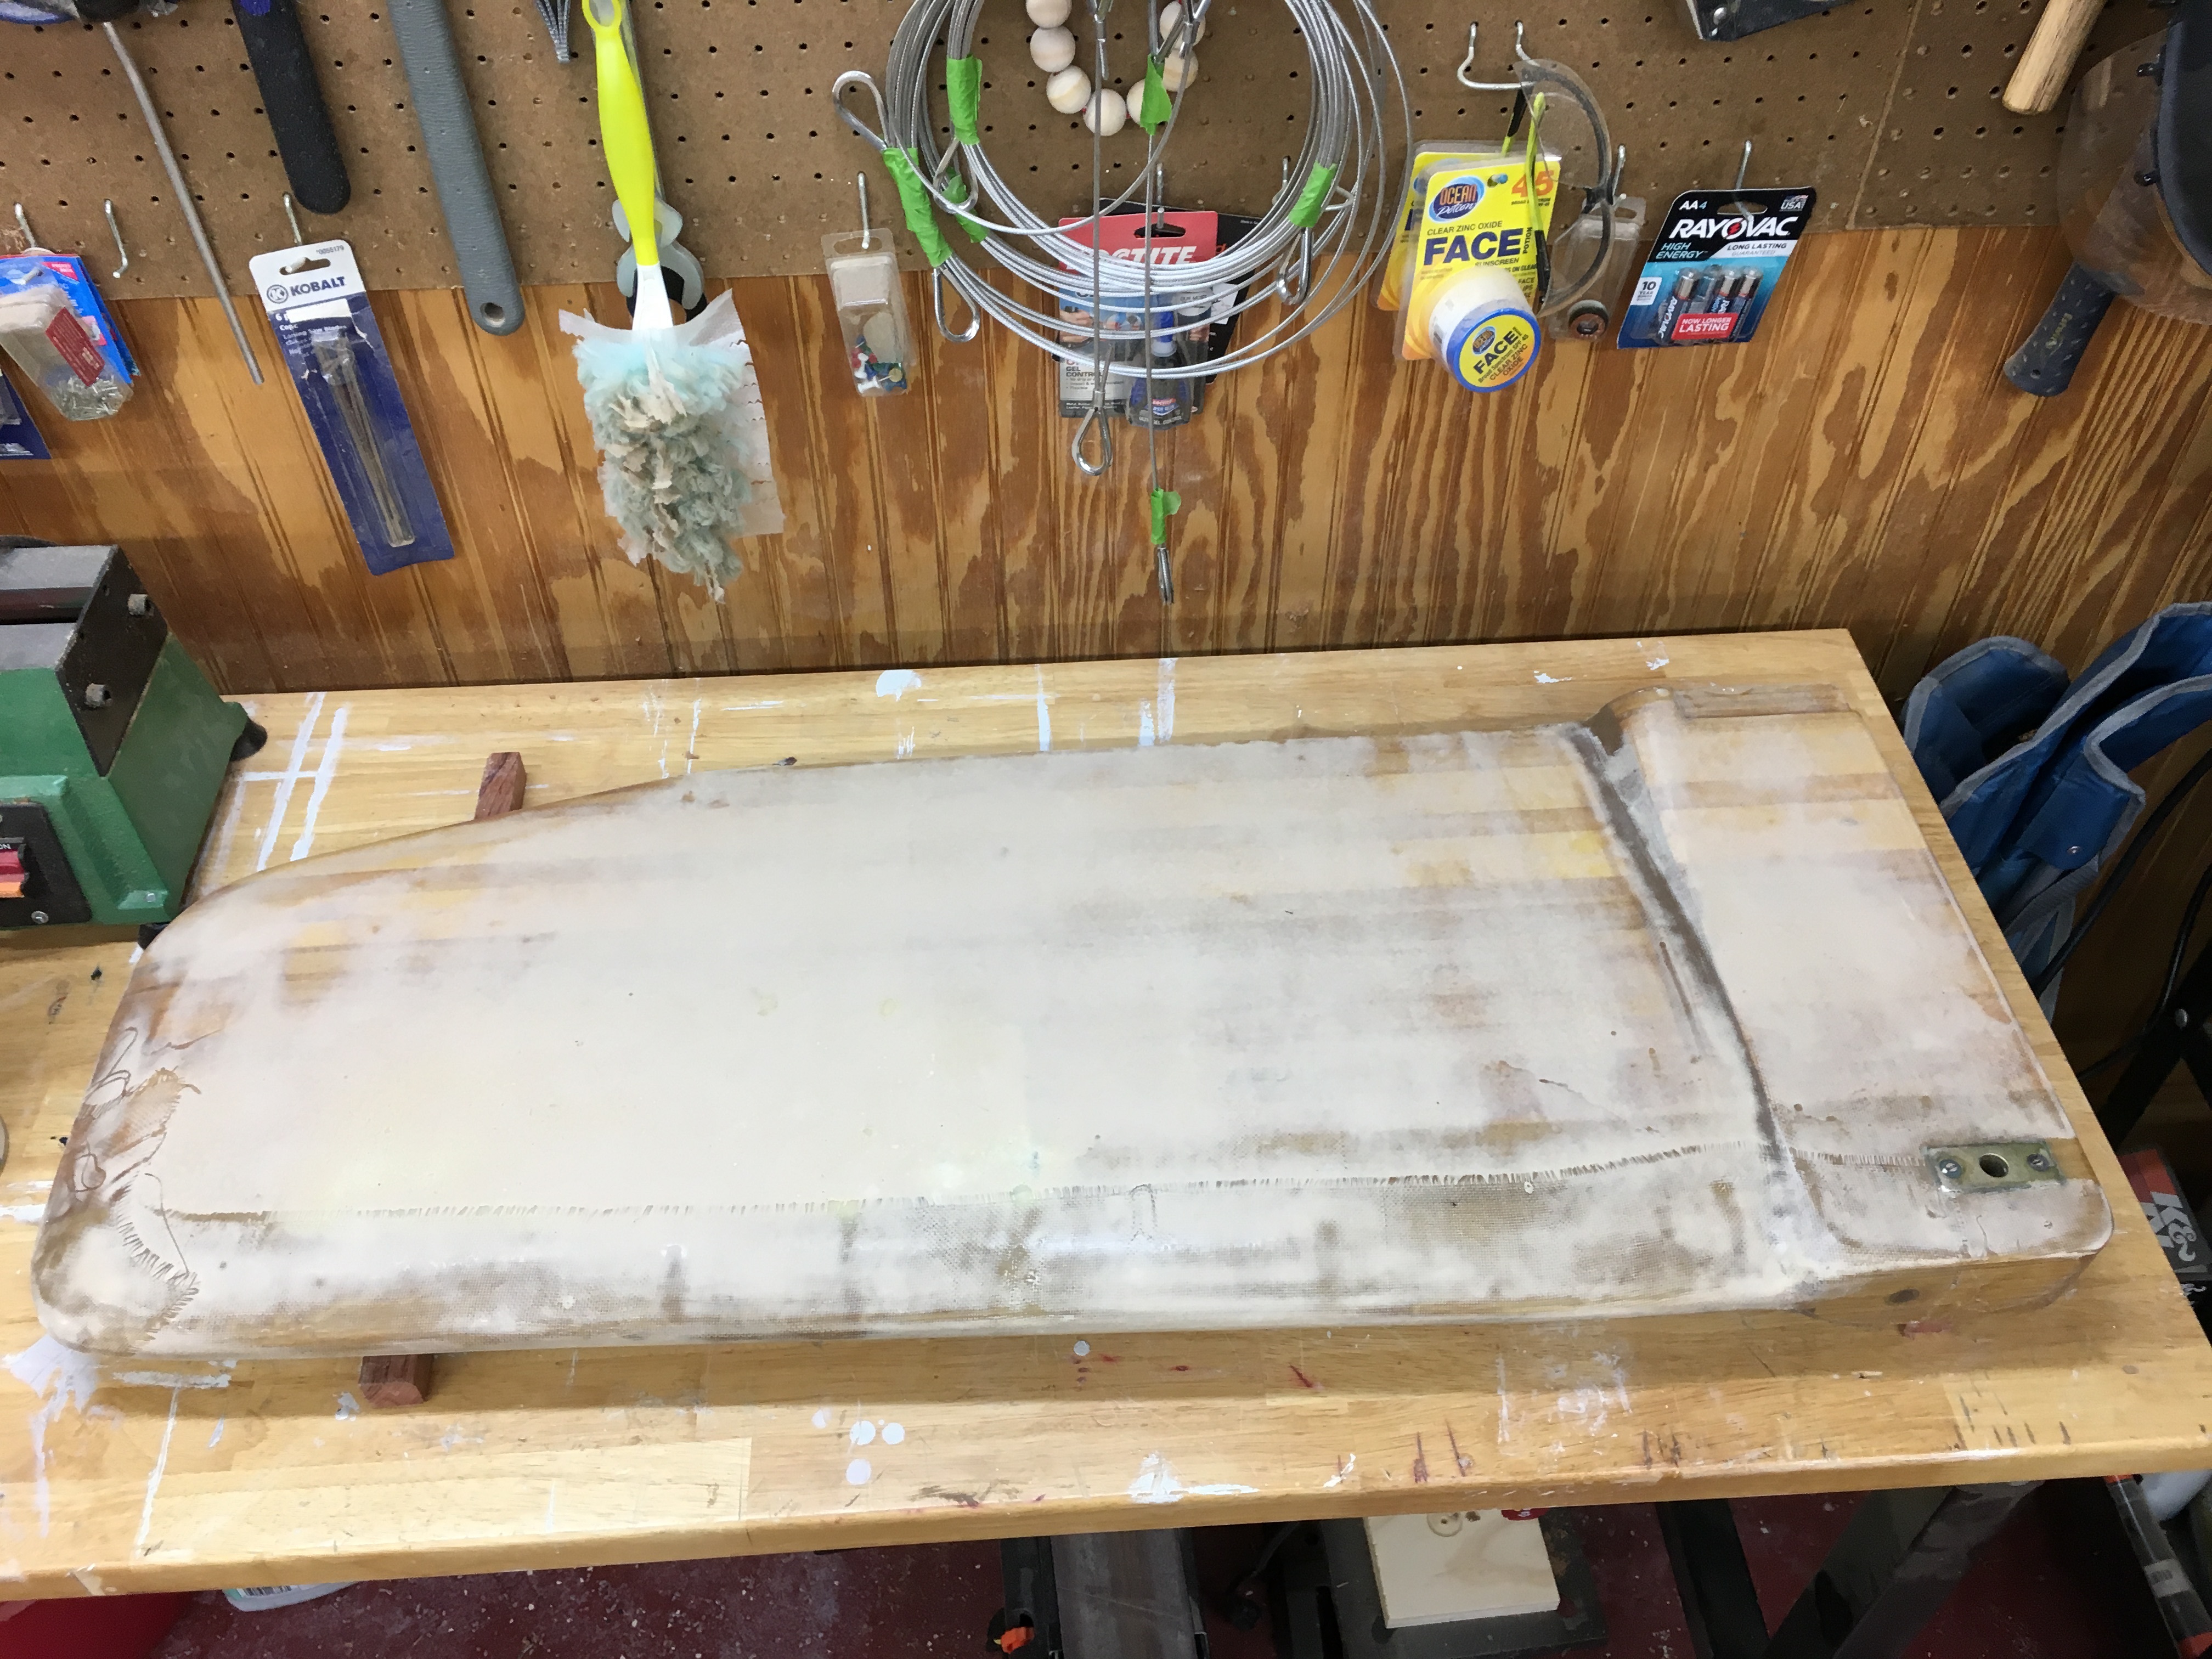
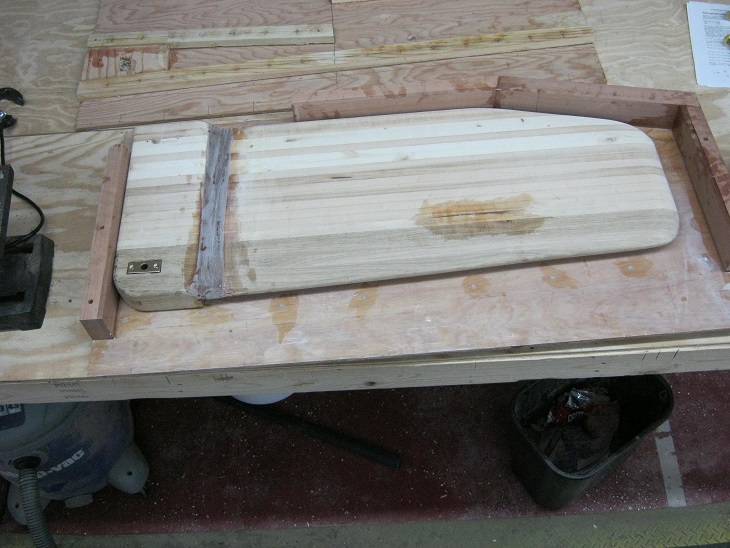
The top side of the lead had settled almost a quarter inch while it cooled so it needed a thick layer of high density filler before I could cover the whole board in several layers of fiberglass. My goal was to get as close to a perfect airfoil as I could. It was not specifically for performance but more because I am an aircraft mechanic and I should be able to shape a pretty decent airfoil.
Several coats of fairing compound were rolled over the entire board.
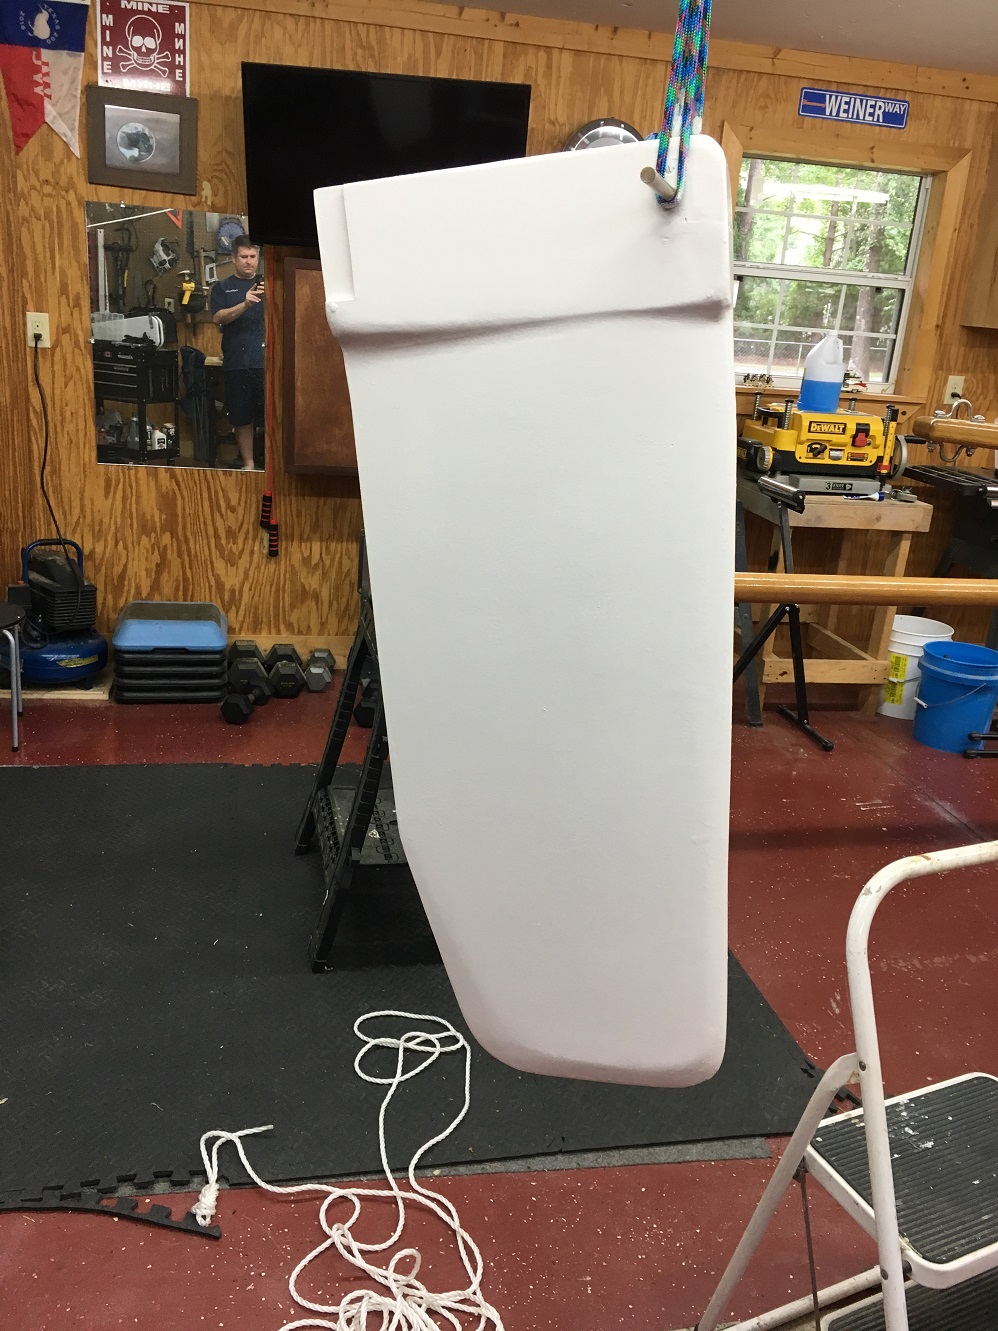
I think the finished product came out pretty good.
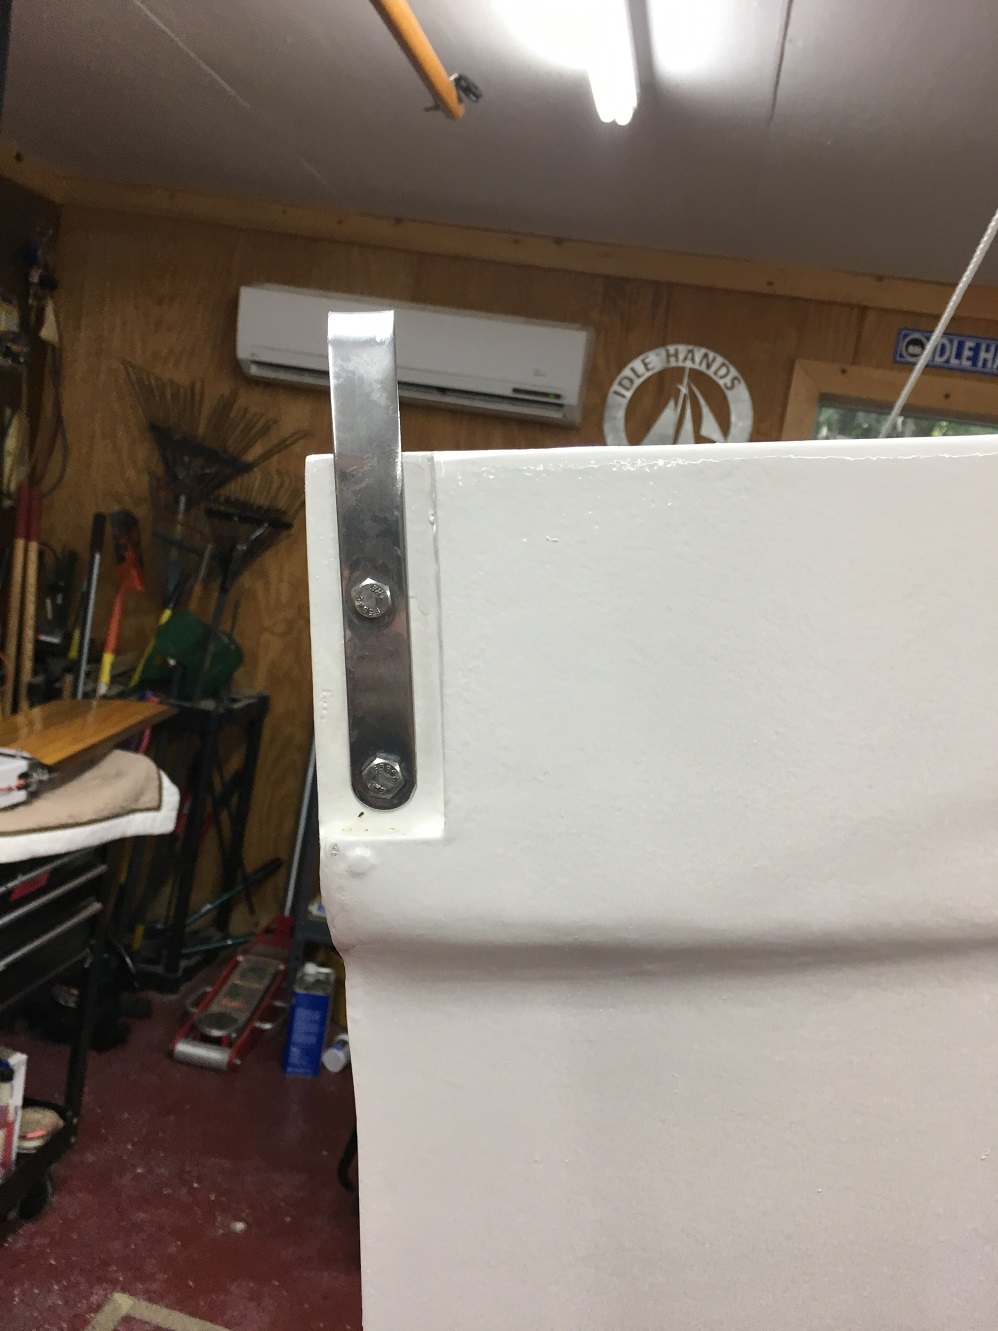
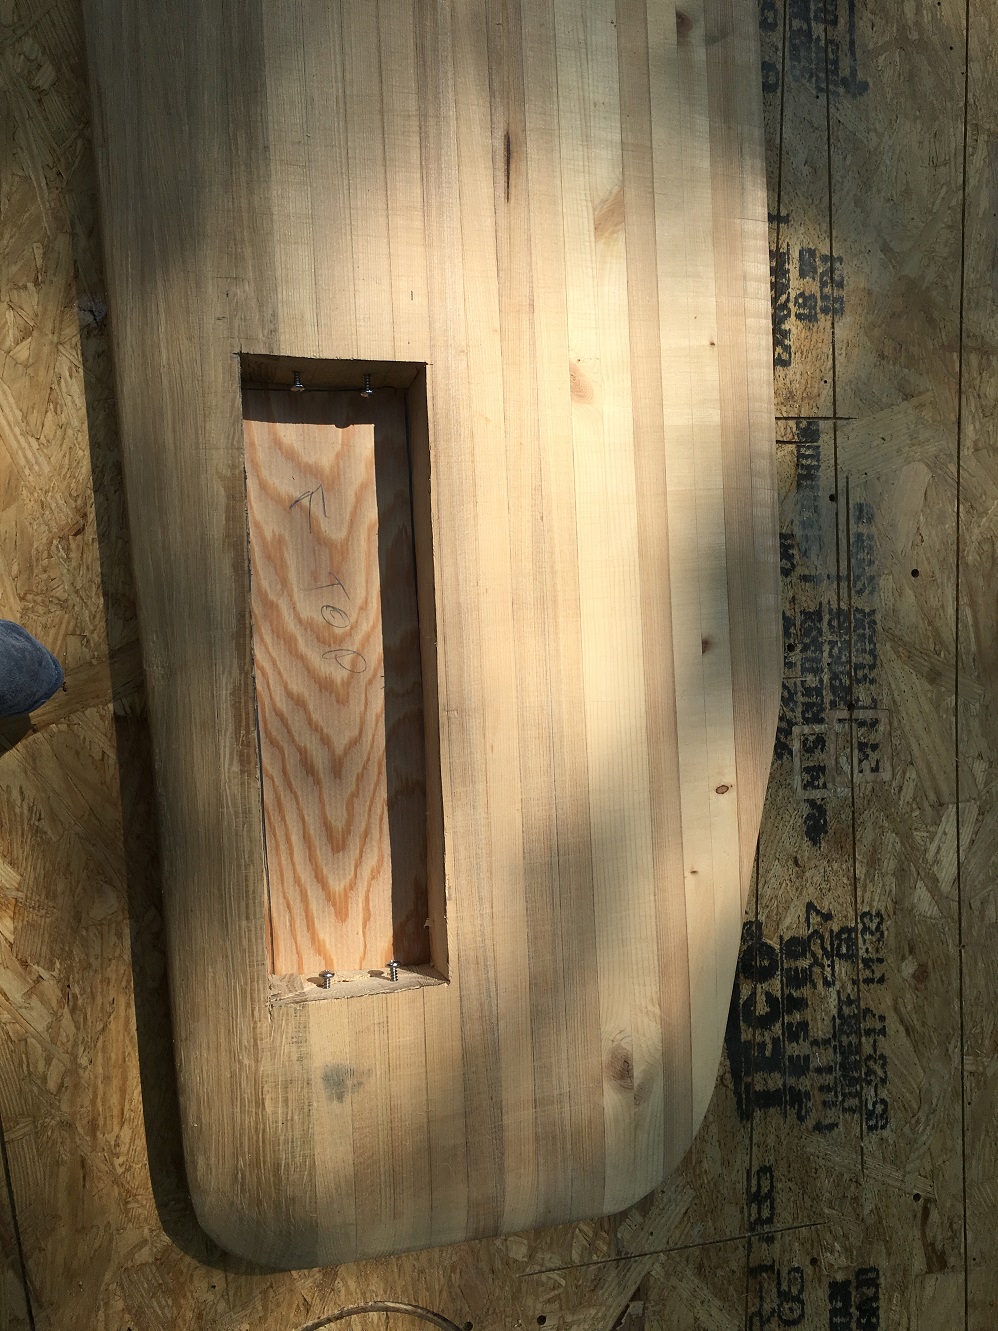
A stainless steel strap was added to provide a place to attach the lifting tackle.
This is a detail of my pivot assembly. I used 1/2″ silicone bronze rod and top mount oarlocks set into the sides of the centercase. The plan is to slightly chamfer the oarlocks and use an o-ring and washers to provide a water tight seal that is easy to remove and service. It took several tries to get the ends of the rod properly threaded. It’s been a while since I have used a die set. At this point the centerboard is ready for install but because of the size it will have to wait until I get the boat up on its trailer. Fortunately, that day is coming soon!
The coaming is an integral backrest and water deflector built into the cockpit opening. It is a compound, complex pain in the ass. The following post describes how I built the coaming. Please note – your ideas on how to layout and install this little piece of wood will probably be better than mine. Read at your own risk. Or use this post as a “what not to do”. You have been warned.
***Disclaimer***
“S&%$!” I threw that piece of plywood clattered down on the growing pile of rejected coamings. This was my second attempt of the day and had ended with the wood springing out and slapping me right in the face. Layout of the coaming had already taken up three weeks of available work time and I was quite frustrated. My normal method of templating wasn’t working out at all. I had started with a large piece of cardboard and slowly worked it to the shape I wanted it. Unfortunately when I transferred it to the plywood it just didn’t work. Something about the way the wood bends differently was messing me up. The plans call for the coaming to be made out of 1/4″ ply but, with that last failed piece, I no longer had enough to finish. @$%#, %$&# ! After cleaning up the shop and soaking my wound in cold beer I went to the all knowing and all seeing Google box for answers.
I posted on the John Welsford Designs, Duckworks Magazine, and the Wooden boat Facebook pages looking for help. Just like usual I quickly had a variety of answers to help me out. This is what we came up with.
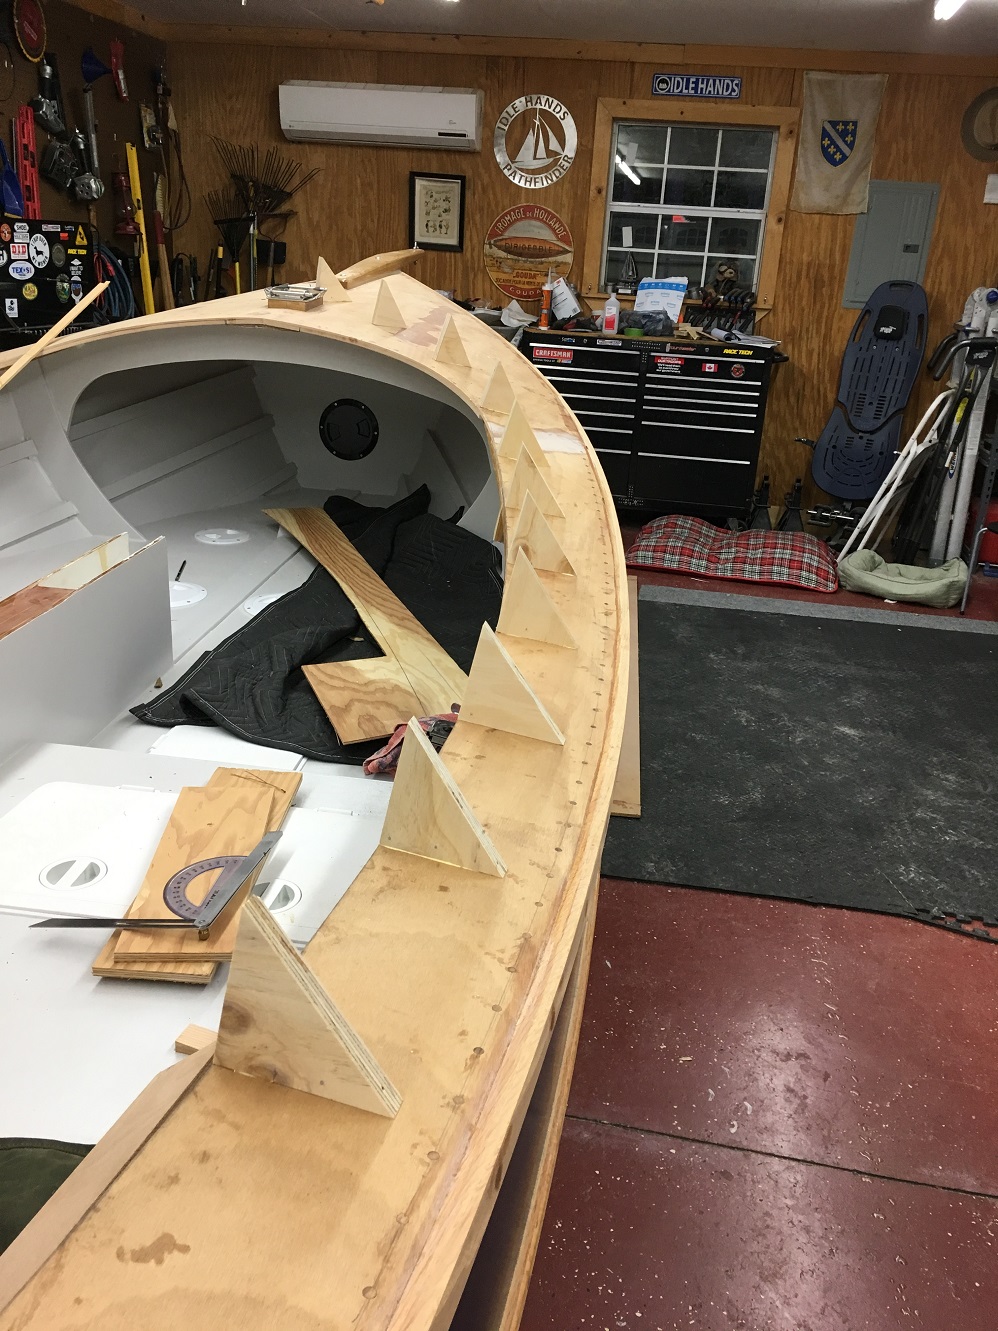
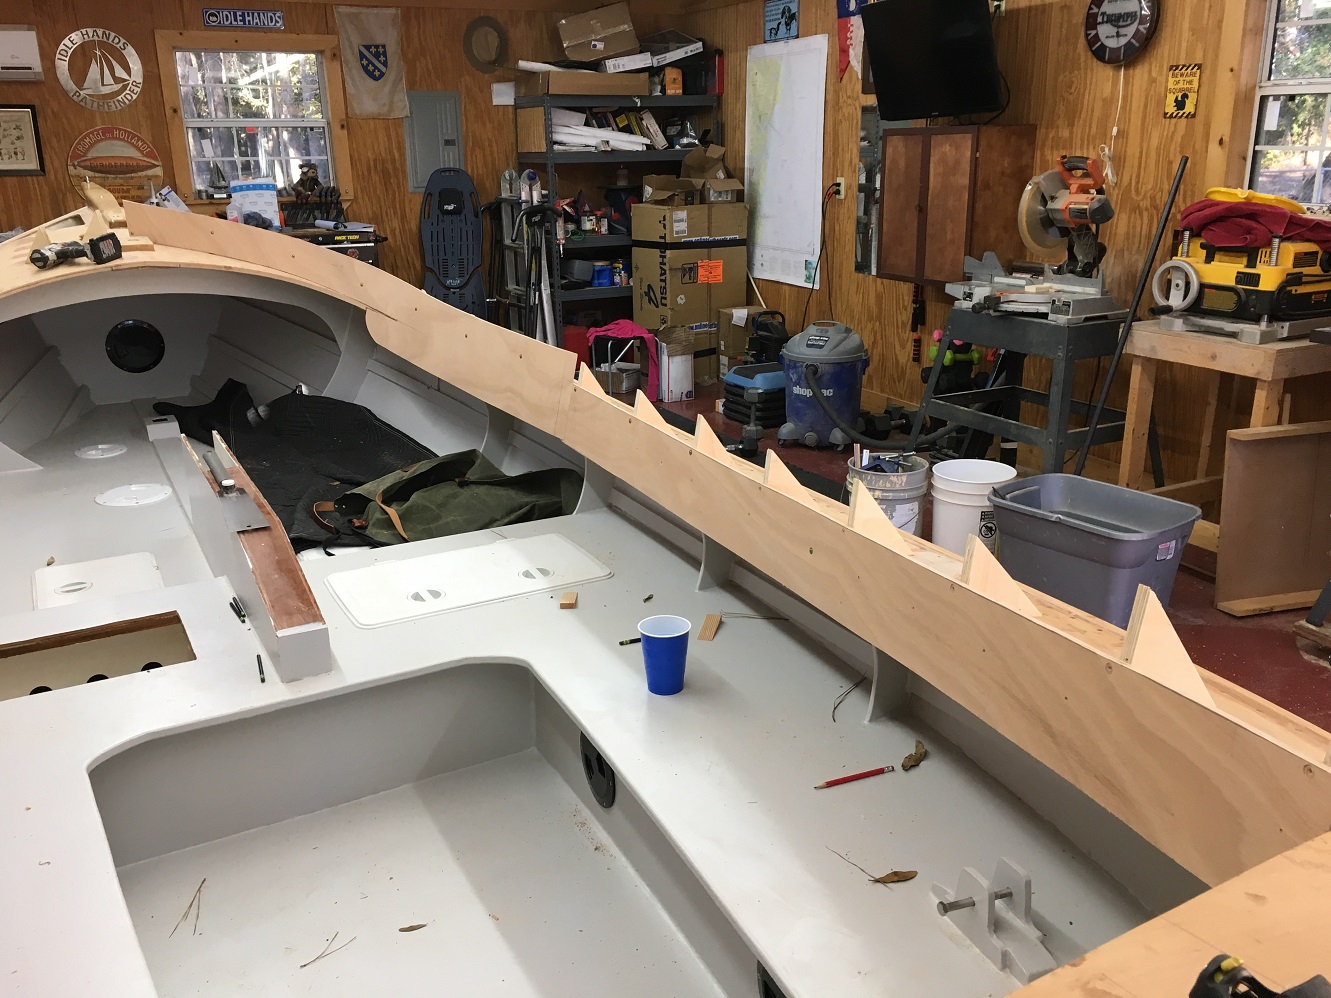
To start I made station marks evenly down the deck and determined the angle off the deck I wanted the coaming to lay. After that I cut out 3/4″ plywood triangles to match those angles and installed them.
I also used Leo Sampson’s spiling technique. If you haven’t seen his awesome videos on -Youtube you need to check them out. He is rebuilding a 100year old Albert Strange gaff cutter named Talley Ho in Washington state. It is well worth you time. https://www.youtube.com/playlist?list=PLUK8GR4xS78v_huHCmJQpcMPRDlzAEw5s
With the shape laid out with the battens the plywood was marked and cut. Turned out to be really easy this way.
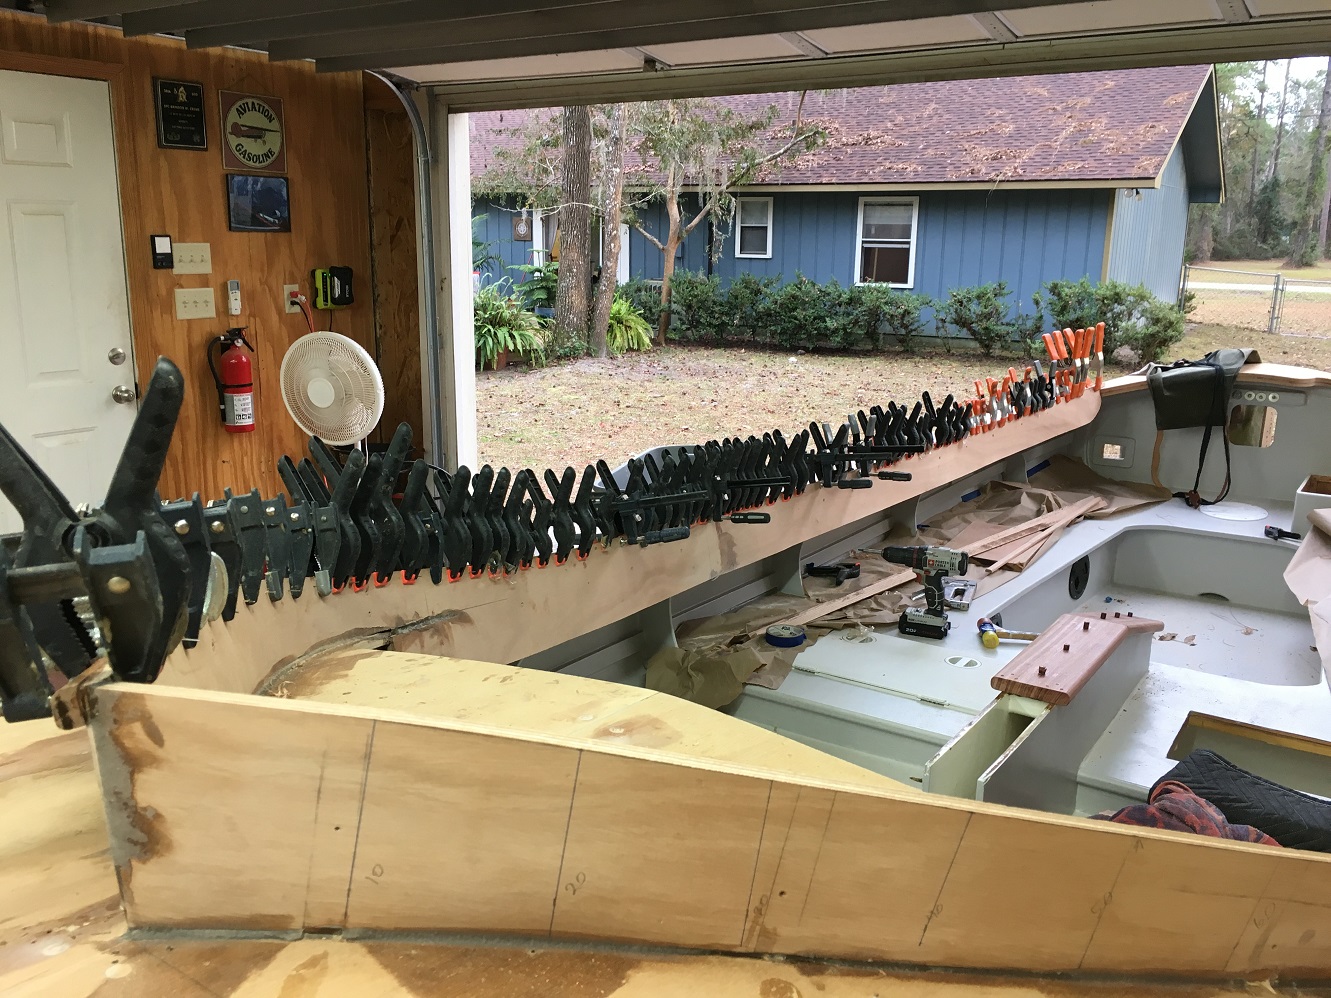
Now I had already thrown away my last piece of 1/4′ ply so I had two choices, order more or use the 3/8″ I had on hand. Not being one to waste material I used the thicker board. Slowly but surely the planks worked themselves into shape, creaking and groaning as they went. I was really glad the wooden brackets were super strong as there was a lot of tension on them. It only took minor fitting before they were ready to glue down. After the glue had set the wooden braces were removed and the screw holes filled. You can tell from the pictures that I cut the planks a little oversize. I did that so I would be able to match the curves of the hull. Using the station lines that were drawn earlier and a little math I knocked up some marks for my batten.
Using my best batten and a lot of sighting by eye I made my mark and cut off the excess with my trusty Japanese pull saw and touched it up with a block plane. The bottom was much easier, all it took was a few passes with the belt sander to finish it up. The last step was placing an oak rub rail on the top. Super easy.
As I took the clamps off the last rub rail it hit me like a ton of bricks, I was done building. It had snuck up so quickly on me I wasn’t prepared for it. All the parts were on the boat and all of the accessories were built. As my Dad says “All I lack is finishing up.” Lots of paint and lots of varnish is all that separates me from the water. How about that!
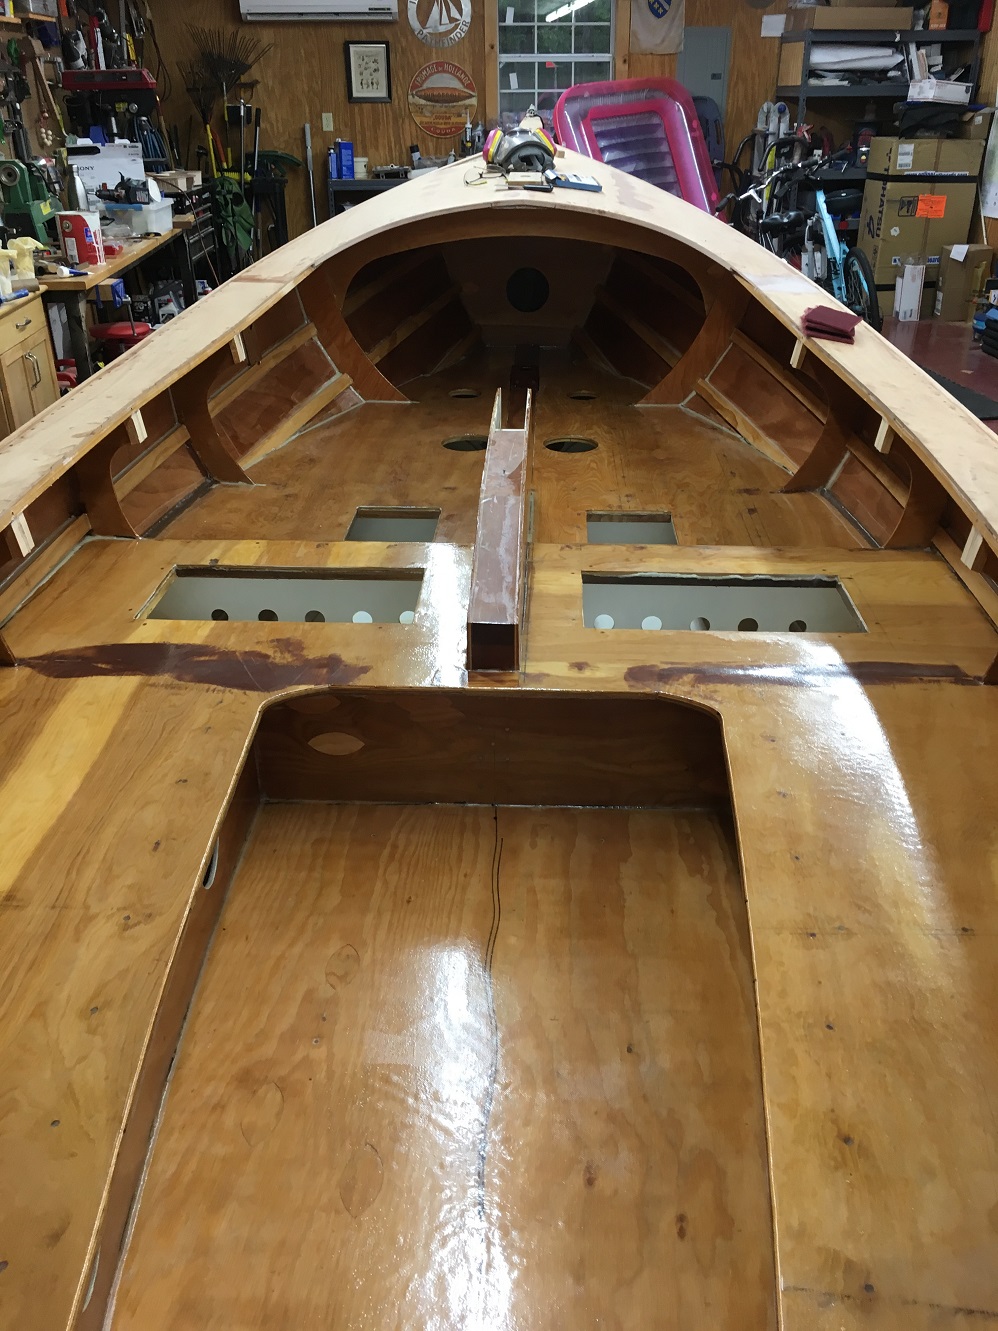
There it is, a small list of tasks that separate me from years of adventures on the water. A punch list is one of my favorite tools to manage a large project. It allows me to break large tasks such as building a boat into smaller bites and it is a huge confidence booster when you start crossing stuff of the list. My next task to be crossed off the list is going to be a 3 for one. Lets finish the interior.
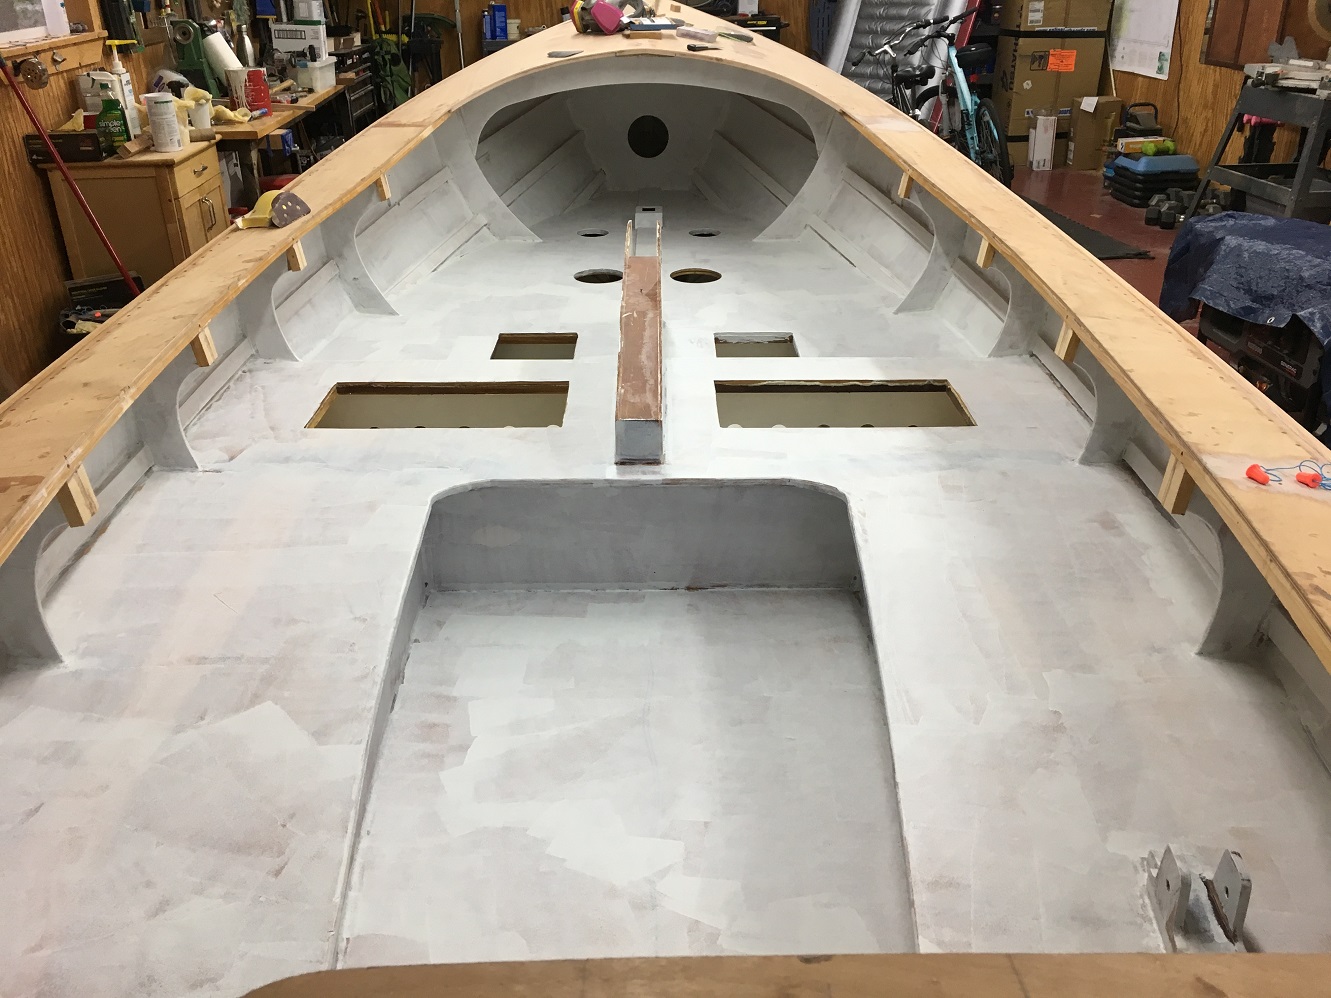
First thing was to protect the plywood from the sand and shells that are always tracked into the boat in this part of the country. For that I covered every walked on surface with a layer of fiberglass.
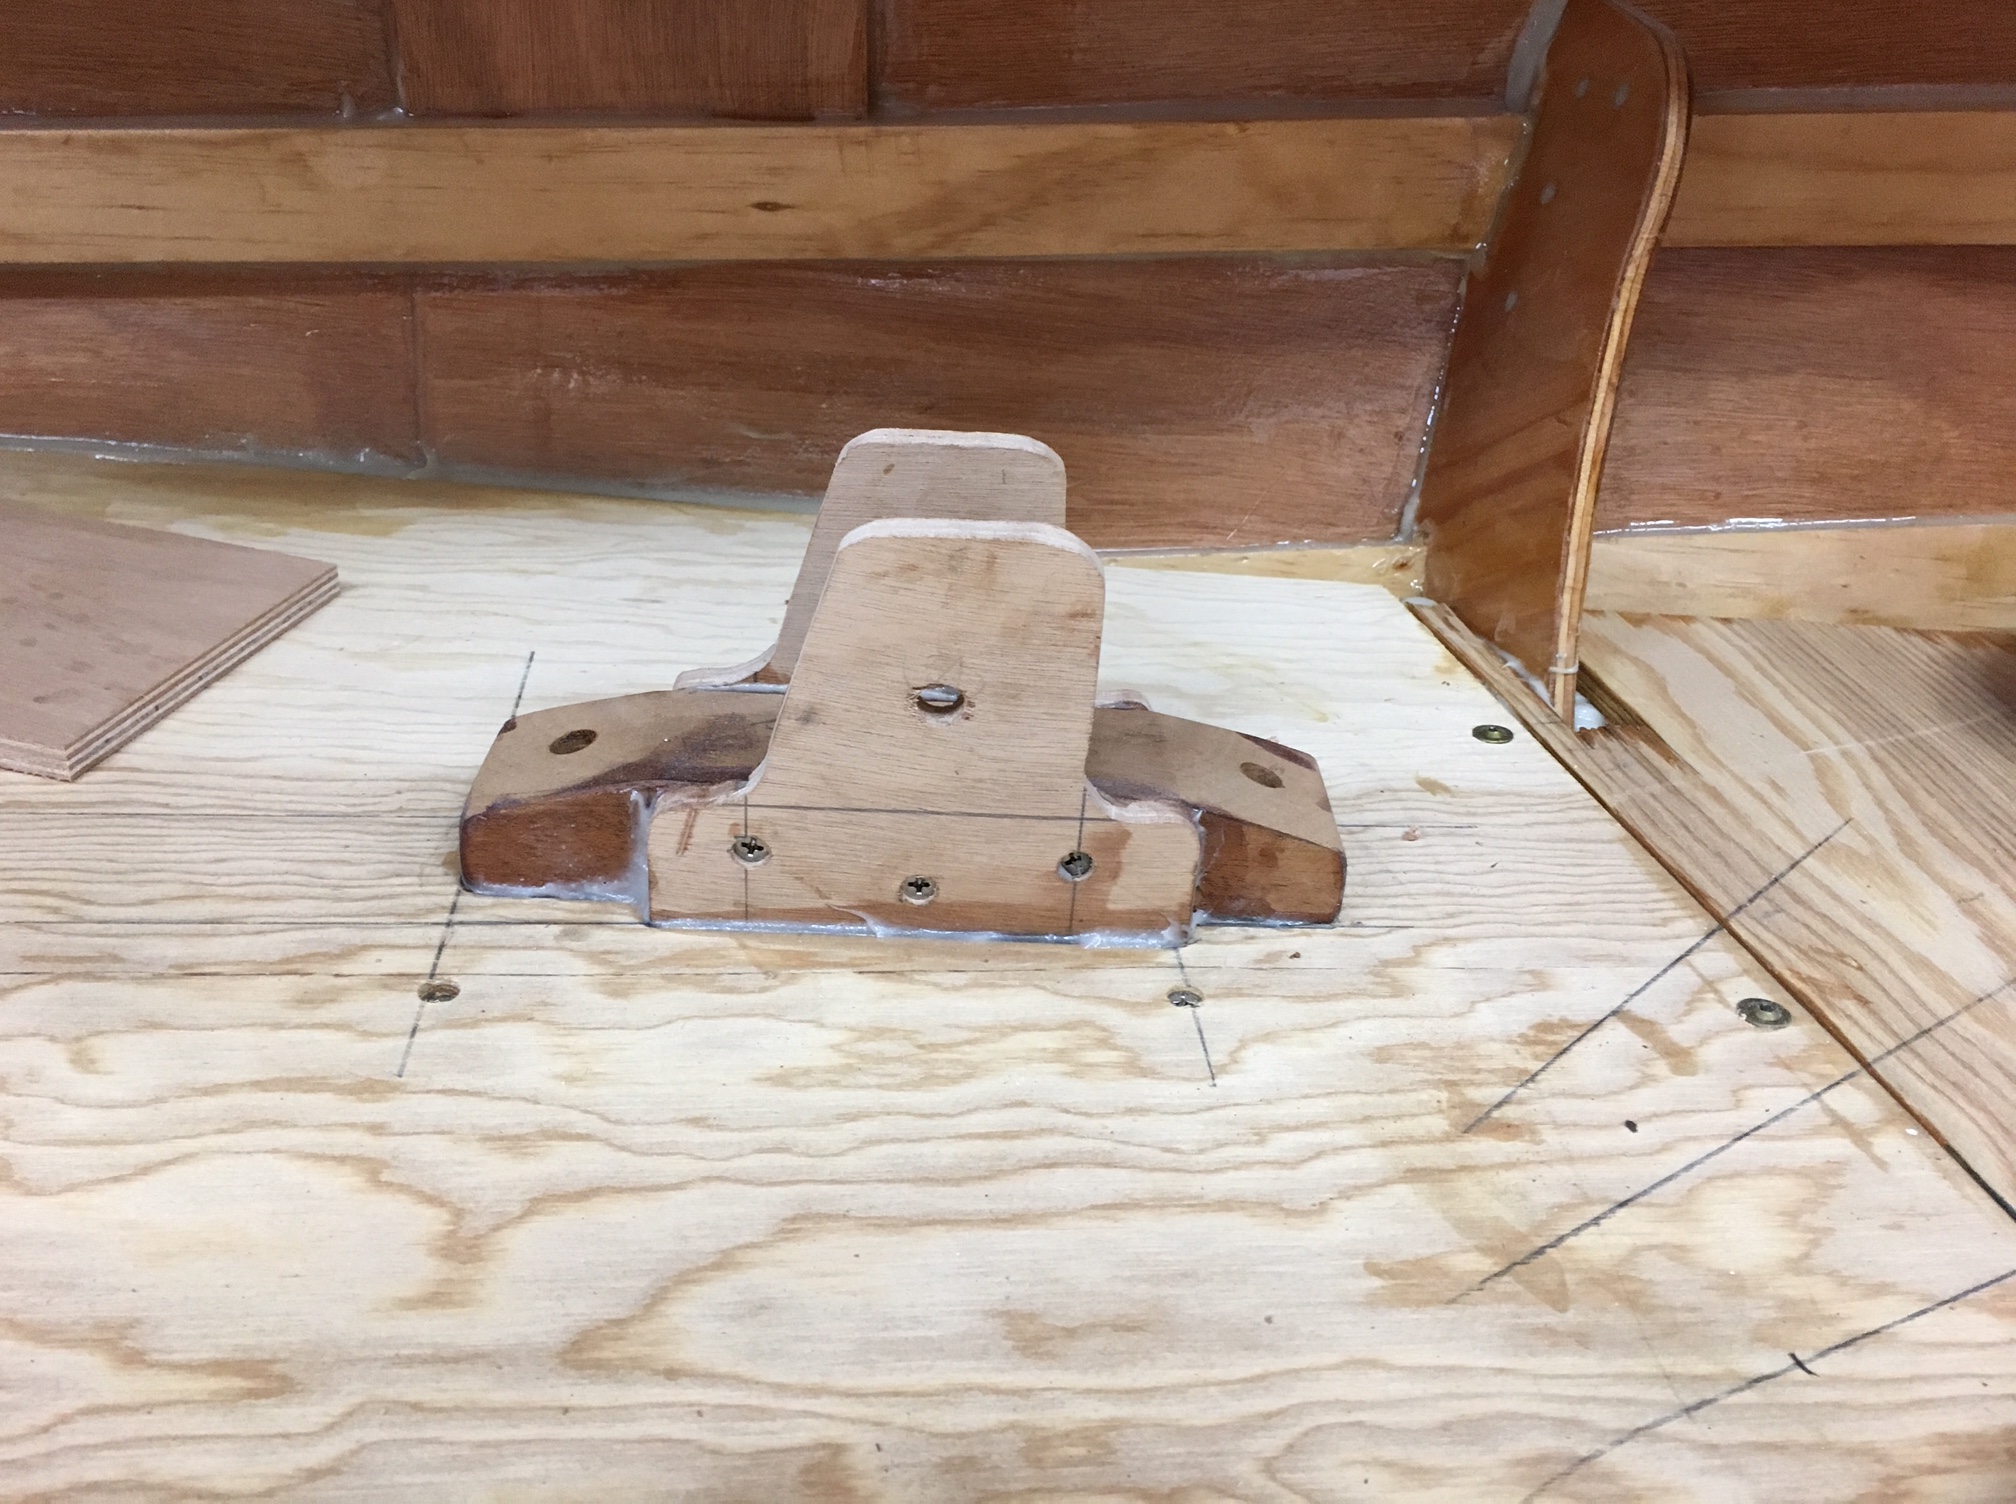
The bunk flats and seats received one layer of 6oz cloth. The footwell got two for extra protection. I also layed up a 6 layer block to glue into the motor well right where the outboard motor clamps up. I had noticed that the plywood was being crunched here by the motor mount so I beefed it up a little. To hold the forward end of the boomkin in place, I had to make a mount block and install it.
This little block goes on the right hand side of the boat and holds the forward side of the boomkin. With those items completed it was time to paint.
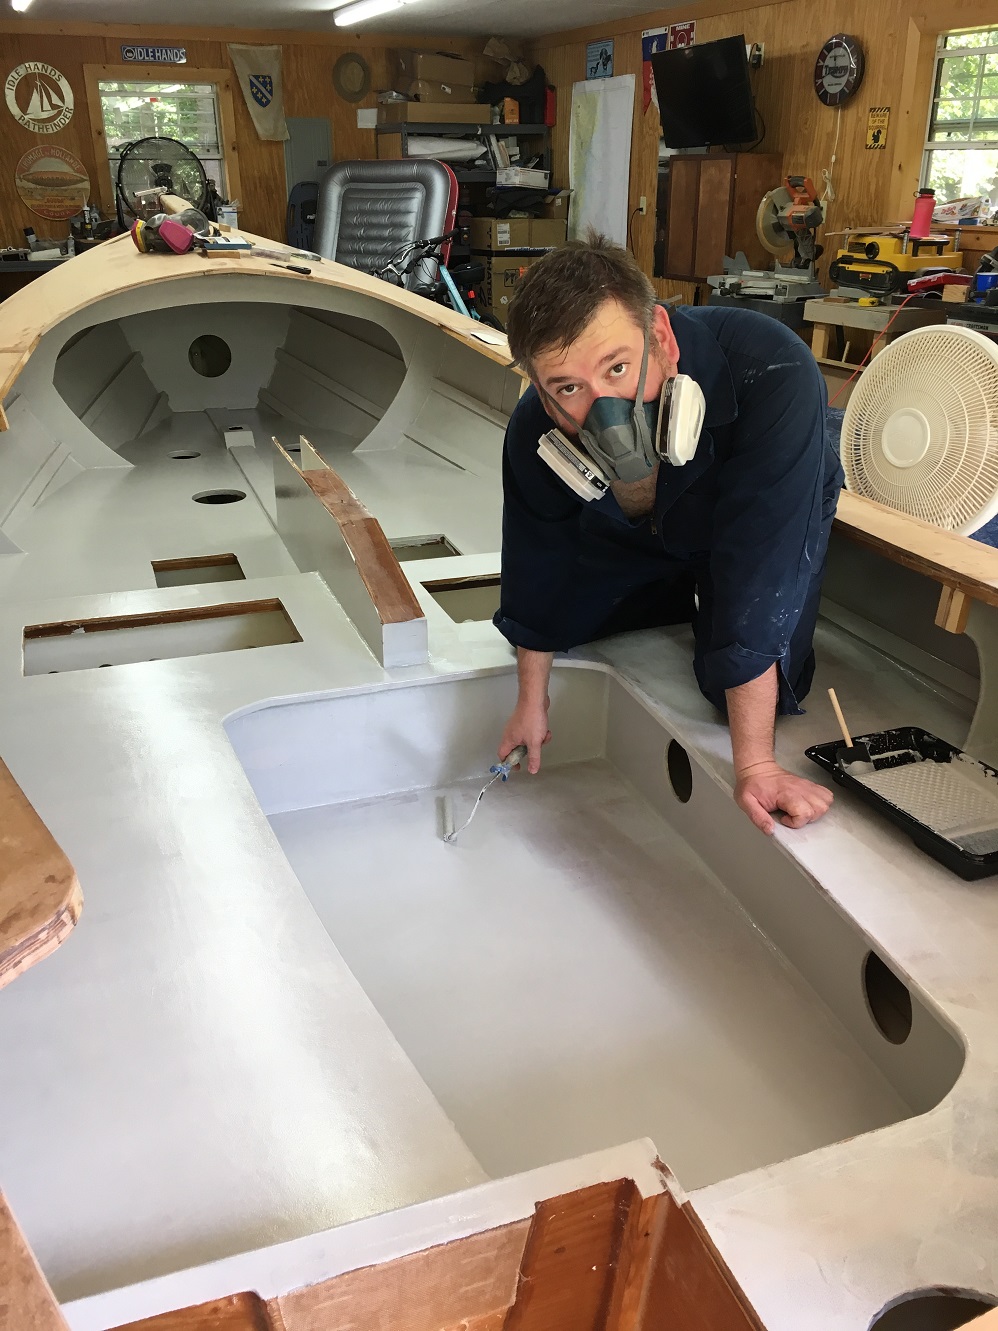
It turned out pretty good. To prevent slipping on wet floors I added sharkgrip sand to the paint. I only did this on the floor and where the big hatches are. I want to prevent slipping but I really don’t want to sit on sandpaper. Since the coaming install was coming up I stopped short of painting the undersides of the deck just in case I need to glue a backing plate down there.
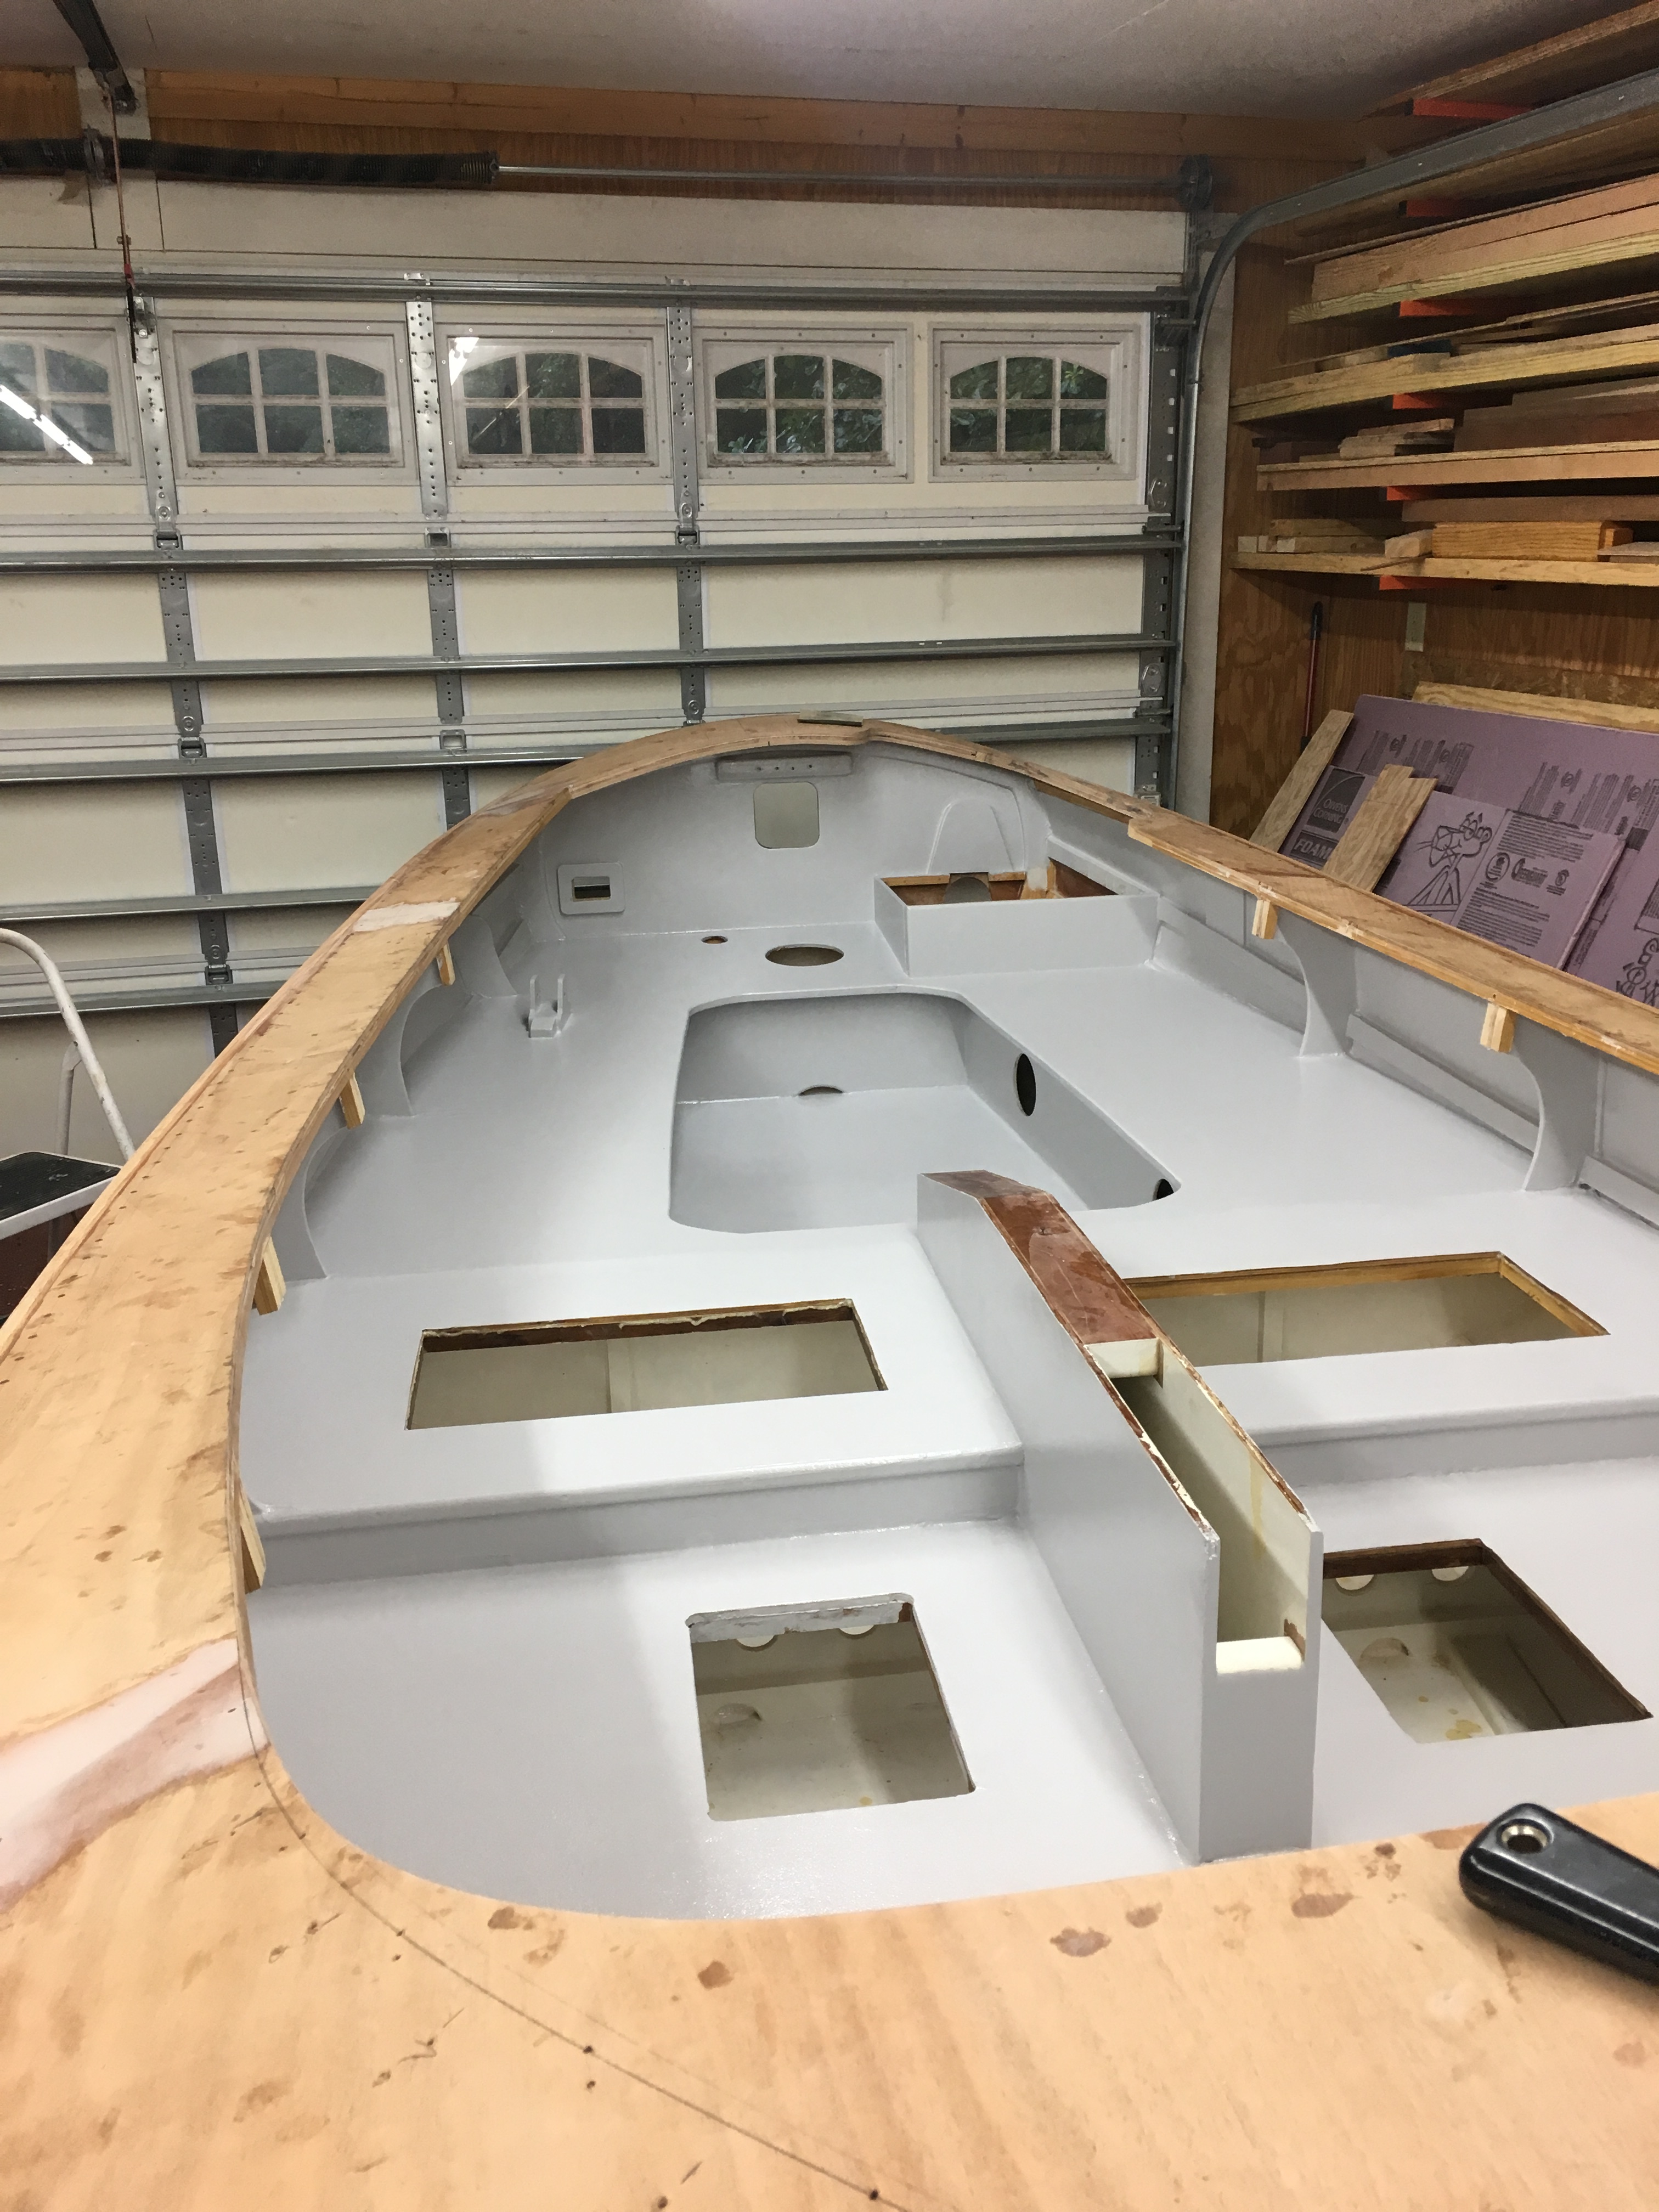
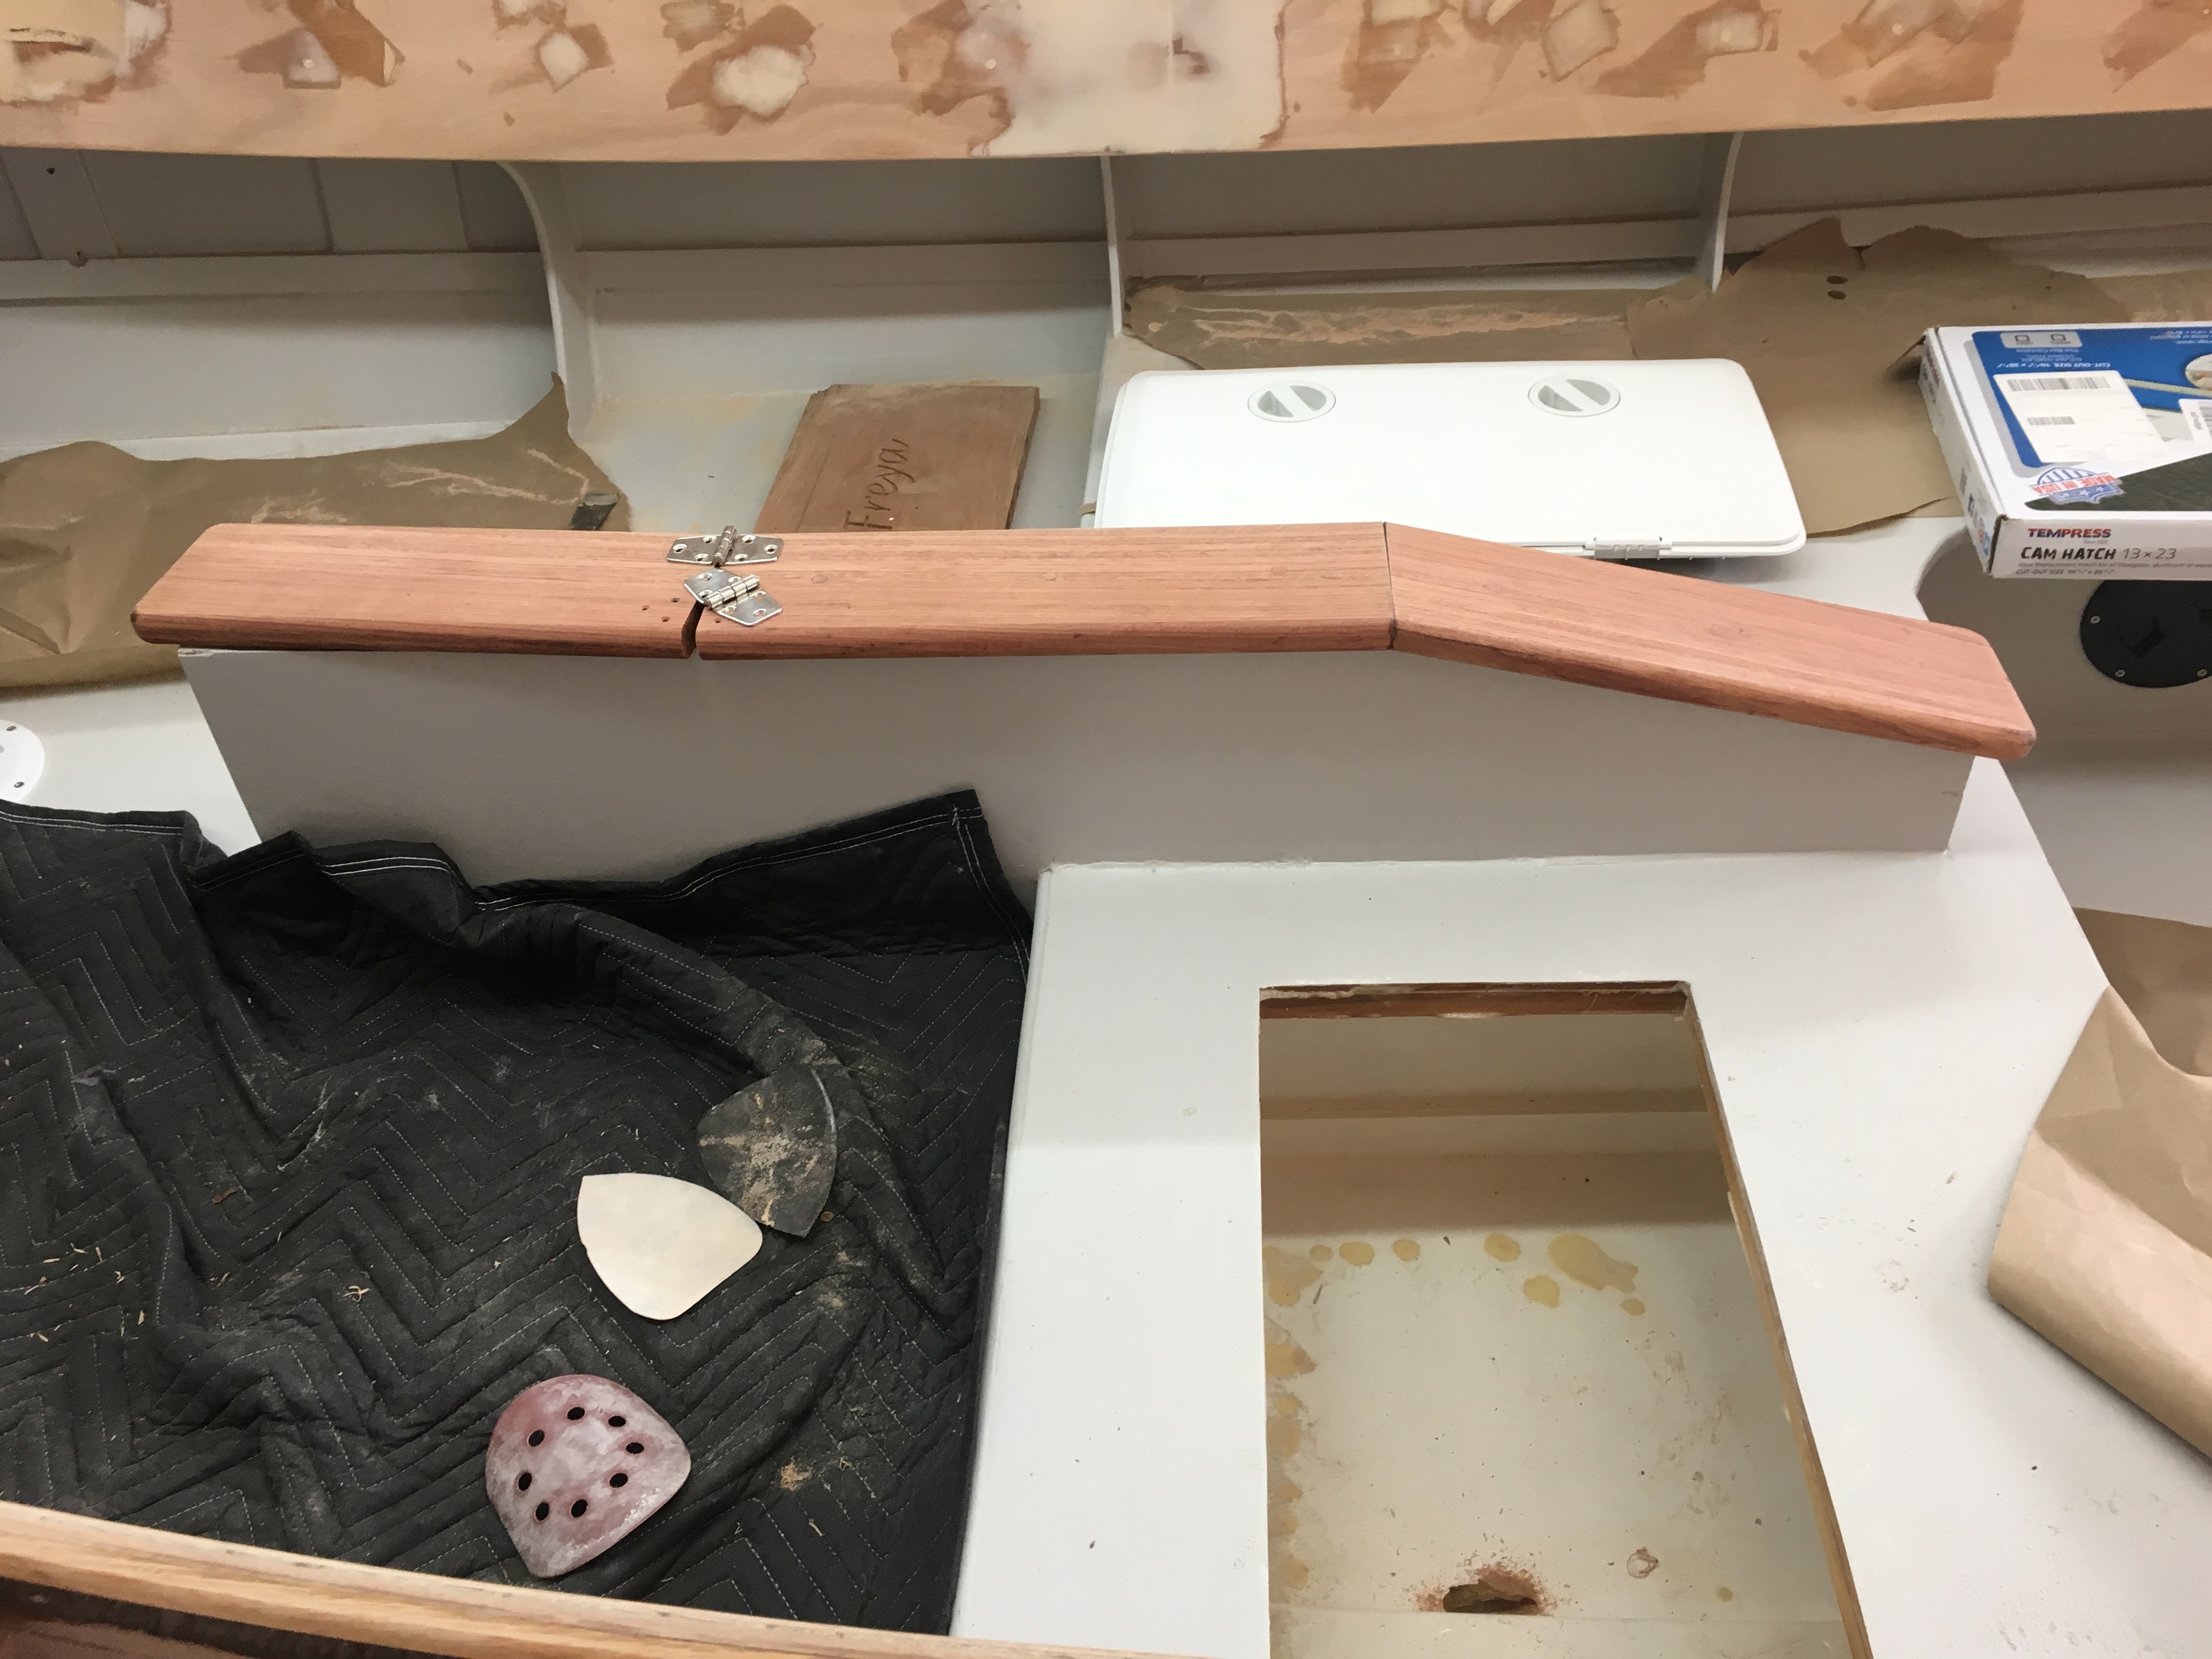
I added a cap to my centerboard which will allow me to mount a fairly large compass and to close the gap at the front of the centerboard trunk to keep the water from splashing in.
I am hinging the front section for access to the centerboard just in case. The centerboard cap is made out of jatoba and is really going to look good when varnished. With these jobs crossed off the list it was time to tackle a job I had been avoiding for quite a while, the coaming.
With a big project the most common question asked is “when are you going to be done?”. This question comes from all corners and all different forms including “When are we going for a boat ride?”, “How long have you been building?”, and ultimately “Why didn’t you just buy a boat?”. If you are reading this I am sure you understand that buying a boat would be much easier if I only wanted a boat. I think that it is hard for most people to understand that 90% of this project for me is learning new skills and building something myself. When I started this project I told myself that I would not set a date and ruin all the fun I was having. Unfortunately in the middle of last year I fell victim to peer pressure.
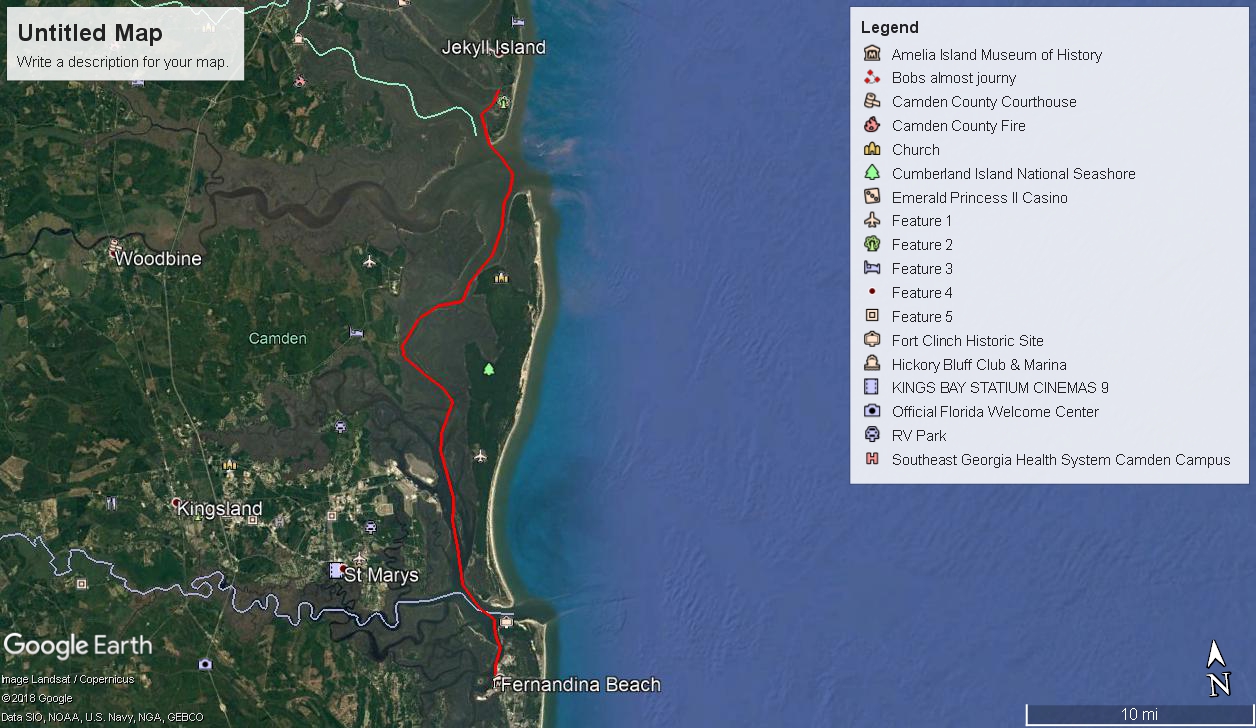
Several years ago when I started looking for a sailboat project for the Idle Hands Workshop I accidentally talked my friend Bob into building a boat. He chose a Chester Yawl from Chesapeake Light Craft, built it beautifully, and has been rowing it around Coastal Georgia since. Over the years he has become quite good at rowing and was looking to take on a bigger challenge. His plan was to leave Jekyll Island and row behind Cumberland Island down to Fernandina Beach and he wanted my sailboat to follow him. This kind of expedition sailing is exactly what the Pathfinder is made for.
This was going to be a really challenging trip on the best of days and he was wondering if I would be done in time. It didn’t take long to figure out that I wouldn’t but it did get me thinking, how close was I really?
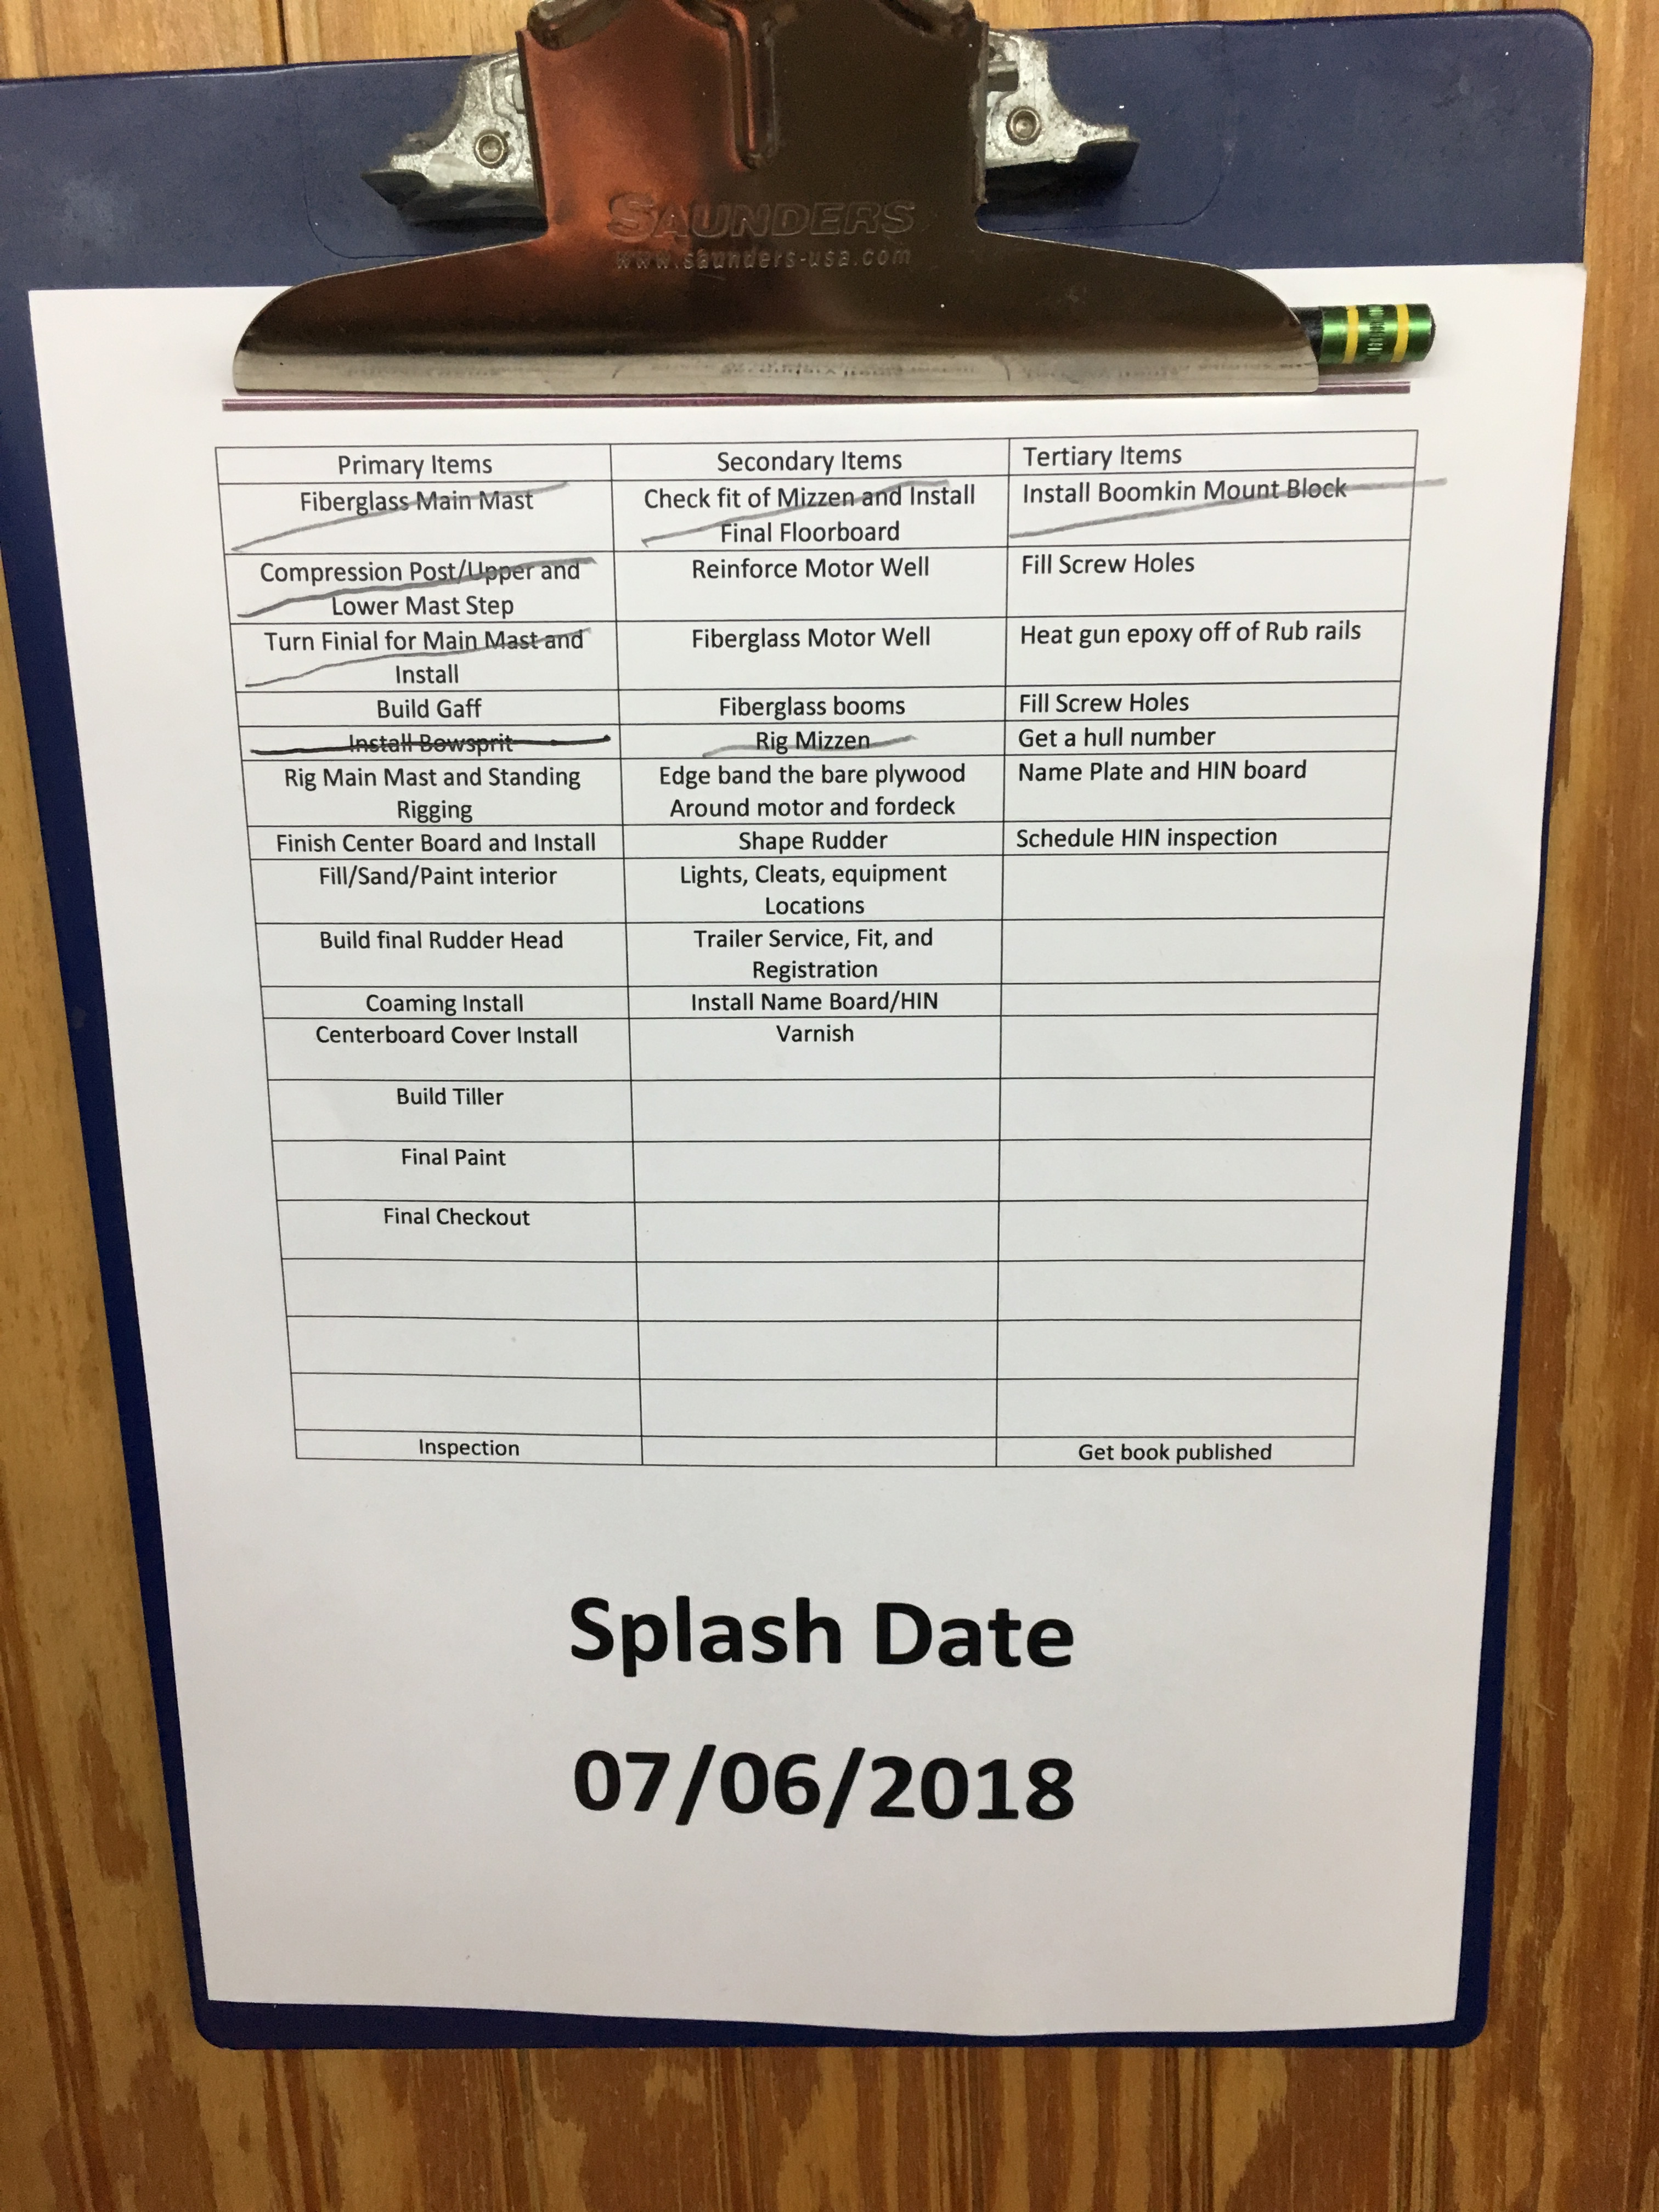
On a really slow day at work I sat down and made a list of everything between me and the water and then broke it down into three columns:
Primary Items – Big structural jobs
Secondary Items – Small weekday kind of stuff
Tertiary Items – Stuff you can do when you are waiting for epoxy to cure
After three years of slowly chewing away at the project my list was unbelievably small.
Saw the splash date, did you? I hung that punch list on the wall on May 1st 2018. The next few months became a blur of building that led up to a full 10 day marathon of boat work. Over the week of July 4th I hit the workshop like it was my job. Up at six, in the shop at 7:30, half hour lunch, and then off at 4 for ten days straight. I accomplished much during this time. I poured the lead in the centerboard, finished the interior, built the final rudder head, finished the masts and standing rigging, and completed several other tasks that I will be detailing in later posts. At the end of the week I had crossed several items off the list but had also burned myself out. I had set a date and taken a fun project to work on and learn from in my spare time and made it into a job. Way to go dummy. I didn’t even want to read my Wooden Boat, and Small Craft Advisor magazines. I needed a break.
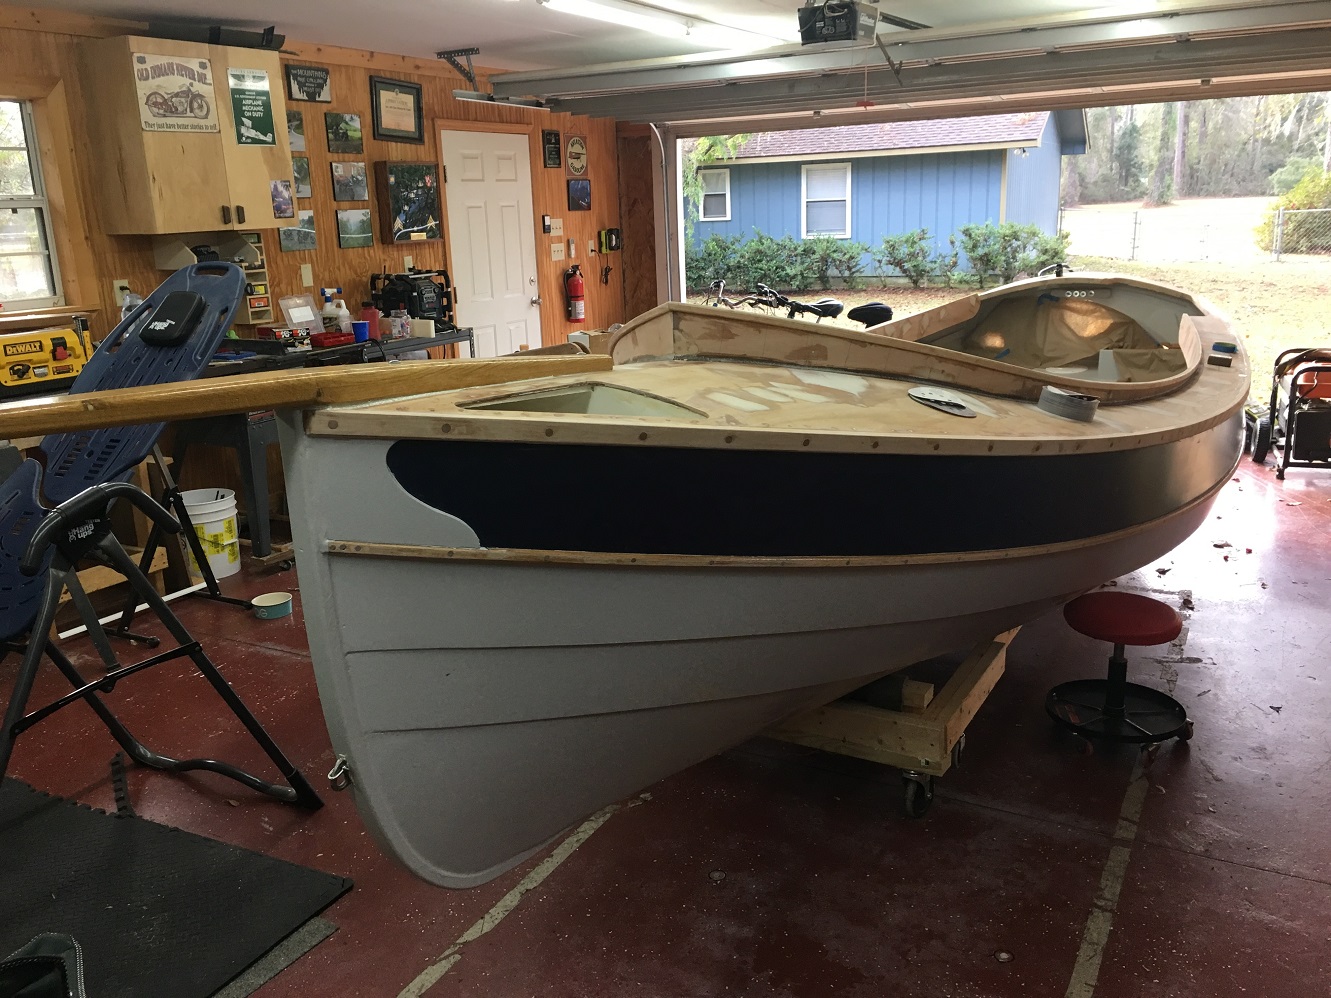
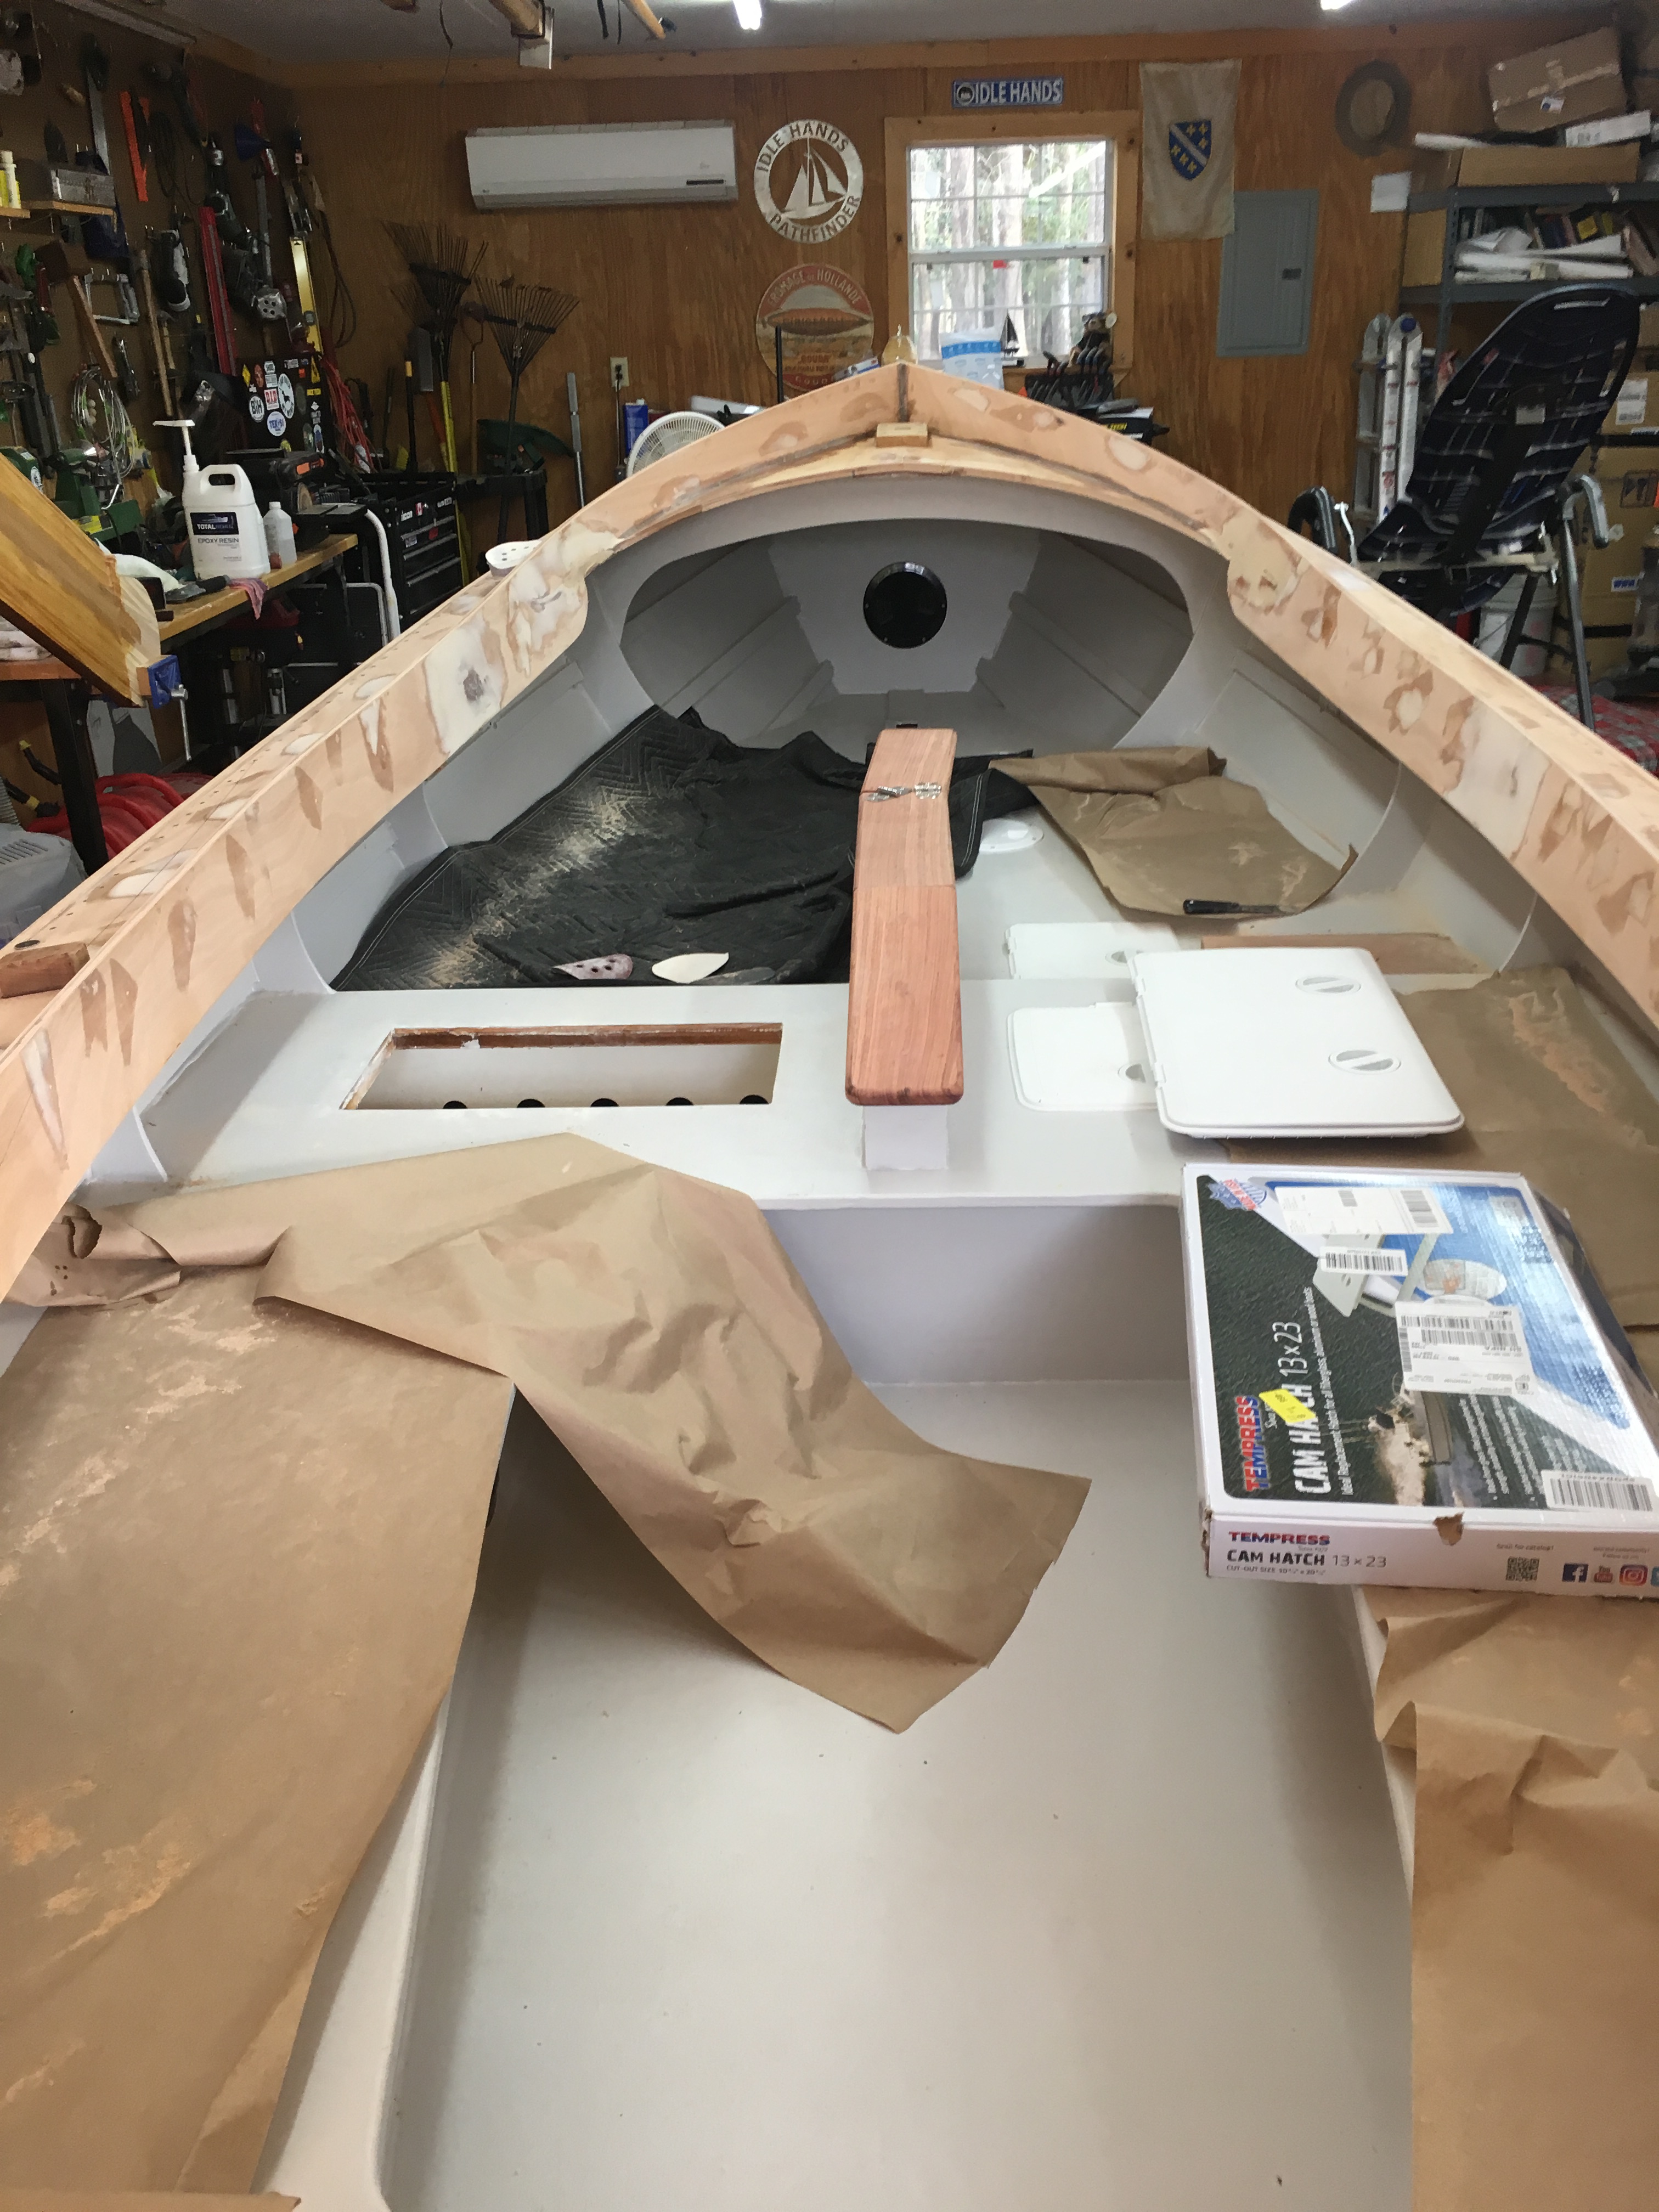
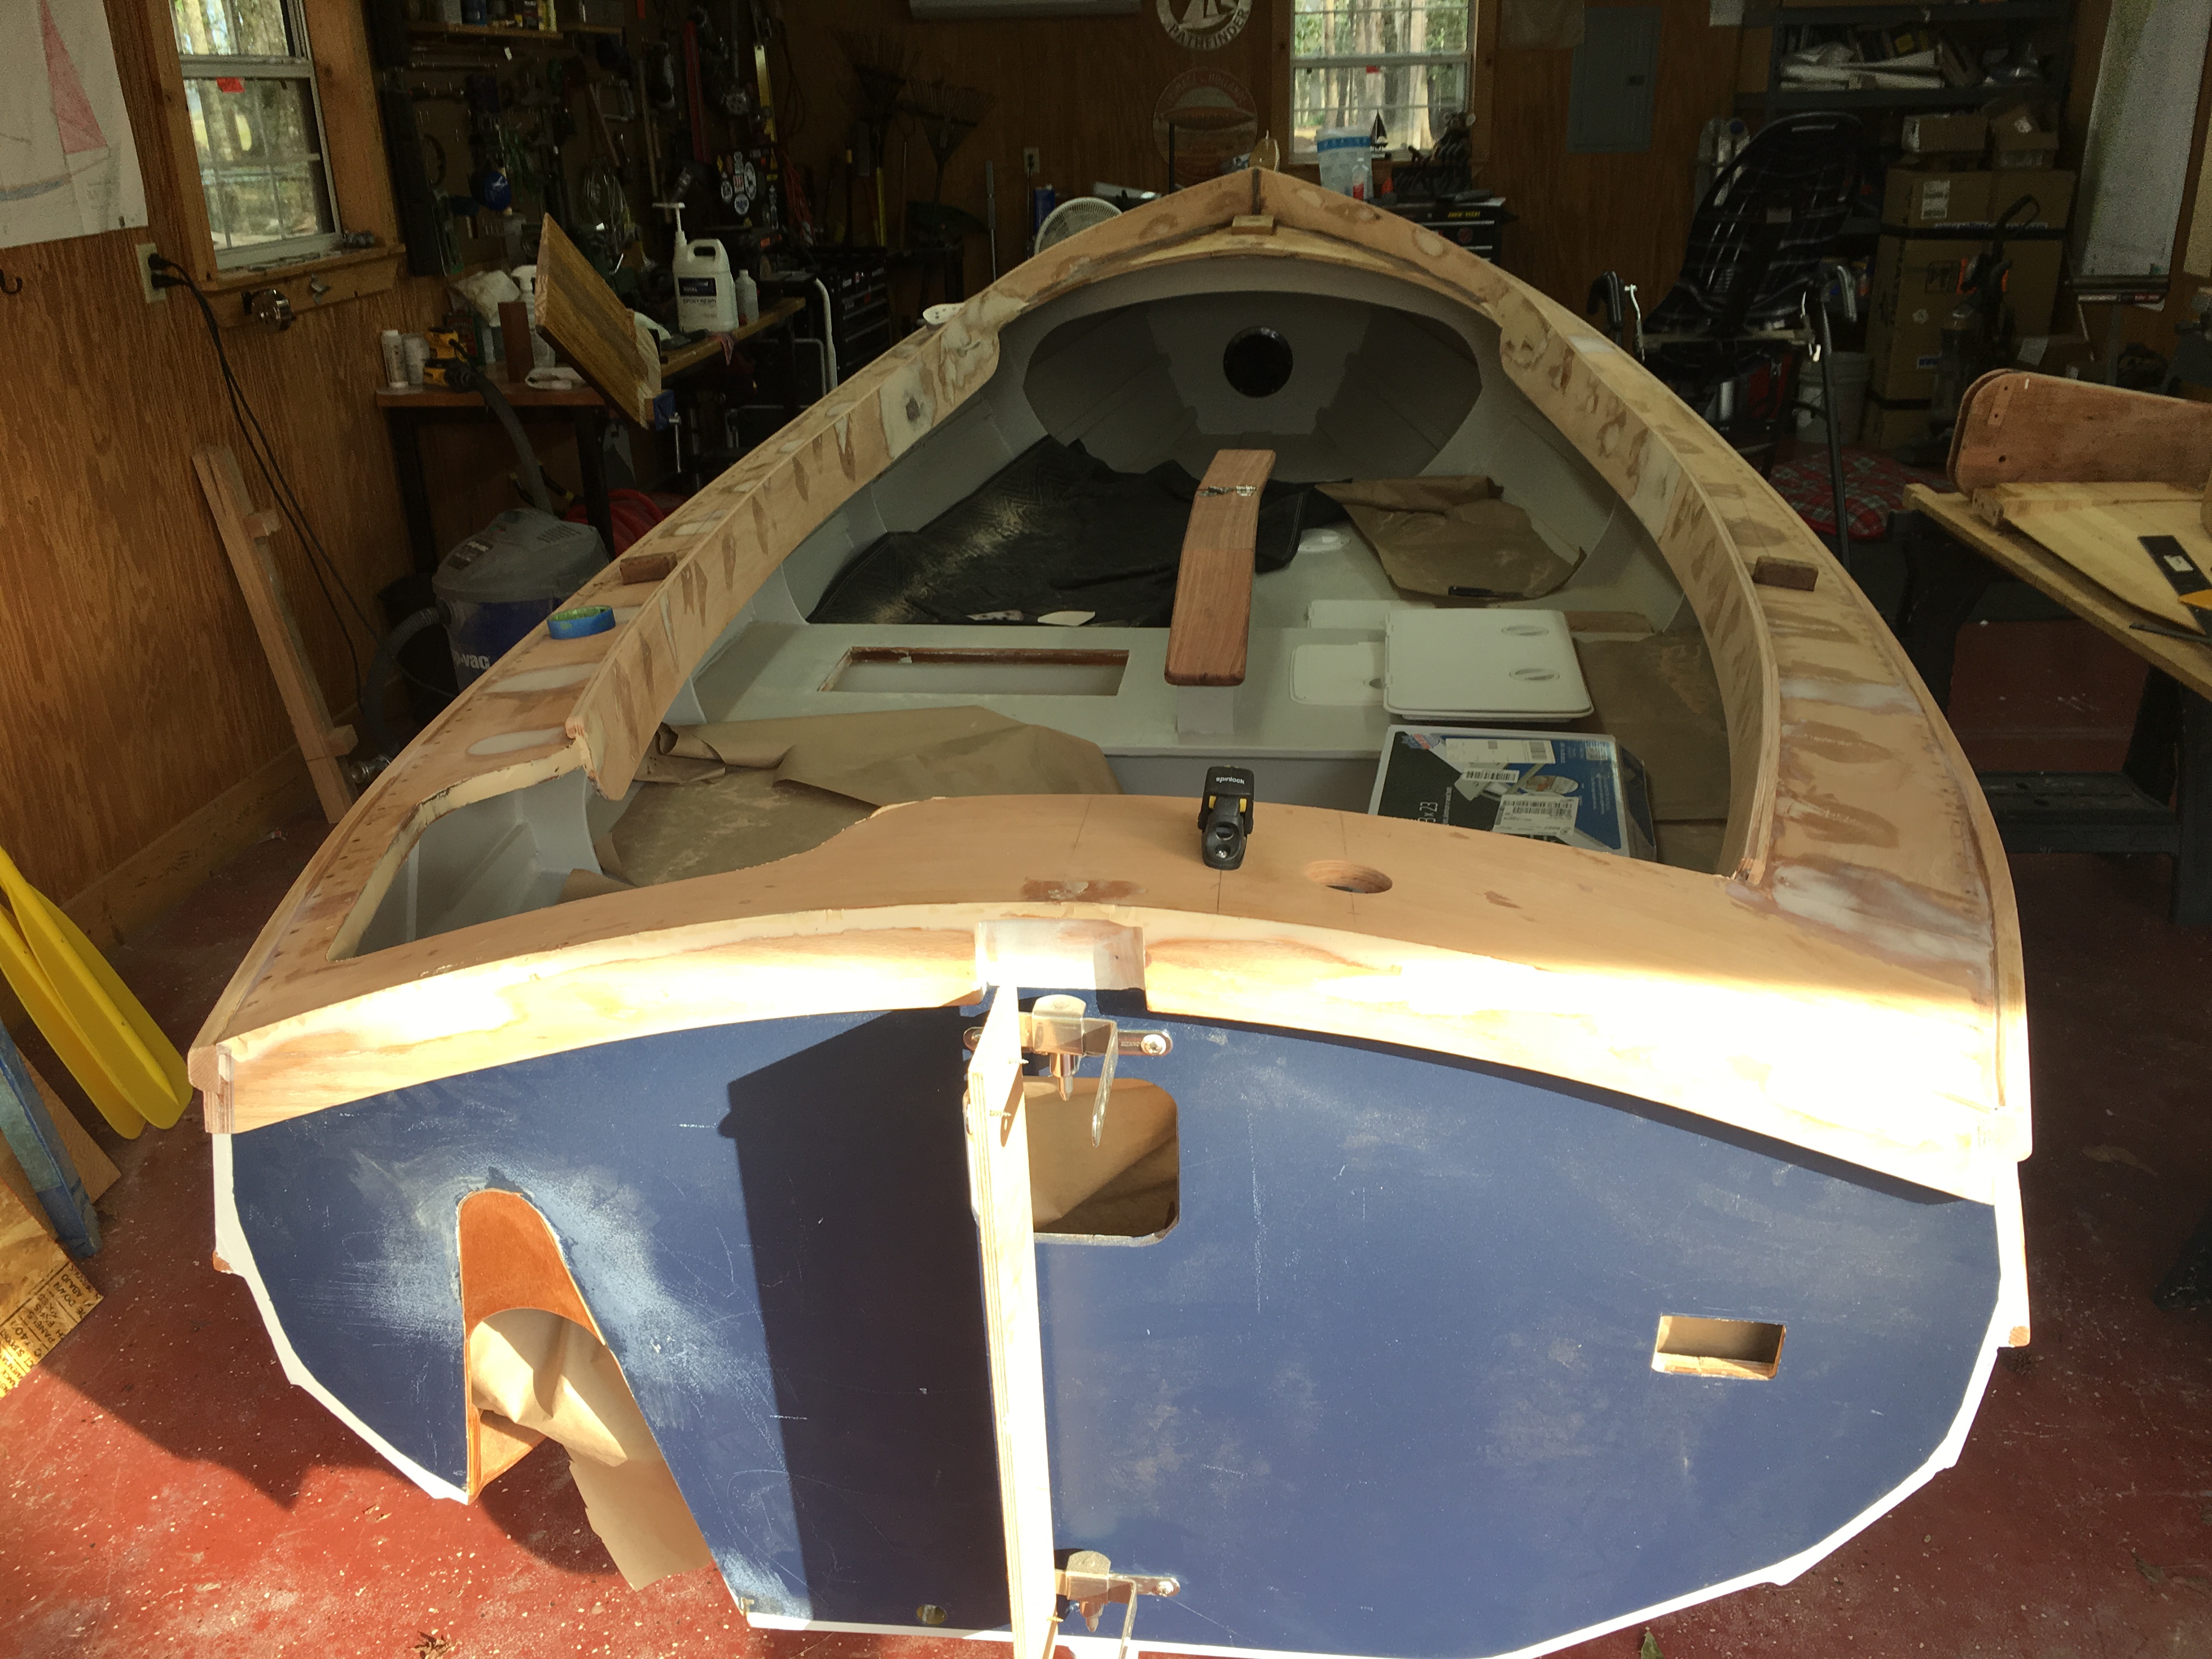
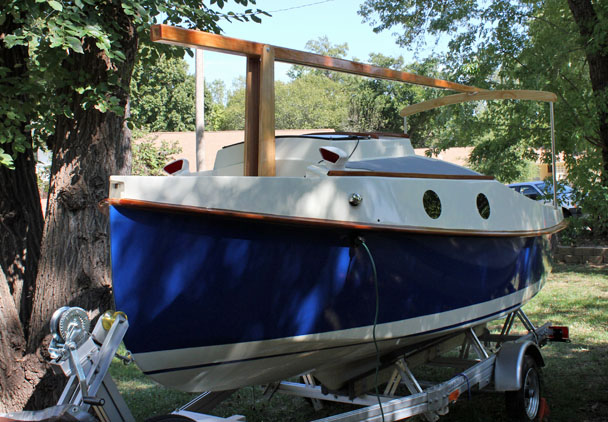
Break times are dangerous because it is super easy to let the project slide and slide until one day you see a half built boat, car, or airplane listed for cheap on Craigslist. This is where an awesome support system comes in. My wife Cheryl is my main support. She is always ready to help and never gives me grief when a box comes in from Duckworks. She understands when I need a break, and gently encourages me to get my tail back in the shop when break time is over. I cannot stress enough how important it is to have the spouses buy-in. The other part of my support system comes from the friends I have made through this blog and the forums. When I have questions or need some advice you guys are there for me. So after all of my rambling I guess you want to know the condition of the boat. Here you go.
No filters, no cleanup this is how she sits right now. You can see a lot of work has been done since the last time I updated this site and I have a lot of catching up to do with my blog. Just know I will work my way through all of it starting now. Break time is over.
Oh, and as for Bob, during the train up phase he tore his oarlock off the boat in some rough weather. He is currently working on a stainless steel replacement and hopes to try the trip again this summer.
If you have read this blog from the start, you know that I am a firm believer that if you want to get a project done on time and on budget then the best way to do this is not deviate from the designer’s plans. As soon as you make a change to one little thing it causes a whirlwind of changes to the other things required to make the first thing work. I call it the Law of Compounding Changes. Another builder friend of mine calls it the Law of Compounding F&%$ups. Sometimes I think his is a more fitting description. In the end, after all the bugs are worked out of your system caused by your first “great idea” you have to ask yourself, was it worth it? More often than not the answer is no. I believe this, but I am really bad at following it.
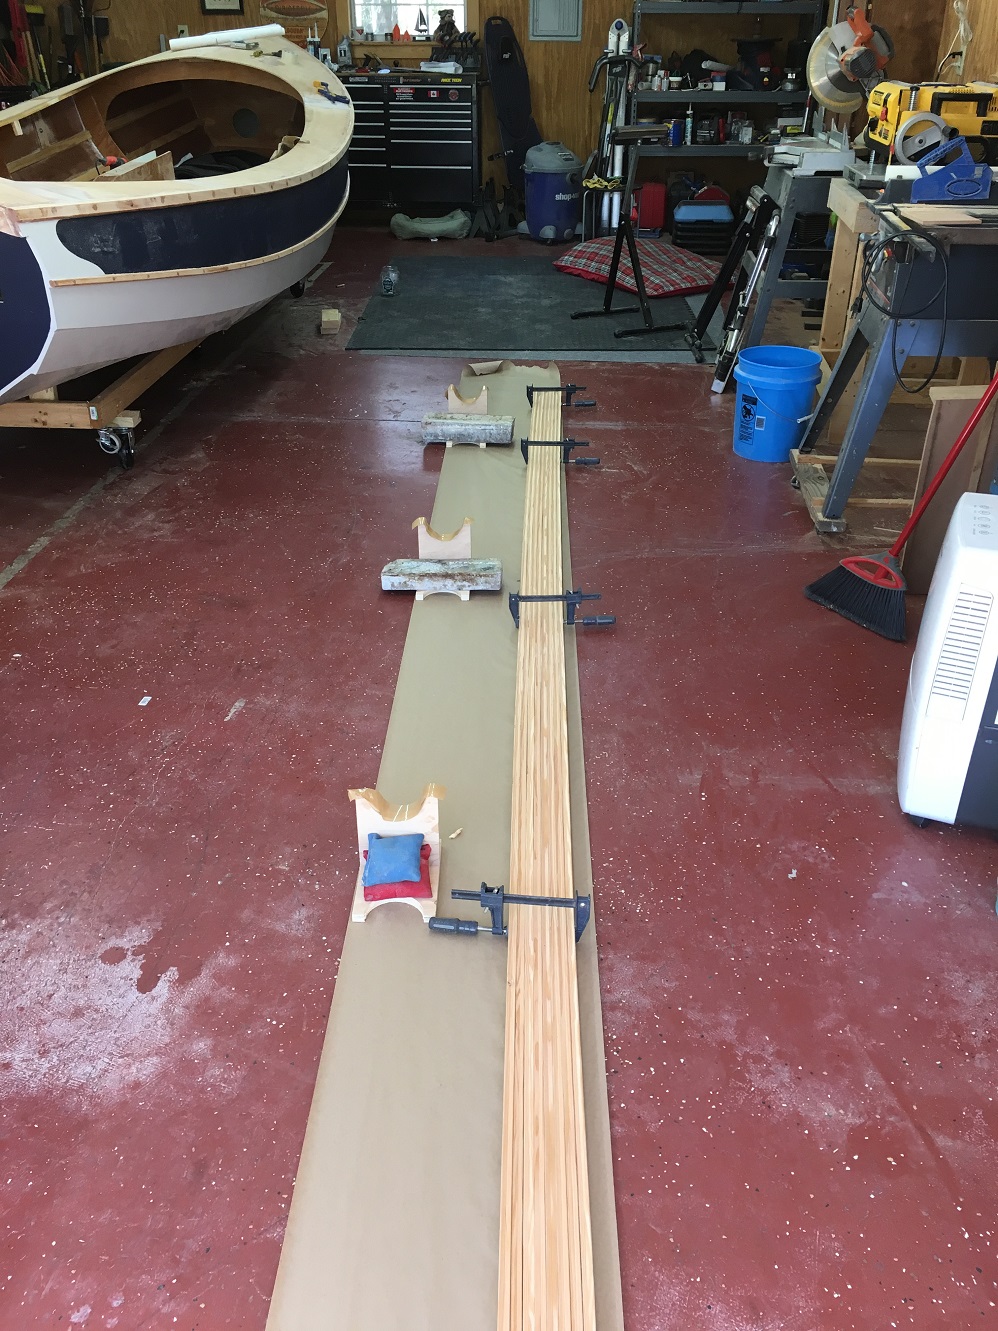
I’m lucky to have several friends in the area with sailboats with the vast majority of them being “trailer sailors”, West Wight Potter, Hobie Cat, McGregor etc. One thing you pick up pretty quickly when you are sweating on the ramp rigging your boat for launch is the faster you get in and out of the water, the more fun you have. My goal is to have the boat rigged and in the water in 15 minutes. To do this I had to make some changes. The original plans for the main mast on the pathfinder calls for a 5.4 meter (17.5 foot) aluminum main mast that is lifted up and inserted through a hole in the main deck and plugged into a mast step on the floorboards. I had already deviated by deciding to build a wooden mast, that adds weight. Trying to maneuver a heavy 18 foot stick covered in sails and ropes on a windy ramp into a little hole in the deck does not sound like a fast or safe way to rig a boat. I had to figure something else out. I decided quite a while ago to build a birds mouth hollow spar (R&D August 2017) so I figured the problem would most likely work itself out as the main spar was built. Off to the table saw!
The staves where milled out of douglas fir.
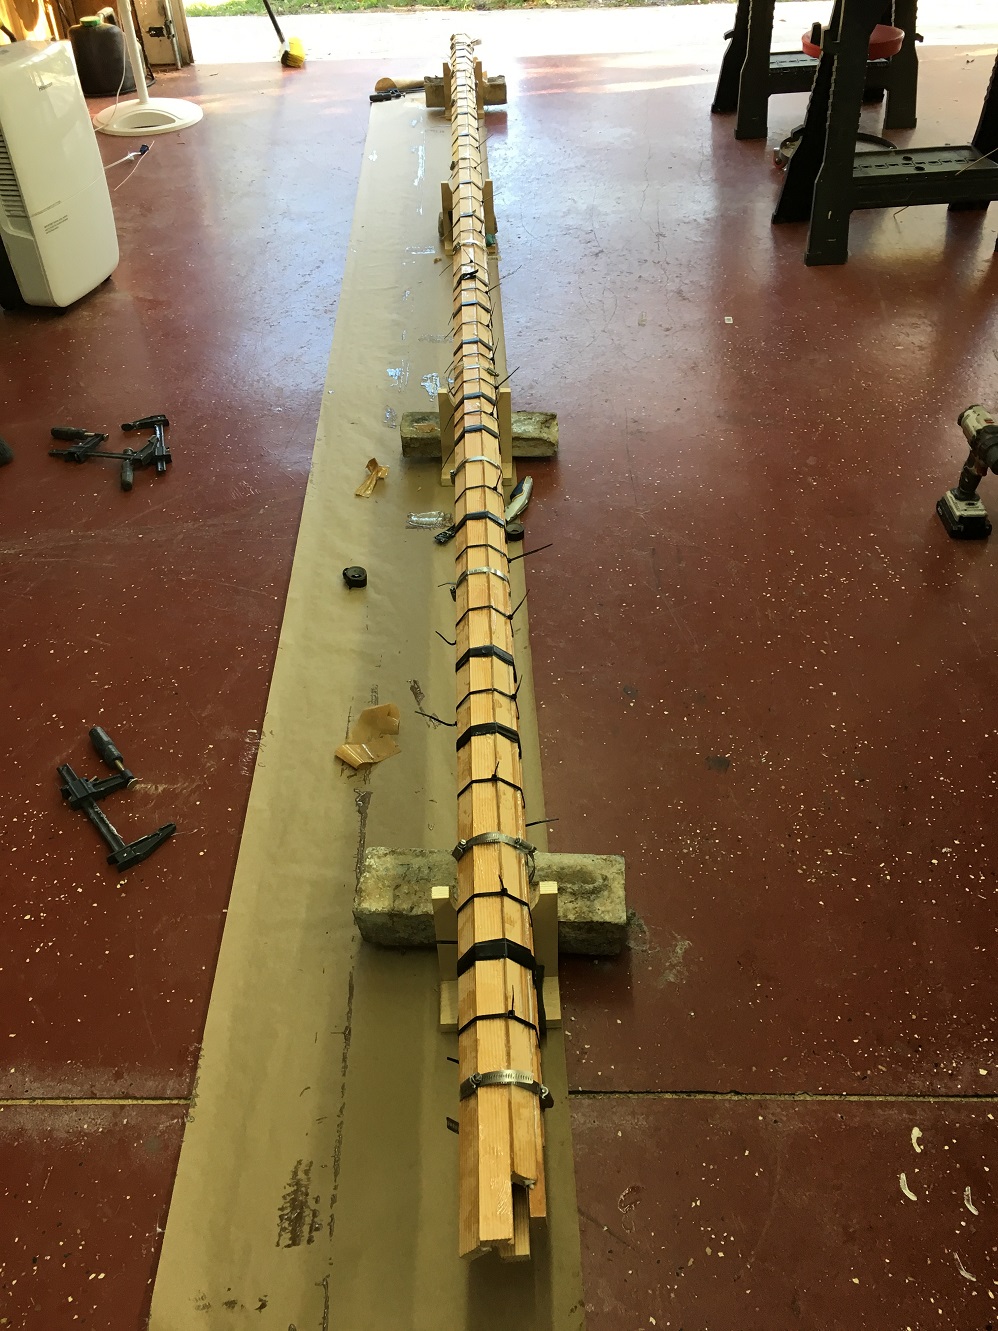
The clamps held them tight while a whole bunch of glue was applied.
The wiggly sticks were forced into shape
Straight enough!
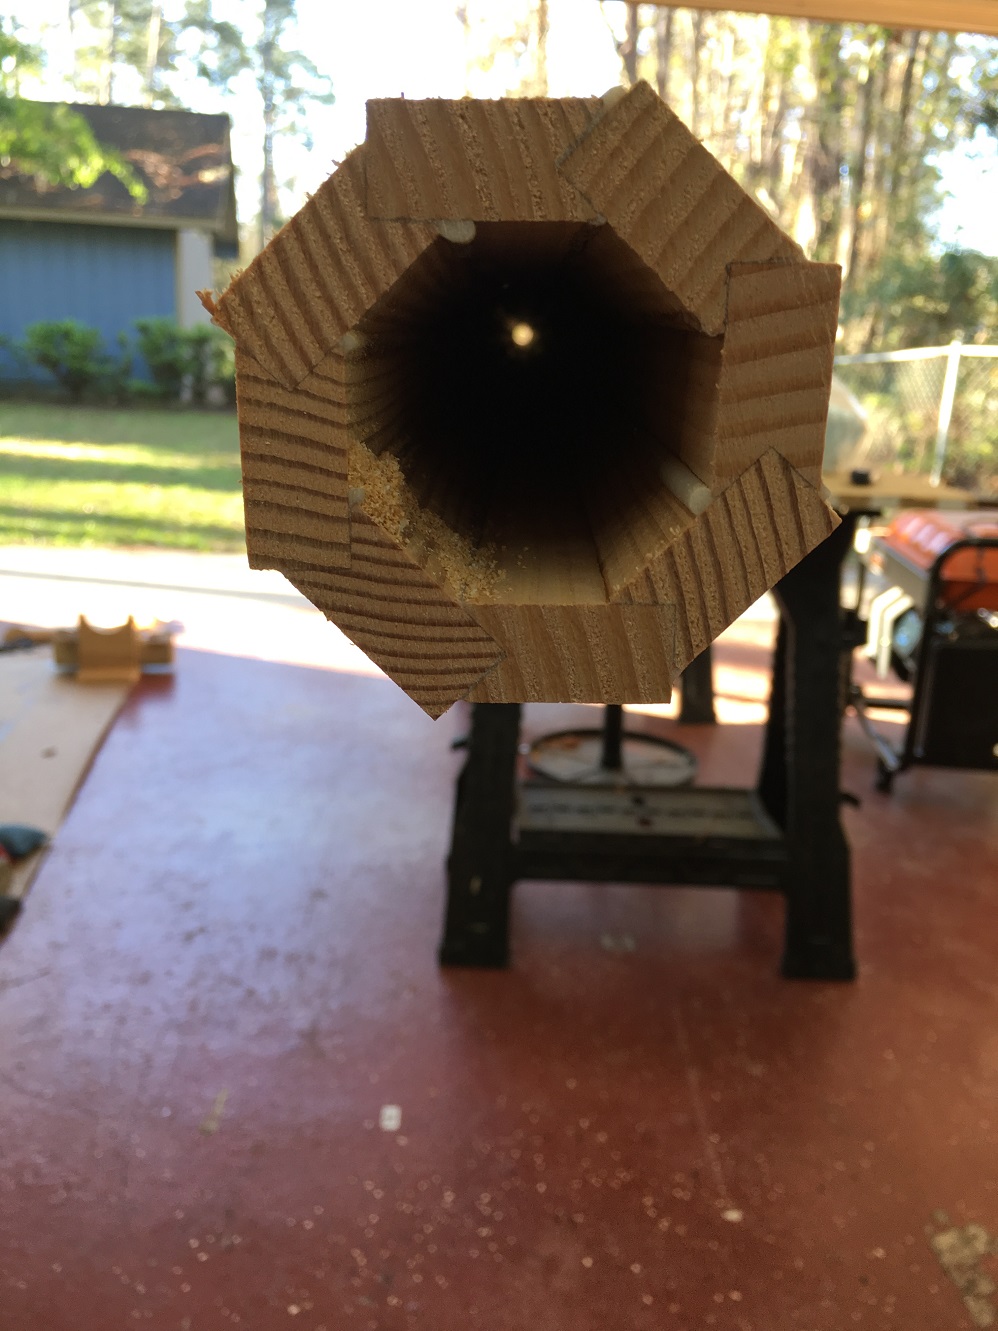
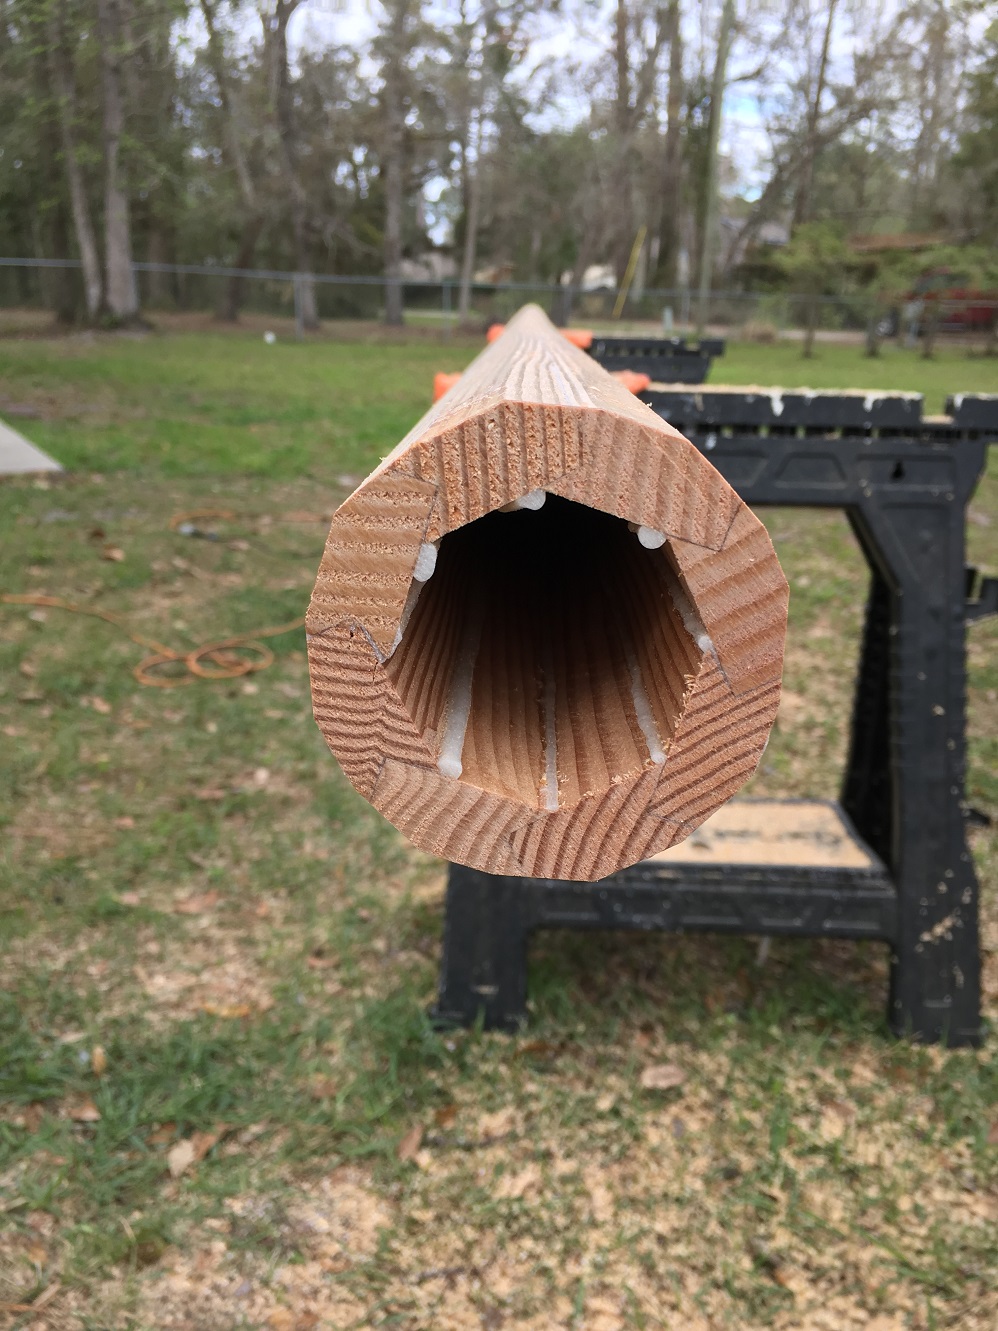
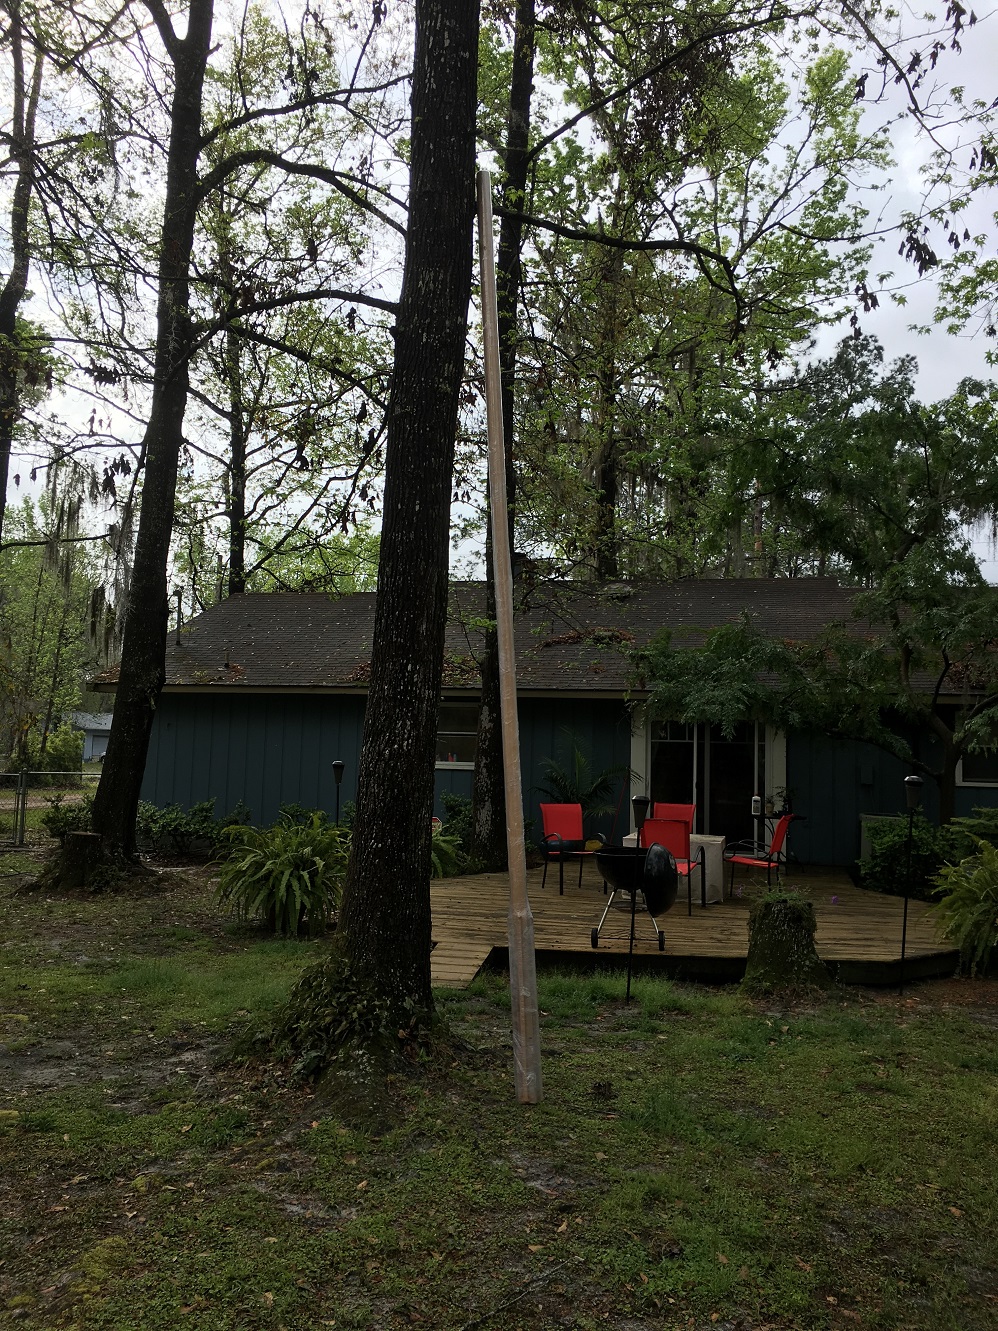
With a power planer, block plane, and sanding tube it went from 8 sided to 16 sided, 32, and then finally round.
A coat of glass later and the mast was done. Now it was time to figure out how to rig it.
The traditional way to speed up rigging and striking the mast is to add a hinge at the deck line called a tabernacle. Here is a picture of a tabernacle on a CLC Pocketship I pulled from the web.
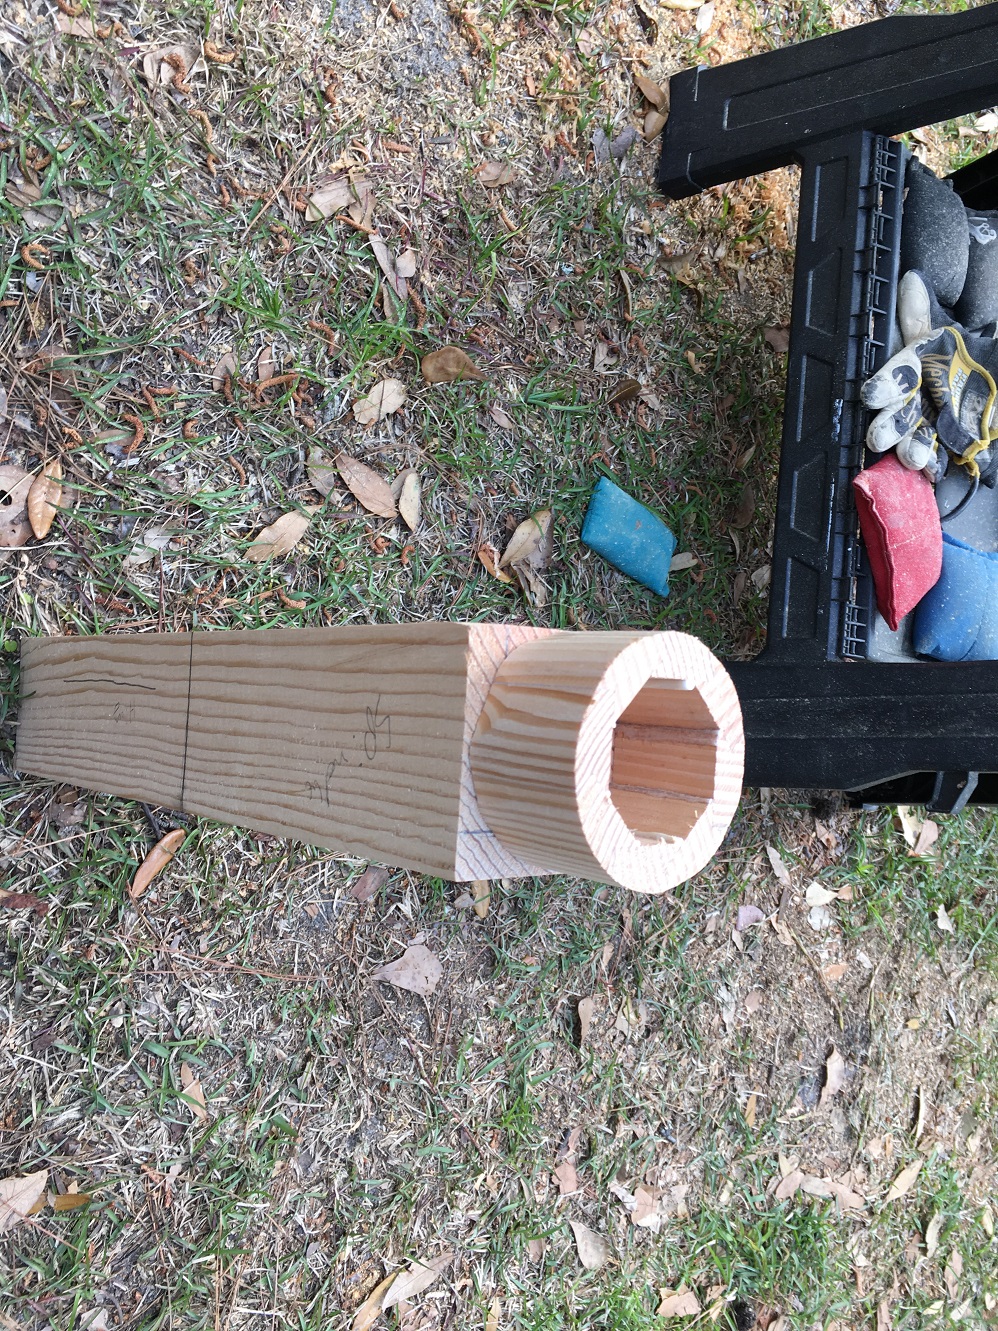
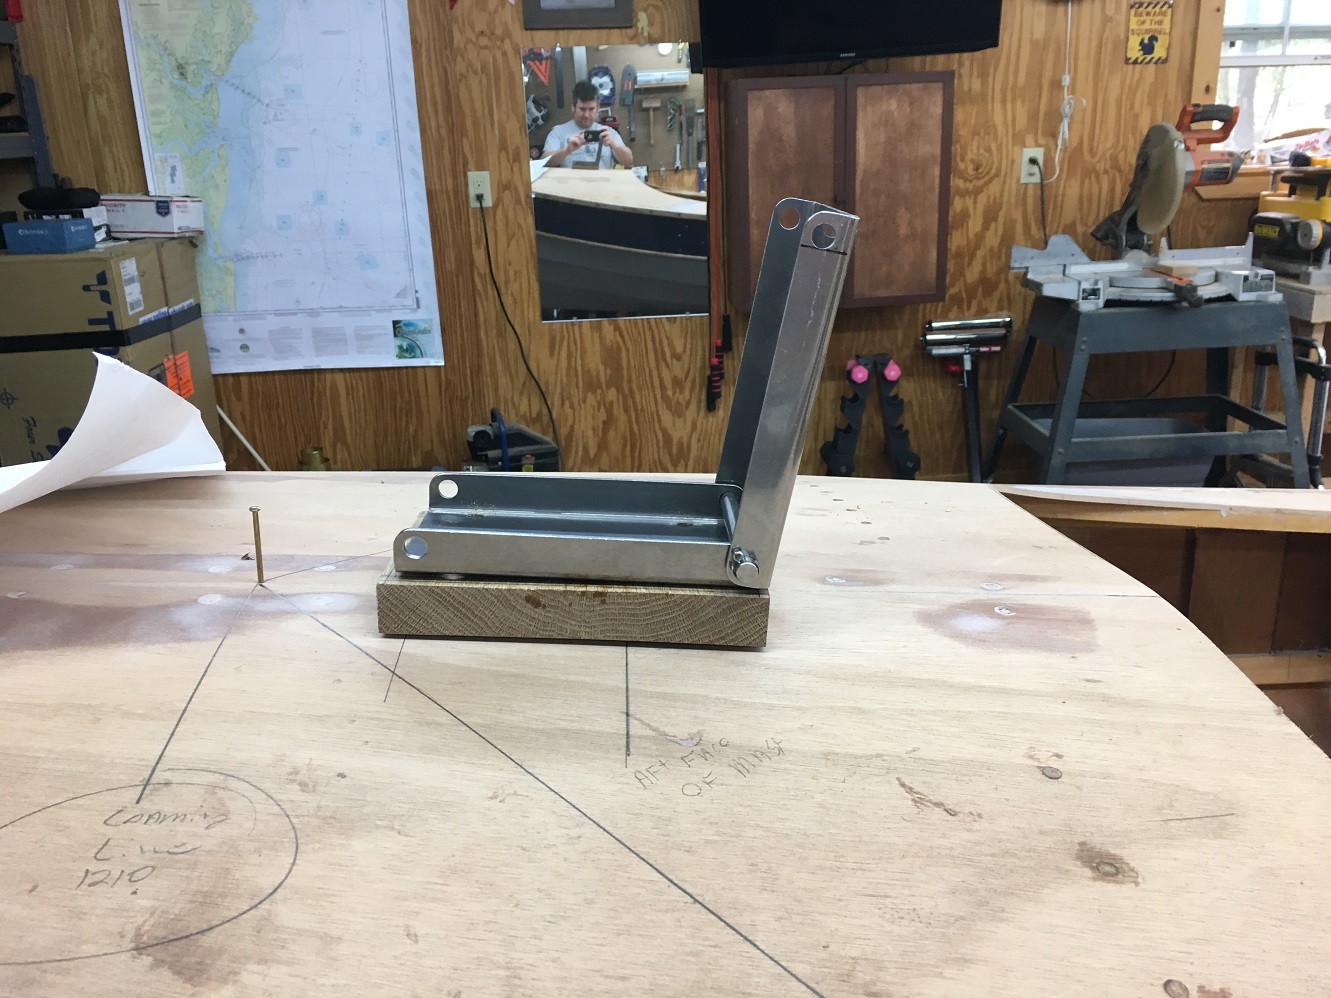
That looked like a decent place to start so it was off to the table saw to build a lower block for the hinge.
I drew out the hinge and then cut a block of douglas fir to make a block to transition between the round mast and the square section tabernacle hinge.
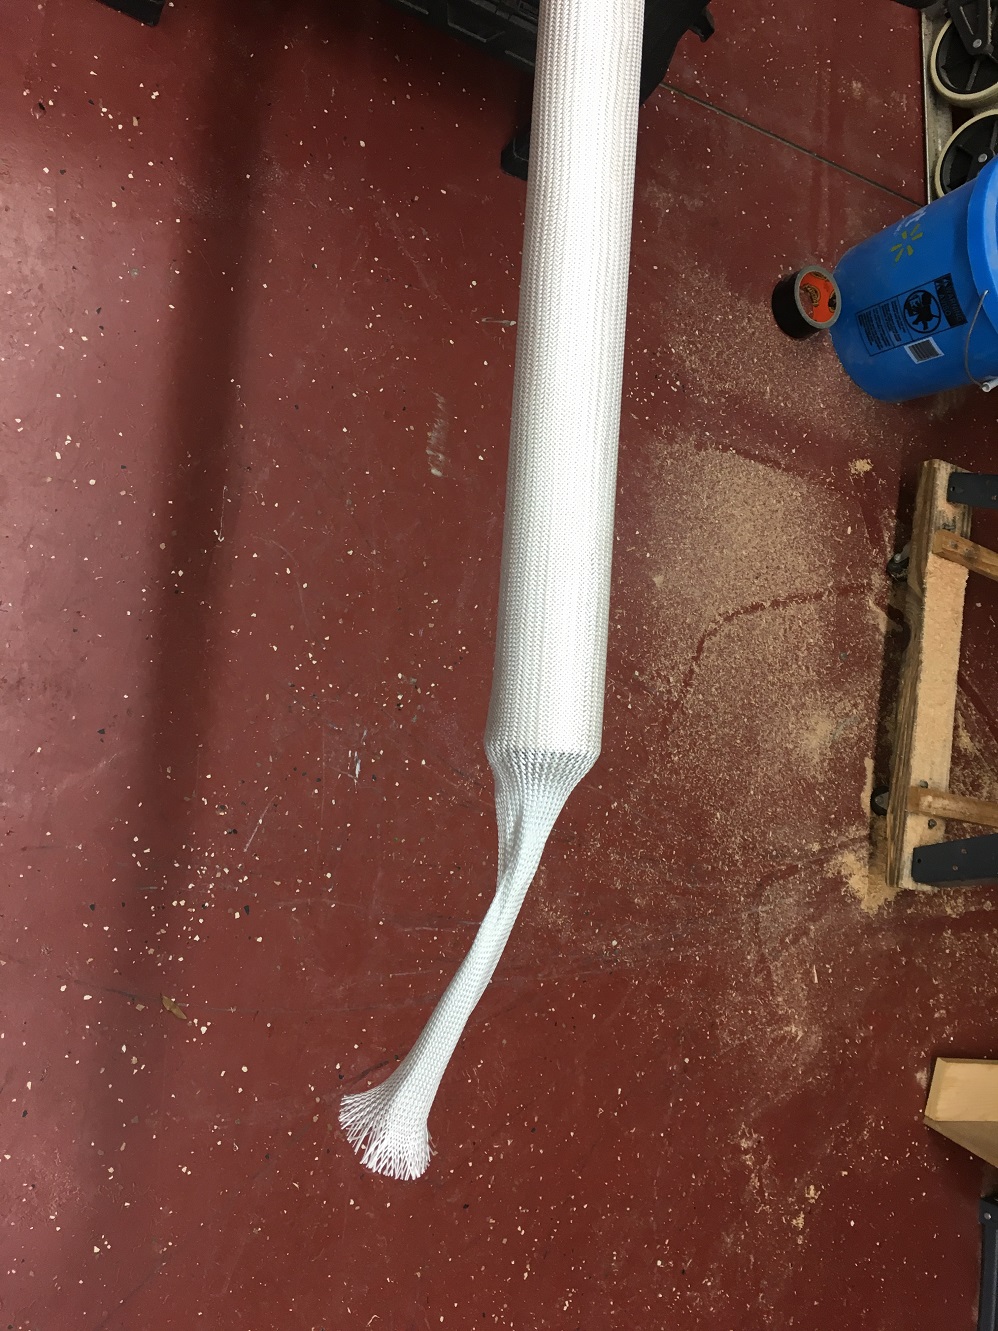
The block was glued to the mast and wrapped in shrink wrap and staves to keep it straight. While this cured I set about designing the lower section of the tabernacle. It was during this time I came across something on the web that caused me to deviate from the deviation. I know, I’ll never get done at this rate.
So this is the final build.
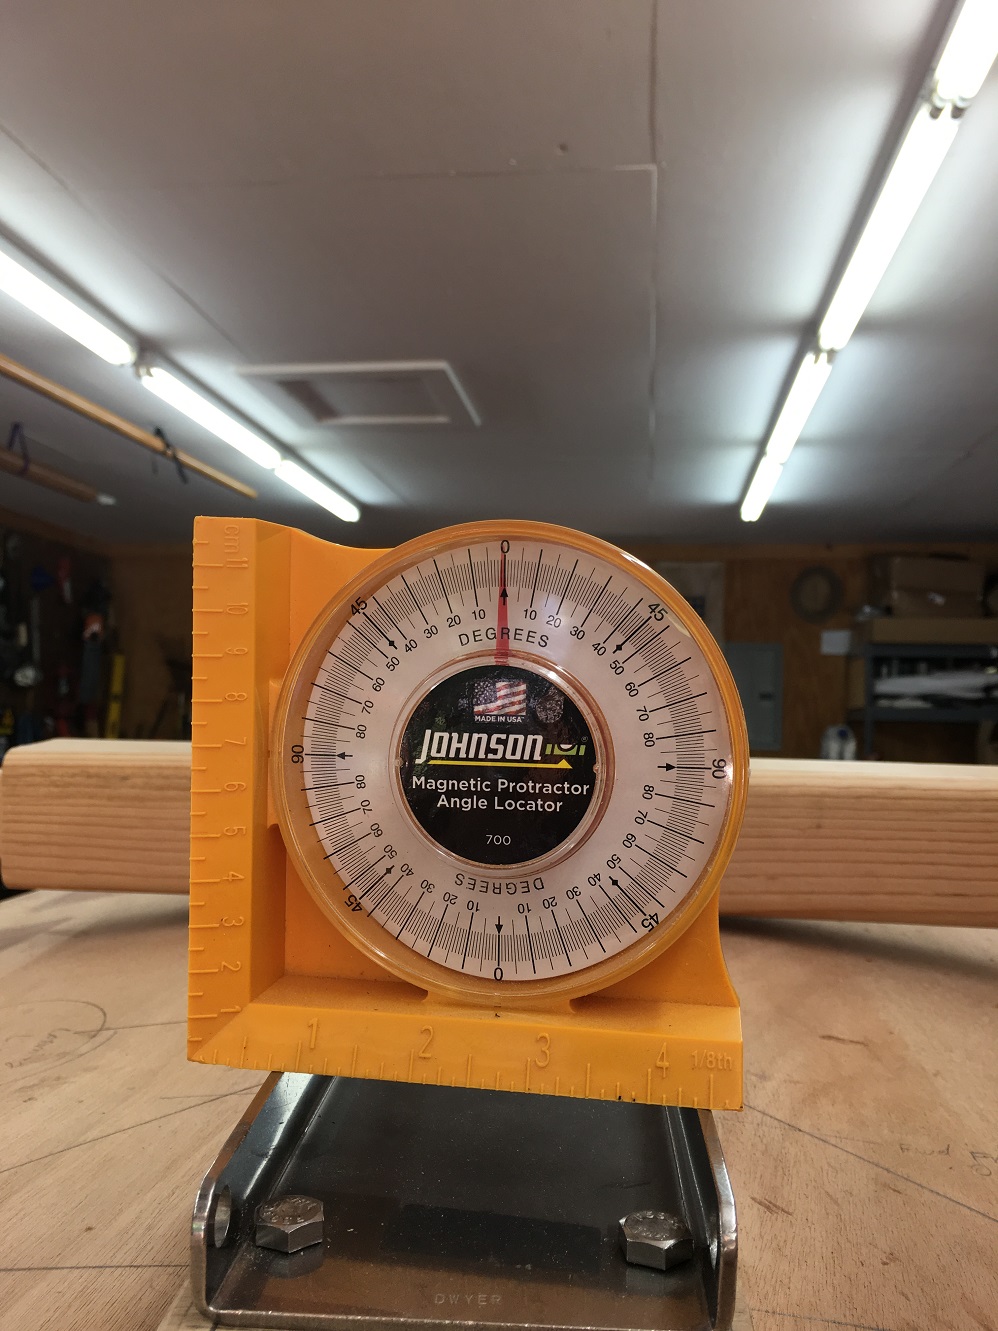
This is a mast hinge from Dwyer Mast (www.dwyermast.com). It is the same part that my buddy Jason has on his West Wight Potter. I like this because it is low profile, easy to use, and I do not have to do any invasive modification to the structure of the boat. If this mod doesn’t pass sea trials all I have to do is make another mast, no harm will be done to the structure of the boat. I did make a white oak transition plate and glued it to the deck making sure it was level with the lines of the boat.
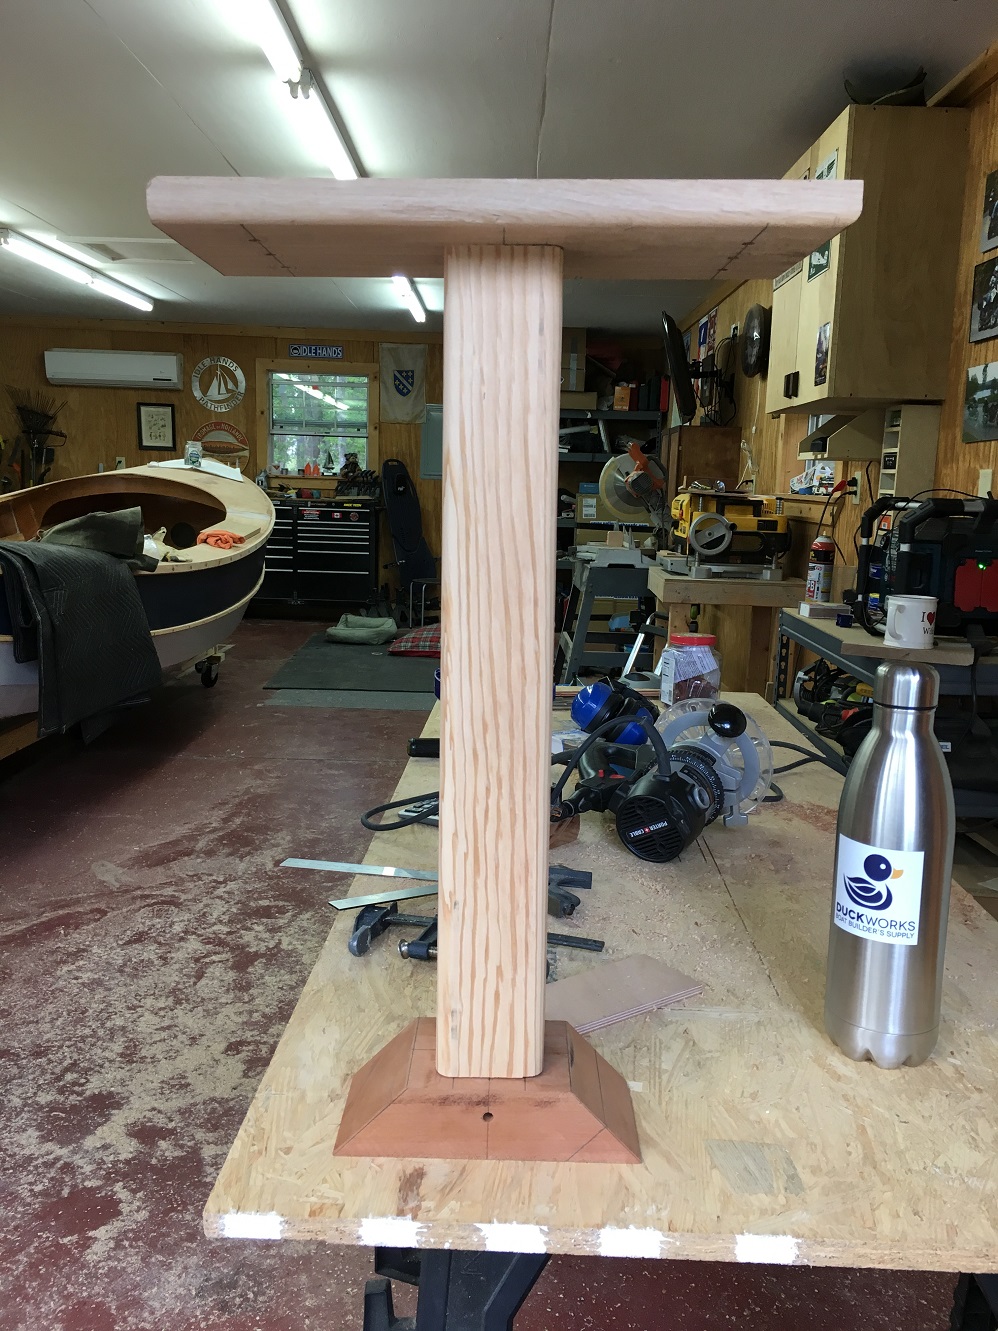
A compression post was necessary to transfer the load from the mast to the step block in the bottom of the boat.
The result?
I attached the hinge plate to the bottom of the mast with 8″ stainless lag bolts installed wet with epoxy. I also reinforced the area with fiberglass to keep the wood from splitting out around the bolts. If this was a free standing mast I do not think it would work but since the mast is supported in three points by the stays I am hopeful the whole setup will last. I will report back once I get it out in the water. Until next time.


 I then leveled the opening on secure ground to ensure the board would not shift when the lead was poured. I used the propane burner that I use for steaming wood and a cheap “made in china” cast iron pot to melt the lead. The lead pour turned out a lot easier than I thought with the only problem being the sheer weight of the pot. I had overstuffed it a little and it was almost too much to lift. The amount leftover in the pot shows how bad my estimation was.