Looks like a boat!

10422911_1604314503148878_3725216501551843767_n

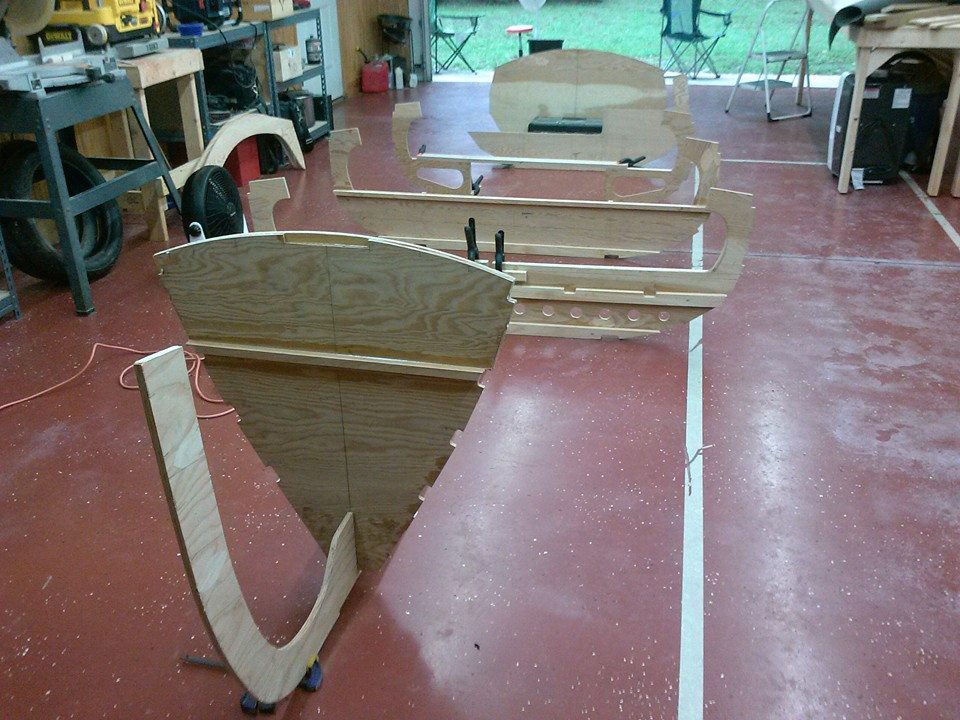
After spending last weekend in the most perfect weather sunning myself in Key Largo, I spent this weekend locked in the shop due to heavy storms. While the rain came down I continued to work on the frames for the pathfinder. I have been working on the frames one at a time – laying out the shape, cutting the plywood, fitting and gluing the stringers and doublers. I usually only have one full day by myself to work in the shop, and an hour or two after work and weekends; often I would not have time to get anything done so I would not start anything at all. My game plan today was to get all of the frames cut out, notched, beveled, and such so that every evening I could come home and build up one frame completely. 10 hours of work later I have everything ready to go. Just for fun I set up the frames in their approximate location so I could finally see how big the boat really is. I will admit I put Jimmy Buffet on the XM and moved my work stool in to the “Captains Chair” just to try it out. I am starting to like rainy days!

All work and no play…

Its time for a break. Cheryl and I took some time out for a long weekend in the Keys. We loaded up the truck with camping gear and headed out to the Key Largo Kampground. The weather was beautiful but hot. We had to go to Kmart to pick up a fan to keep us cool in the tent. Saturday we woke up early and headed to Florida Bay Outfitters to pick up our Hobie Tandem Island.

11021515_1600109836902678_7816401127684734626_n

19084_10153153252861253_4149765674952158476_n

If anyone is debating as to whether or not to buy one of these let me tell you buy it! We spent the day sailing Blackwater and Barnes sound. This thing sails like a dream, and when the wind is not in your favor you can use the super cool Hobie “Mirage Drive”. If you have never used it the Mirage Drive is two small fins that stick through the bottom of the kayak that are powered by your feet. As you pump the pedals the fins swing back and forth powering the kayak forward. Add that to the roller furling mainsail, retractable centerboard, and dual controls for each seat make this the finest sailing machine I have ever sailed.

By the end of the day we had logged 15 miles, most of which was logged tacking upwind back to Florida Bay Outfitters.

Forward Progress

Sorry about the break in posts but if I am writing I am not building. That being said it has been a busy week for me work and personal life wise so there hasn’t been a lot of progress on the boat. I have cut out all of the plywood for the frames and shaped them with my planes and spoke shaves. Each frame also gets a variety of solid wood stringers and bearers and some get plywood doublers. This is cool for me because it is finally time to break out the glue!

frame 6 bp

This is a picture of frame 6. This is one of the smaller frames so I can get it all in focus. Mr. Welsford lets you decide if you want to cut the frames out of large pieces of plywood or make them out of several pieces to save wood. I decided to make most of mine out of single pieces of plywood because its easier to draw and seems to be stronger to me than a frame with several glue joints. You can see from the drawing that there is a 20 x 20 mm horizontal bearer for the seat and a vertical bearer for the seat front glued on. The notes on the page tell you what side to attach it to and if it needs to be screwed as well as glued. One of the best tips I have received is to use dowel rods to fix the location of the bearers before you glue them. This keeps everything in place so you are not wrestling with the slippery wood trying to glue it to a line you cannot see.

frame 6 dowel

Frame 6

After the glue sets you can take a sharp chisel and cut the dowels flush and sand them smooth. Thanks for the tip Bob!