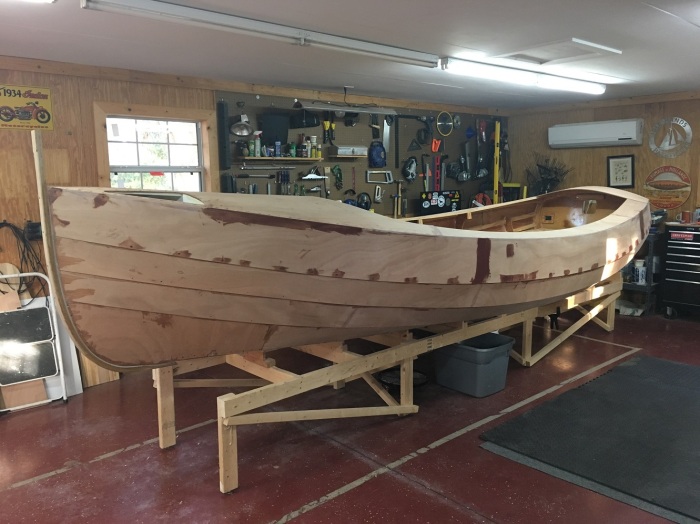
It’s Superbowl Sunday in south Georgia and this is how my Pathfinder looks. As you can tell there has been a lot of work done so I really need to catch up on my “homework” so here we go.
I set myself a punch list on the wall of all the things I had to do before I was able to lay the decking:
- Fiberglass, fair, and paint the anchorwell
- Floorboard supports
- Fillet and seal the interior
- Deck It
The deck edge supports were a pain in the rear but I got them done. It’s not my best work but I think they will do the job. If you want a picture let me know, otherwise I will let this part of the build be permanently hidden by the floorboards.
Fiberglassing and fairing the anchor well was pretty straight forward. I laid down two layers of glass to help protect from the pointy bits of the anchor and painted with interlux bilge coat. 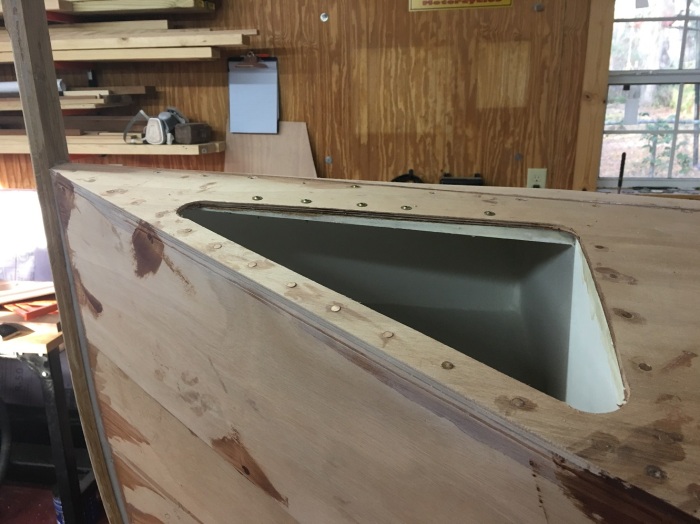
Checklist completed I headed on to decking.
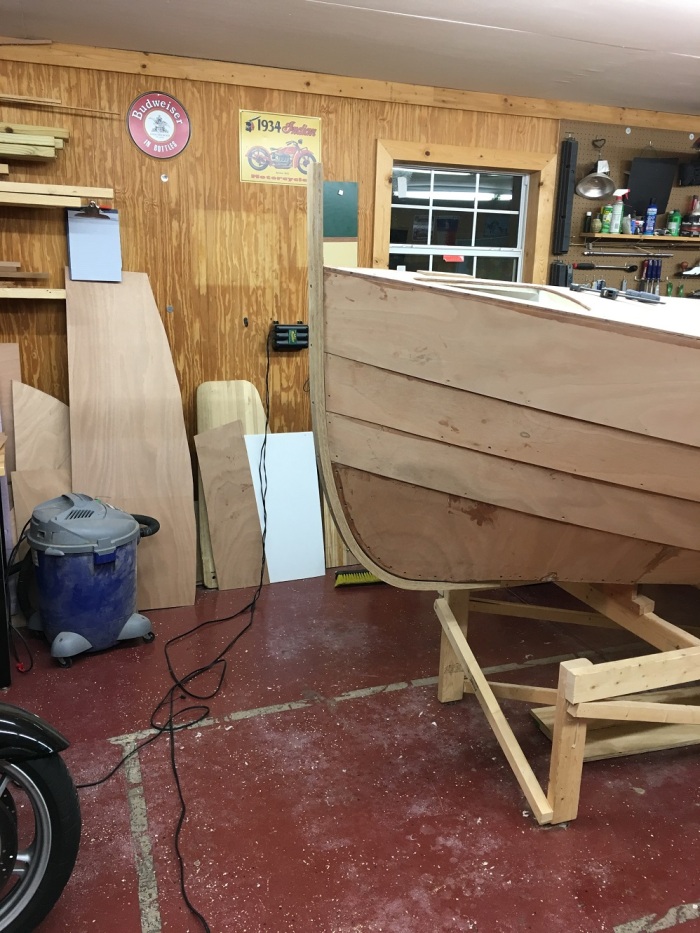
Decking was a refreshing task. It was an easy task with each step leading to huge visual progress. I started by roughing out pieces of 1/4″ and tracing the underlying structure on to them.


Being an aircraft mechanic I really love the neat even rows of rivets on my planes so I duplicated that with boat nails on the decks. I laid out the “rivet pattern” with dividers and pilot drilled the ply. After that it was a simple matter of epoxy coating the bottom of the deck and gluing it on.
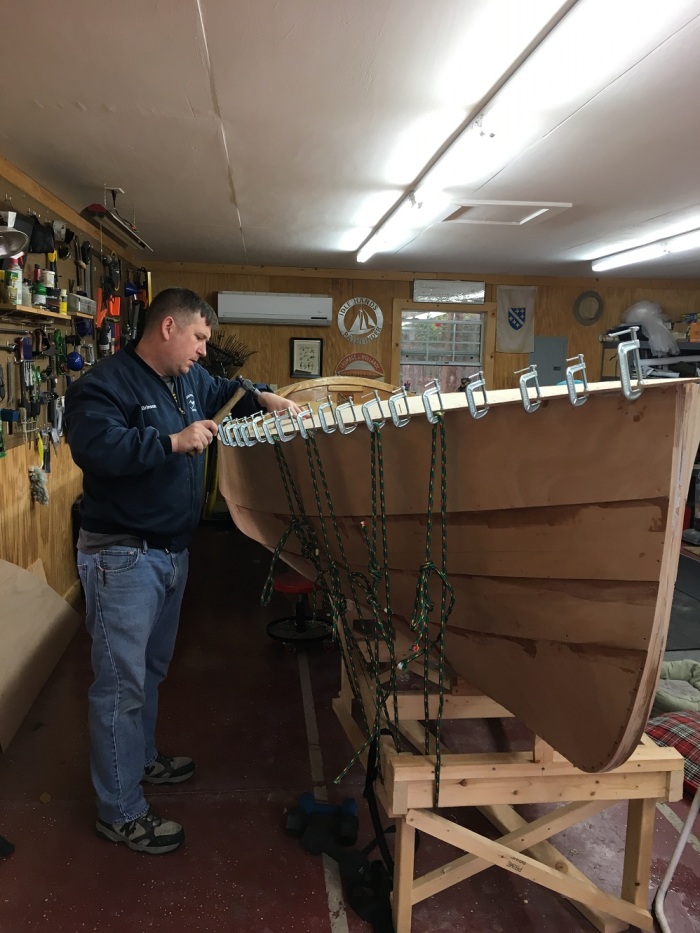
After the deck was on I trimmed the overhang with my router. I still have to shape the front with my belt sander and add the doublers called out in the prints but the deck is on! With that done there are two things preventing me from flipping and finishing the bottom of the boat – the outer stem and the rub rails.
I have been reading about traditional bent frame caravel construction so I wanted to try my hand again at steam bending wood. I made a pattern for the outer steam and busted out the “steam weasel”. 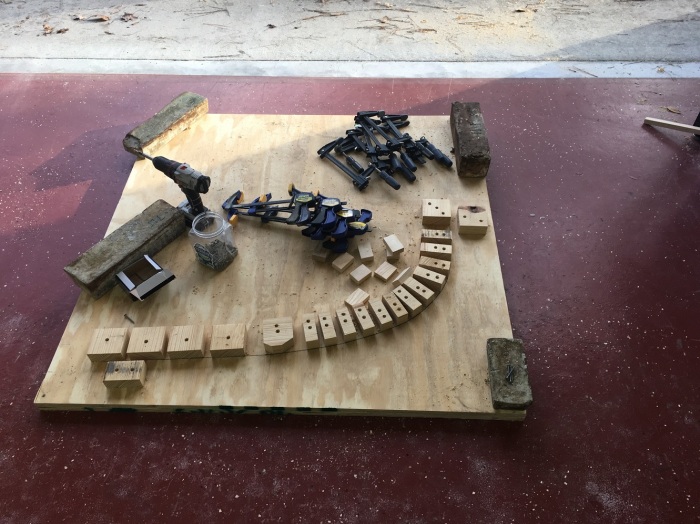
I had enough oak laying around so I could try bending the stem in a single 1″x2″ piece and, if that failed laminate the outer stem with four 1/4″ strips. If you have been following this blog for any length of time you know how this one ends.
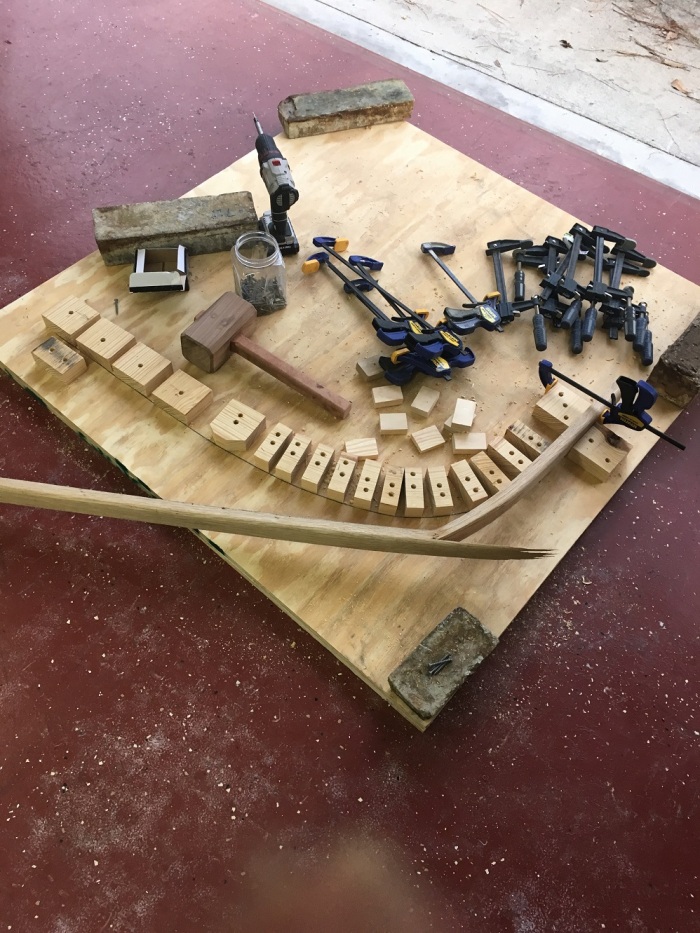
Lets try that again.
There was a video of the first attempt but it was deemed not suitable for younger audiences or those with weak hearts.
A little glue and screws and that task was done! After all that work it’s time for a break.